Three Roll Review Of Old Svema 250 Film
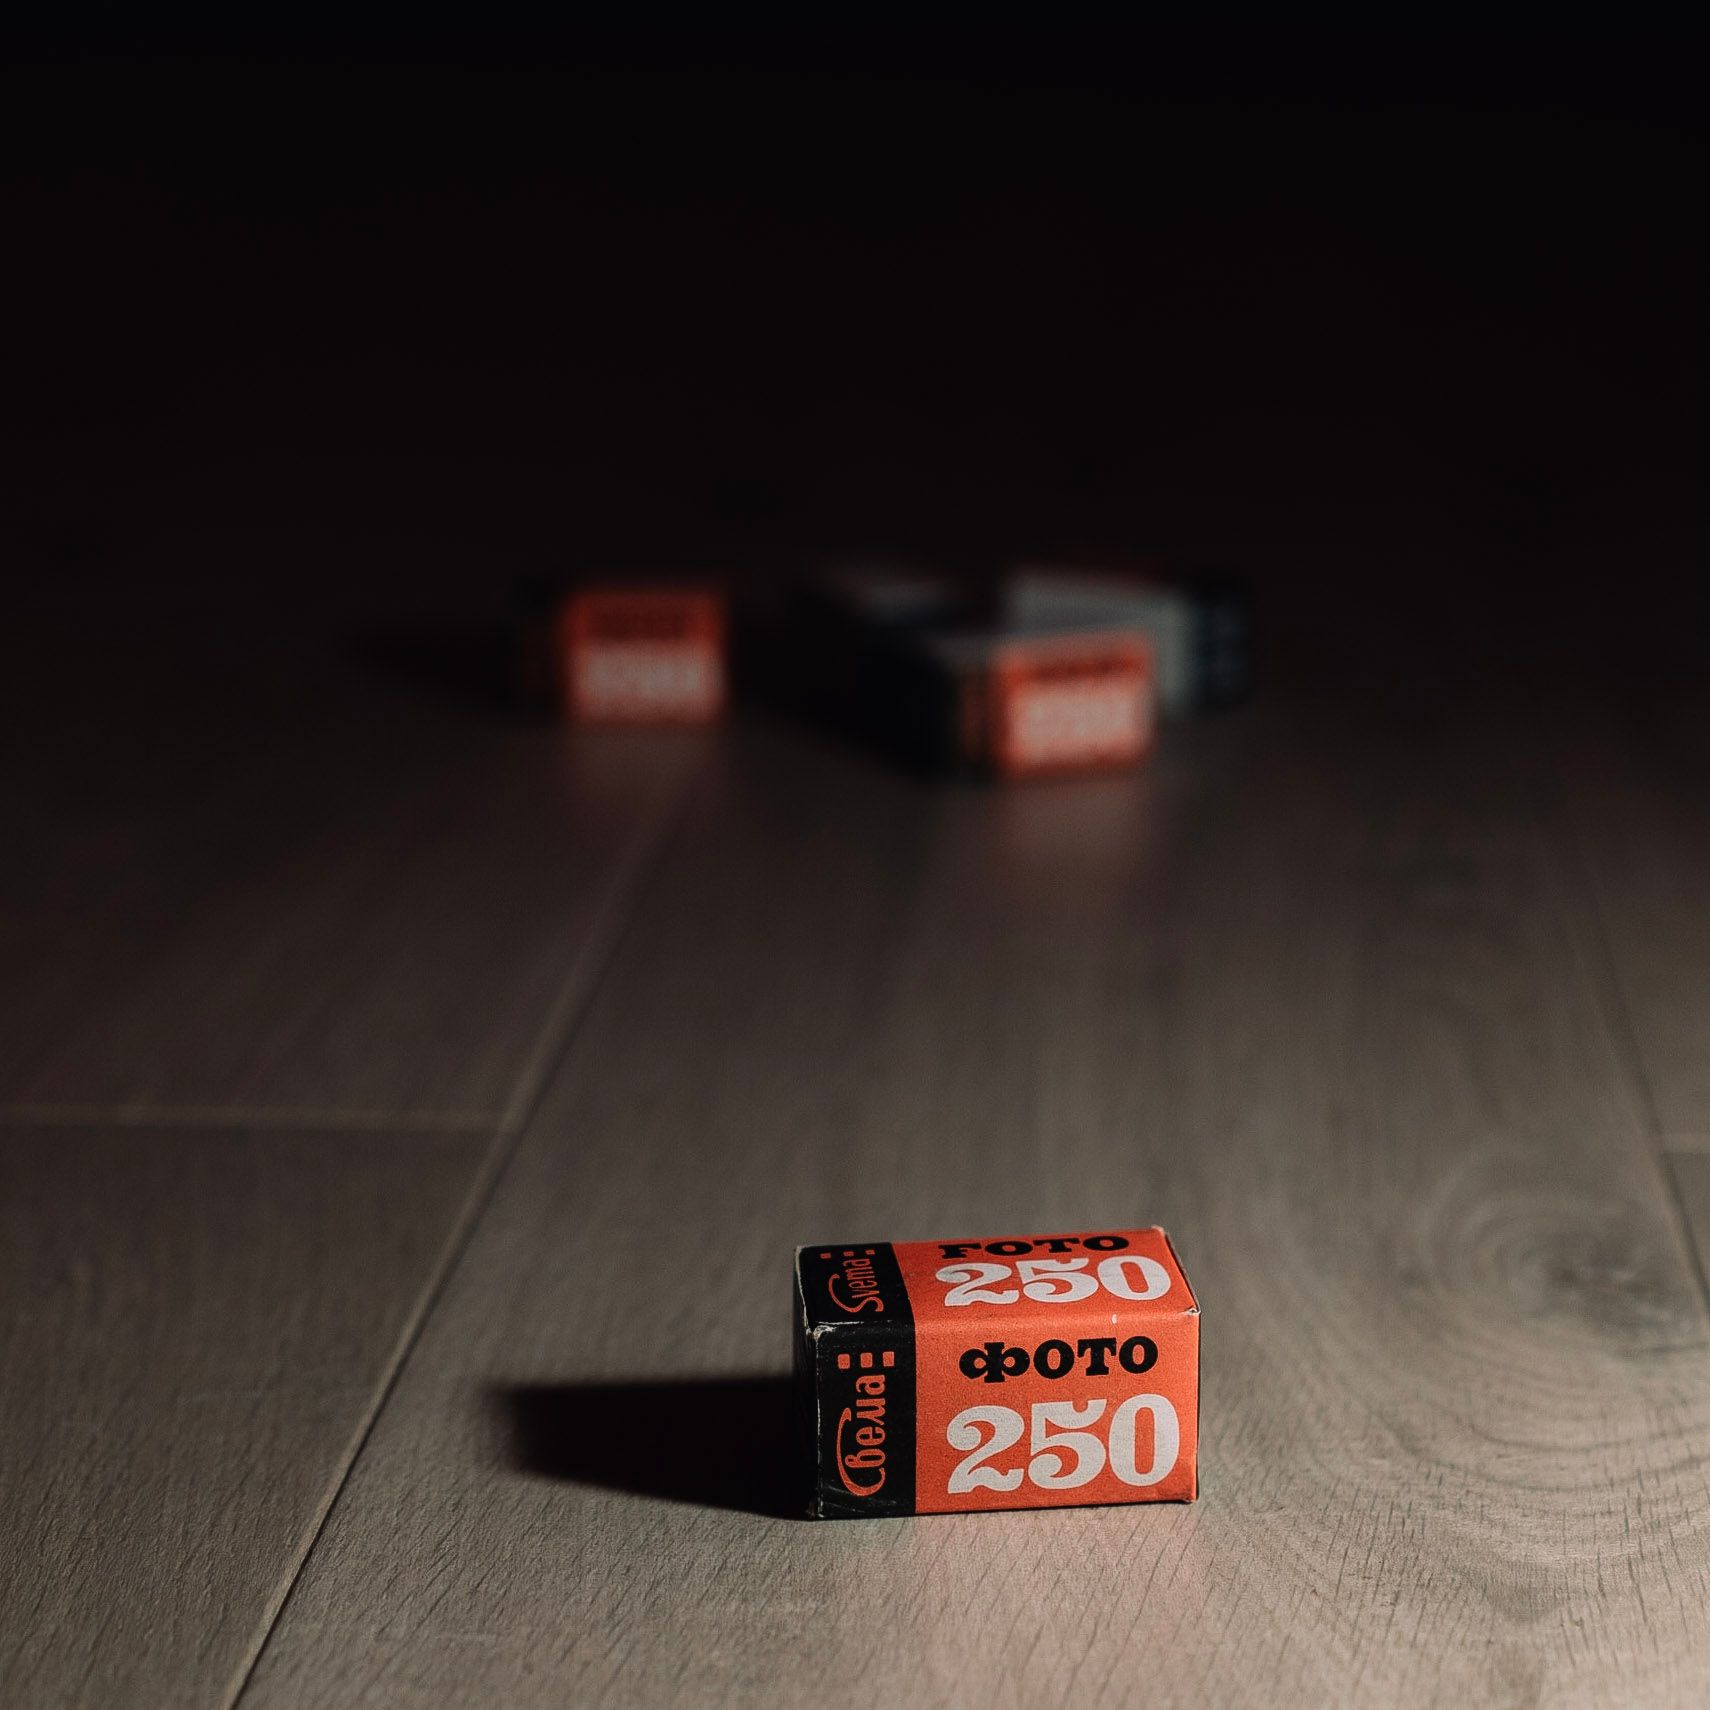
A few of the rolls with one roll being designated as the "main roll" for the photo shoot.
Recently I got hold of 10 rolls of Svema Foto 250 film in 35mm. The price was 1 EUR per roll which I thought was a pretty decent deal - even considering the expiry date ( which I'll disclose in just a few lines of text ). Storage conditions for the film were unknown. I think the dude I bought the film from somehow got a pretty large stock of old soviet film and was now selling it.
I have shot expired film. But not this expired. The best before year was 1990 or in other terms - one year after I was born the film was considered expired. Not sure if that's correlation or causation.
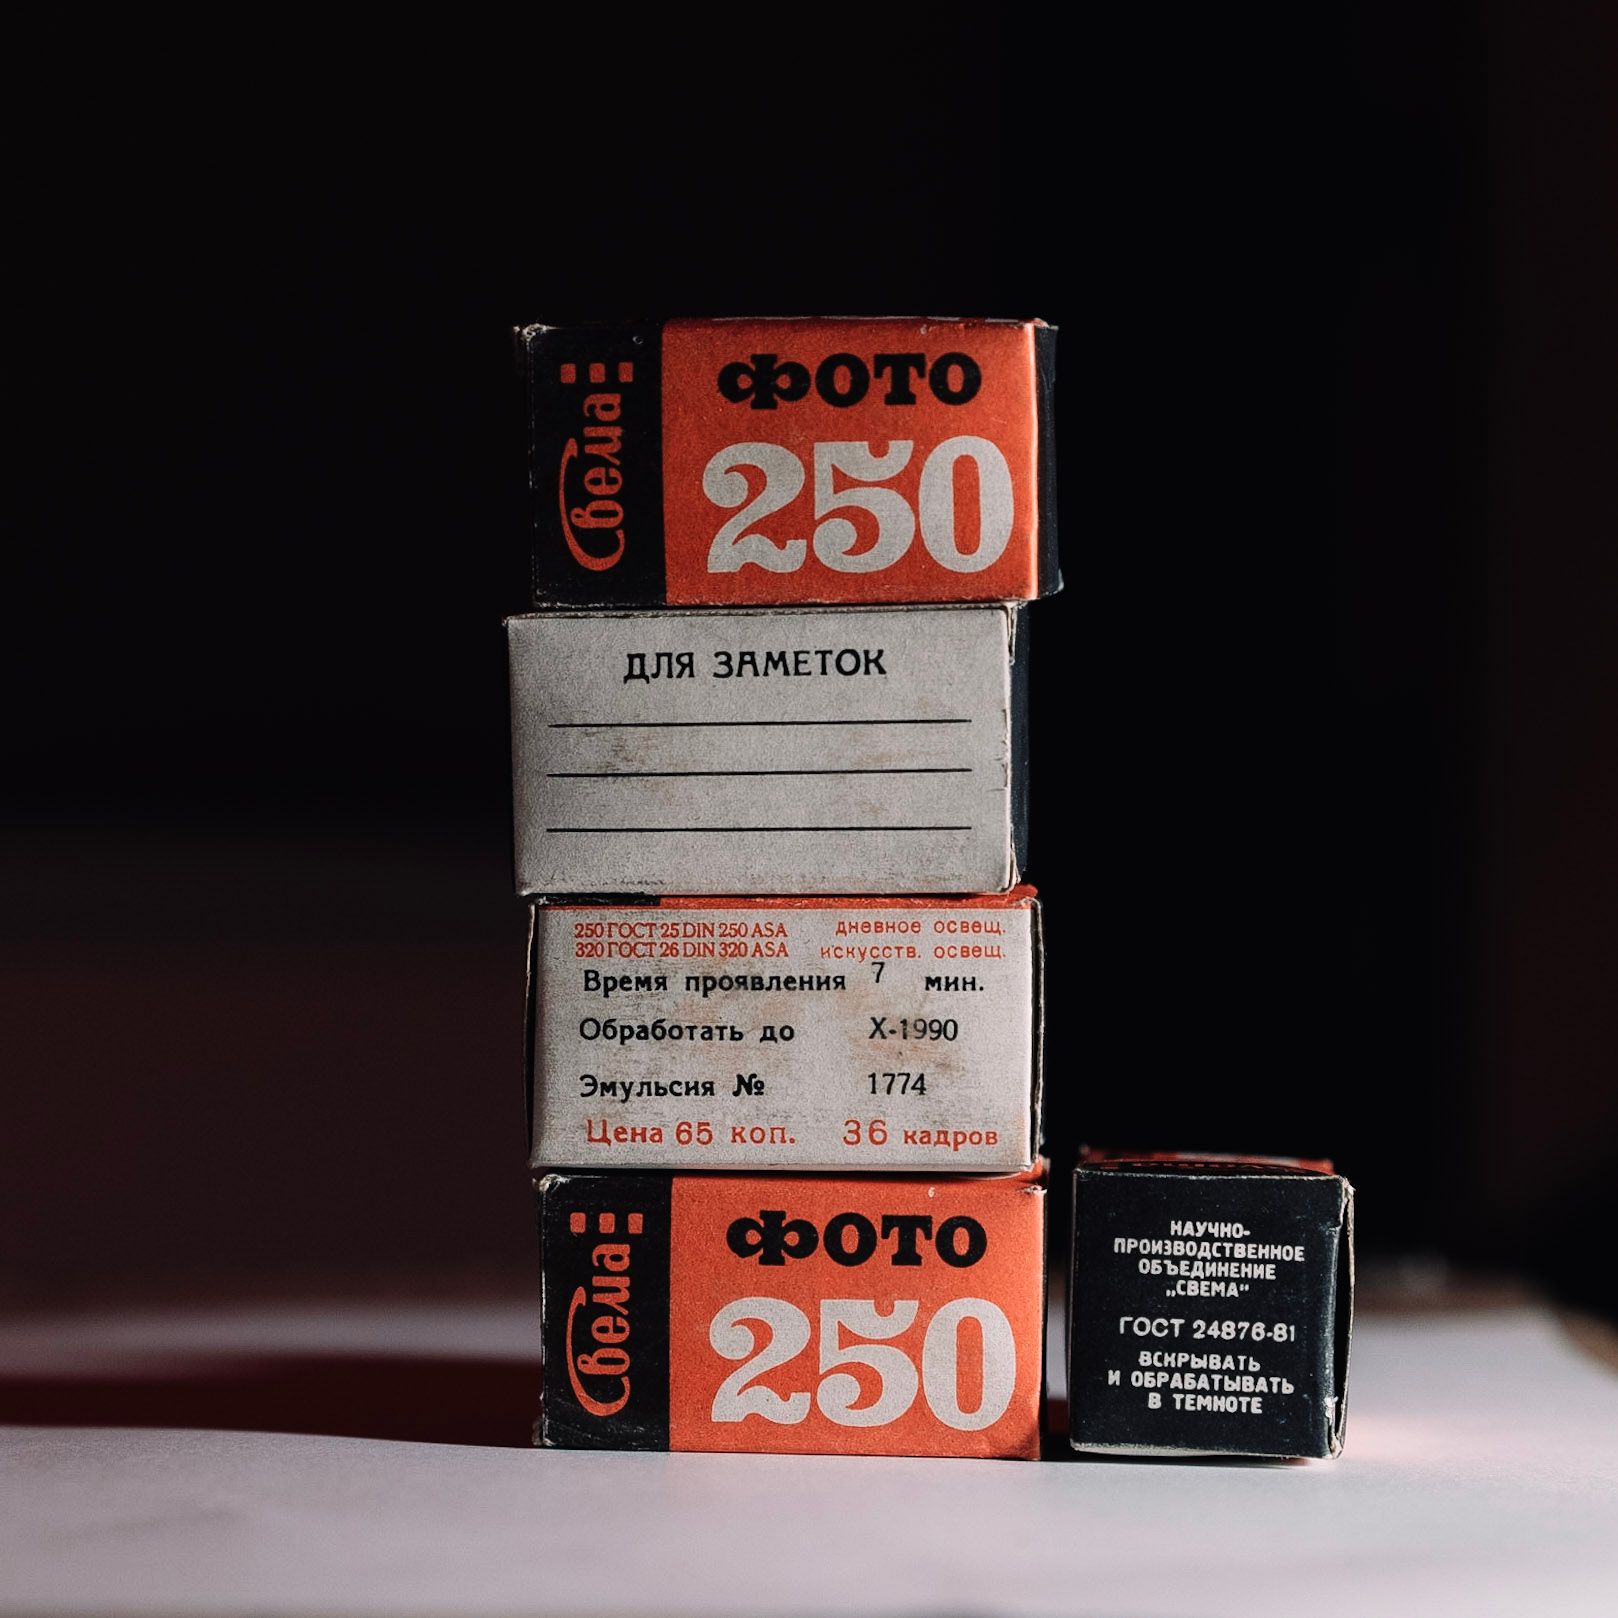
You can see the expiry date and all other information that's available on the packaging for Svema Foto 250. You might need some russian knowledge before you can read it though.
Basically it says to use it by October, 1990 and that it should be developed for 7 minutes.
Realistically I knew that it might not give any usable results - but for 10 EUR ( + 3 EUR shipping as I didn't want to drive to pick it up myself ) I was ready to take a chance.
Words of caution. If you're interested in the history of this film then this review is not for you. I know nothing about history. All I know is that it's a Soviet Union film. 250 means that it's rated for ISO 250 ( or 25 DIN, or 250 ASA - choose your aged poison ). It's black and white. And that it's heavily expired.
My expectations were not super high. Mainly because of the expiry date but also because I have had experience with photo stuff from Soviet Union. I've used Zenith and Zorki cameras and a number of lenses as well. And whilst they can be used...they are not the best. The cameras are quite simple, utilitarian...and not the most reliable in my experience. And lenses for the most part are worse copies of existing designs ( although they are still usable and can give nice and interesting results ). So I applied these pre-conditions to the film as well.
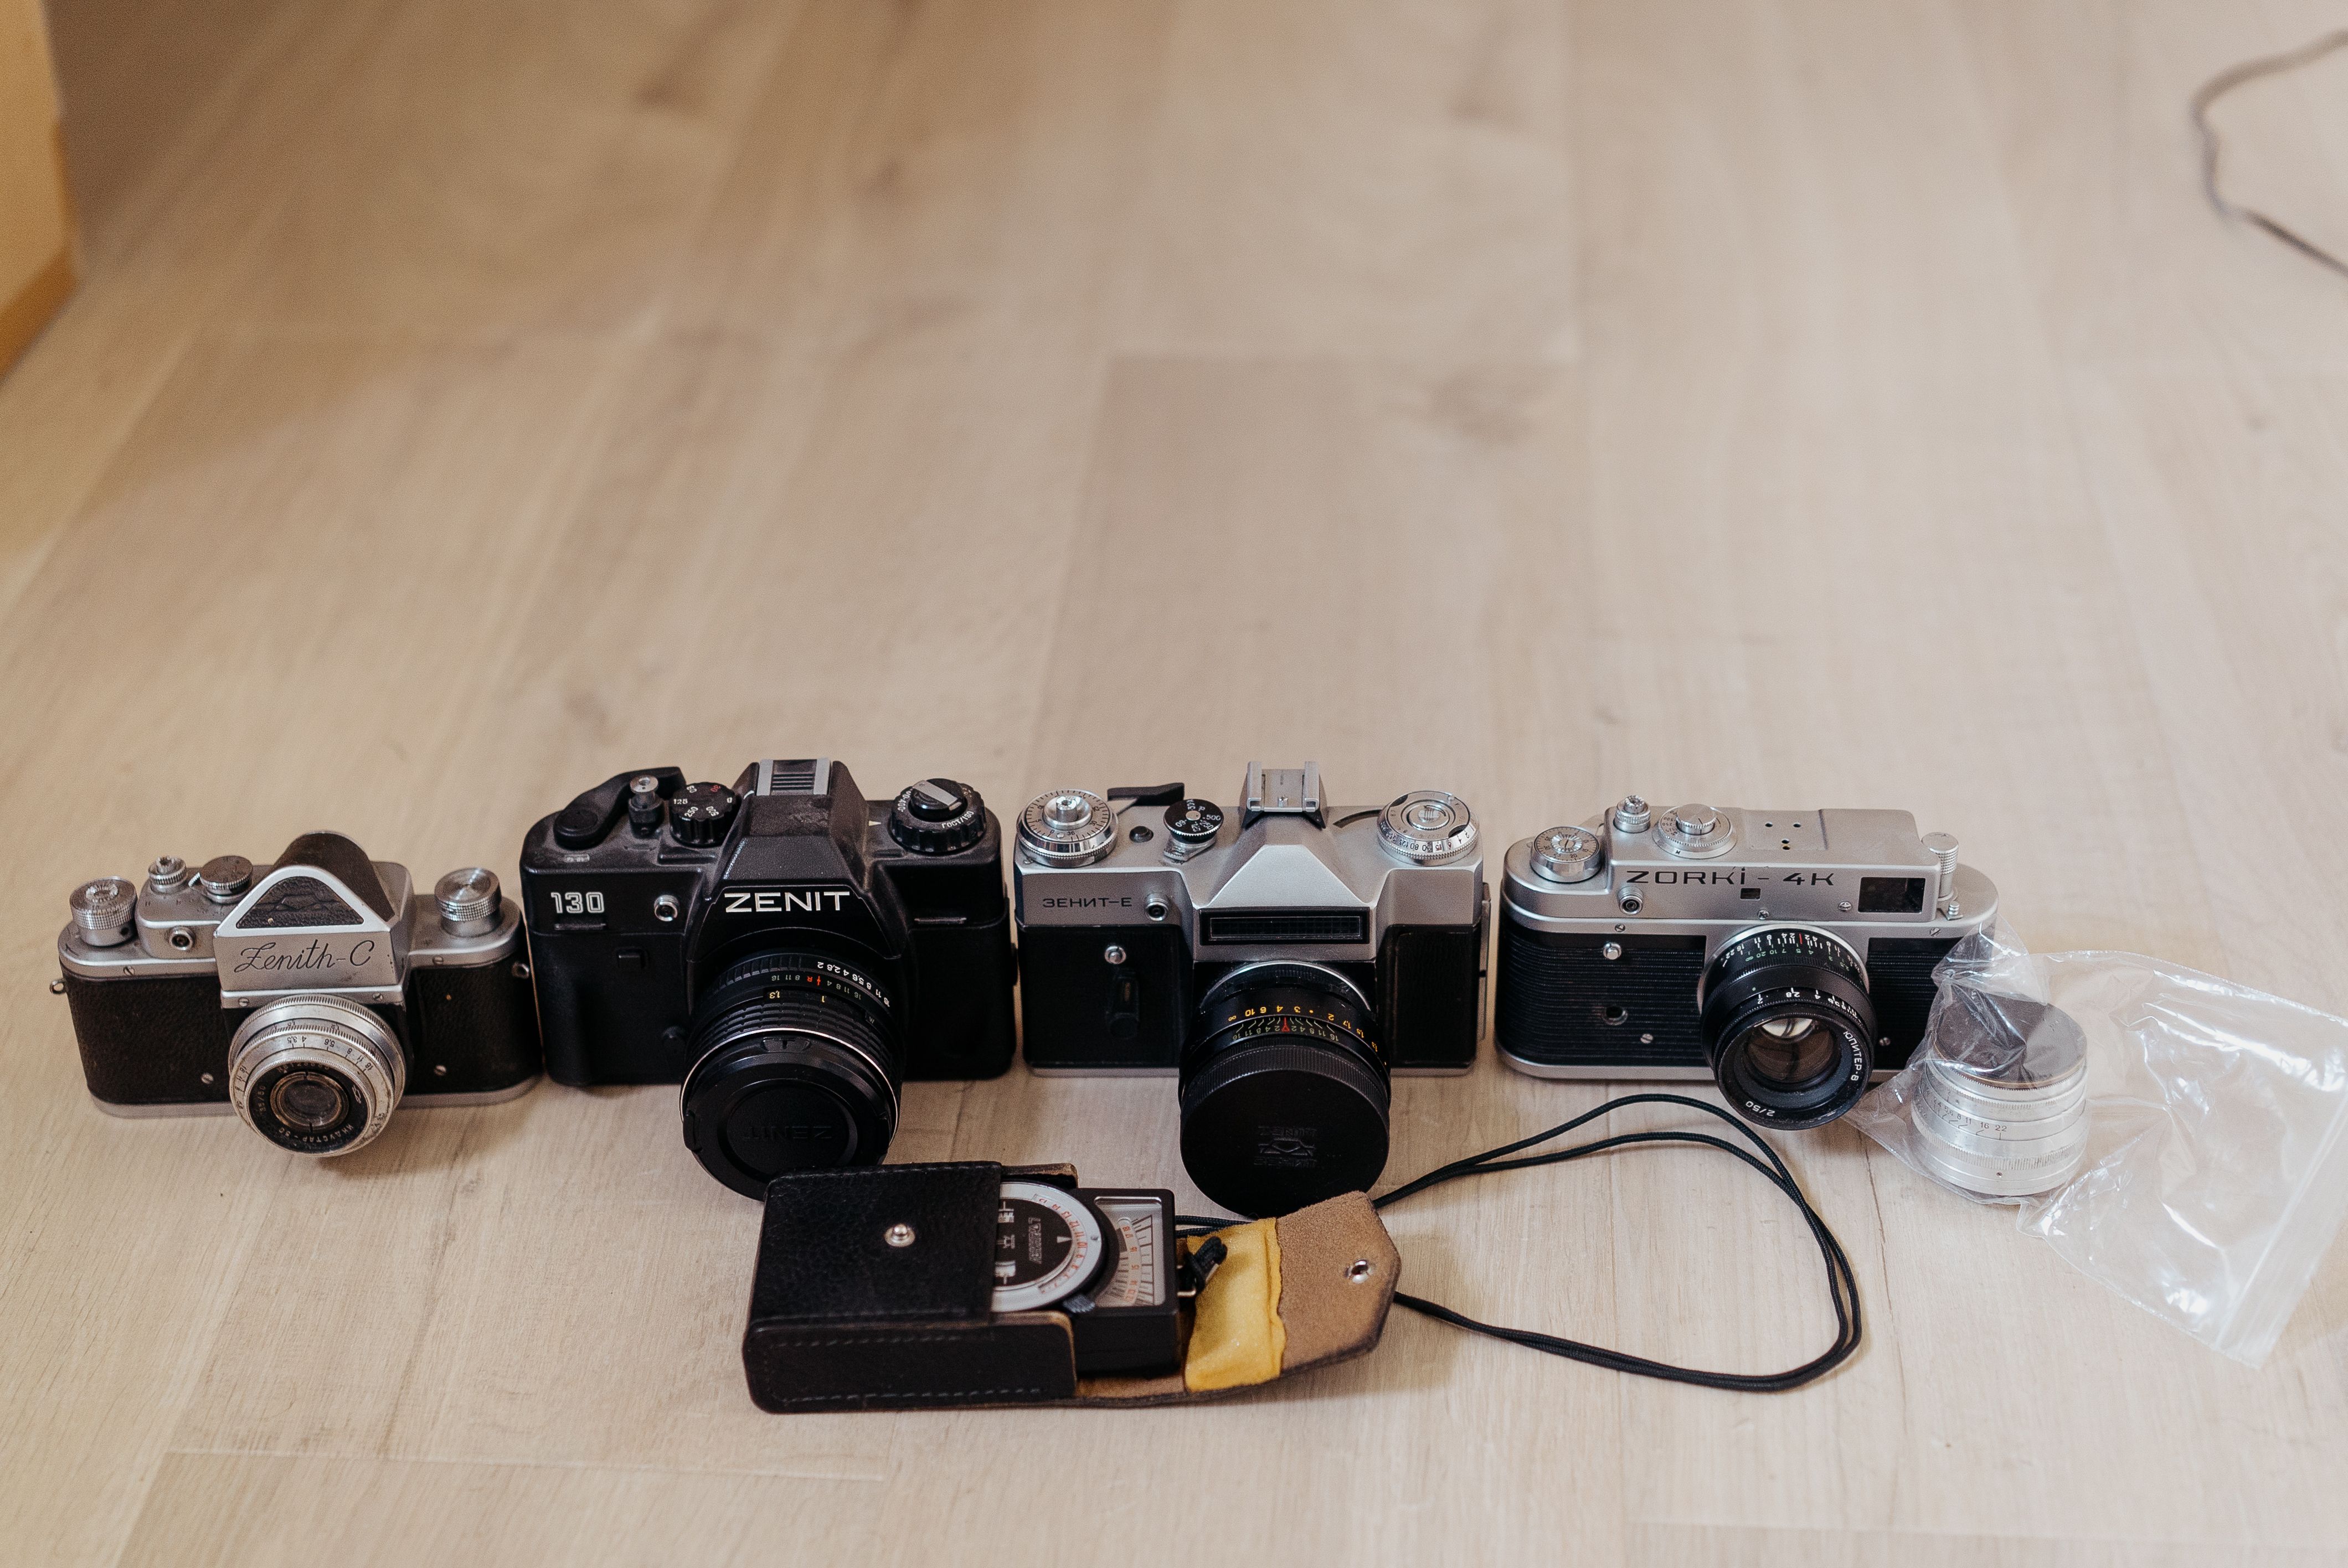
Some soviet gear that I have around. Would I recommend any of it? No...not really. But they are still fun to have around.
I didn't check any examples online before I shot and developed this film to keep some intrigue ( I had seen some examples in the past but not many ). My guess was that when it was fresh it would yield some relatively grainy, low contrast and low dynamic range photos. And with age - things would likely not improve so muddy and very thin results were the best I was hoping for. Was I right? Well let's read ( and in my case - write ) on.
Step 1: Choosing EI
Originally this film is rated for ISO 250. I had read that you should drop about one stop every ten years it's been expired for. 2020 - 1990 = 30 / 10 = 3 stops. After some more heavy mathematics and high brain power - I just removed the 0 from the film name and decided to rate it at EI25 ( ISO 25 - bet your digital camera can't do that! ).
Step 2: Loading Film
I thought I would just follow the standard 35mm film loading procedure but how wrong was I. This film is naked. Meaning it doesn't have a film canister. Each film came to me in individually packed cardboard boxes. They did look small but for some reason I didn't think too much of it initially. When it came to loading film I was "pleasantly" surprised.
Because the cardboard boxes were small I did have enough intelligence to open it in a dark bag. Within the cardboard box is a film wrapped in thick, black paper and something tinfoil-y. Once you unwrap it - it's just the film.
I had bulk loaded film in the past so the next steps were not foreign to me but bulk loading with some bulk film loader is simpler as you attach the film to the canister in daylight ( or artificial light if you so please ) and then seal the loader and just crank a lever. Here the whole canistarisation had to happen within complete dark. I guess I could've hacked something with a bulk film loader but I would lose some shots that way so nah - dark bag it is ( as I don't have access to a completely dark room that I trust ).
Attaching film to the canister is not super easy in a dark bag. The film does have something that looks like it could attach to some canisters easily - but none of mine. So I either taped it to a remaining film already attached to the canister or to a reusable canister core.
The main difficulty is that you don't know which side the leader is cut ( maybe they are all the same - but I have not noted it down yet ) so you might need to re-tape if it's not right. Or just cut a new leader. But I want the OG leader.
Side note. The leader is like twice the size of a normal film leader. And is visibly cut by hand. Just an interesting factoid.
Anyway - film is now in a canister and ready to be inserted in camera. That part I ( and you ) already know.
Step 3: Shooting Film
Not much to report here. Shoot the film as you would. Same as any other ( black and white ) film.
ISO is small - yes. I shot it mostly in sunlight and had no issues. Indoors I used the magical power of f1.1 and f1.4 to achieve reasonable shutter speeds.
Side note. I mostly meter by Sunny 16 Rule and fall back on the light meter on the phone when I doubt my light judging skills. This means that metering is not 100% correct but it has served me well so I feel no need to change. It shouldn't impact the results too much.
Step 4: Develop The Film
I believe that in Soviet times there was a special Soviet developer meant for their films. It says on the box that it should be developed for 7 minutes. Obviously it's likely hard to come by now. You can also use any other black & white developer but getting dilutions and times is a bit more tricky. I'm sure there are recipes for this film on Massive Dev Chart but I went with the tried and true "I don't know what I'm doing" method of Rodinal ( Compard R09 in my case ) and stand ( semi-stand in my case ) development. That's the most magical recipe as it works for everything ( as long as it's exposed more or less correctly ) and has impressed me each time.
Here's the recipe ( you can use it for this film or any other film ):
- Rodinal in 1:100 dilution.
- ~20°C but in reality as long as water is not frozen or boiling - is fine.
- 1 hour development.
- 10 inversions at start.
- 4 inversions at the 30 minute mark.
- ...
- Profit.
Stop / fix / wash as usual.
Step 5: Observe The Film
Damn it's curly. I guess being curled for more than 30 years has left an impact. Hope it straightens after drying ( spoilers - it doesn't ).
I can see pictures. Nice. It's not very contrasty but you can make things out. I rate it at 3.6 - not great, not terrible.
It also has a weird smell. I don't remember other films really having a smell. This one does. Let's just put it down to age as well and move on. Or I might become toxic soon.
Now let's dry it. I added a bit of weight at the bottom to keep it more straight in hopes that it would stick ( spoilers - still doesn't ).
Step 5: Observe Again And Scan
Can you guess which side contains Svema Foto 250 film and which side contains Ilford Delta 400 film?

Well can you guess now?
Hint: look at curling.
After drying it's still curly. Very curly. And whilst typically film can be curly on horizontal axis ( because of the way how it's rolled in canister ). This film has the balls to also slightly curl in a vertical direction. You better have a good scanning holder to keep the film straight whilst scanning. Luckily the scanner that I use ( Reflecta ProScan 10T ) has decent holders that can mostly keep it flat ( or flat enough - it's not perfect ).

Once it's in a film holder it's OK. Not all film holders could contain the curls though so be vary!
Next observation is that it loves dust. I don't know what it's made from but it attracts dust so well. You could probably make some dusting tools using material from this film. It also holds onto this dust with such power that my air blower was not pushing enough air to dislodge the dust. Unless you're in a super clean room where there is no dust - forget about clean scans without dust particles.
Also some areas have heavy drying marks that are not drying marks. I tried cleaning them off but they just remain. I don't know what it is but I can't get it off ( haven't tried fire yet ). One one of the films it was especially noticeable. I put it down to age and possibly heavy sweating of a Soviet worker.
Step 5: Observe Scanned Results

My first ever shot on Svema Foto 250 film. You can already see the dust and some drying marks.
Camera: Leica M3
Lens: 7Artisans 50mm f1.1
I was pleasantly surprised. The results are not half bad. They won't compete with modern, in-date films but like I wrote before - I was expecting a lot less from this heavily expired Soviet film.
Straight out it's not too contrasty but that is easily fixed in post. I'm not against tweaking levels in post as you can do the same in darkroom when printing ( Lightroom makes it easier though ).
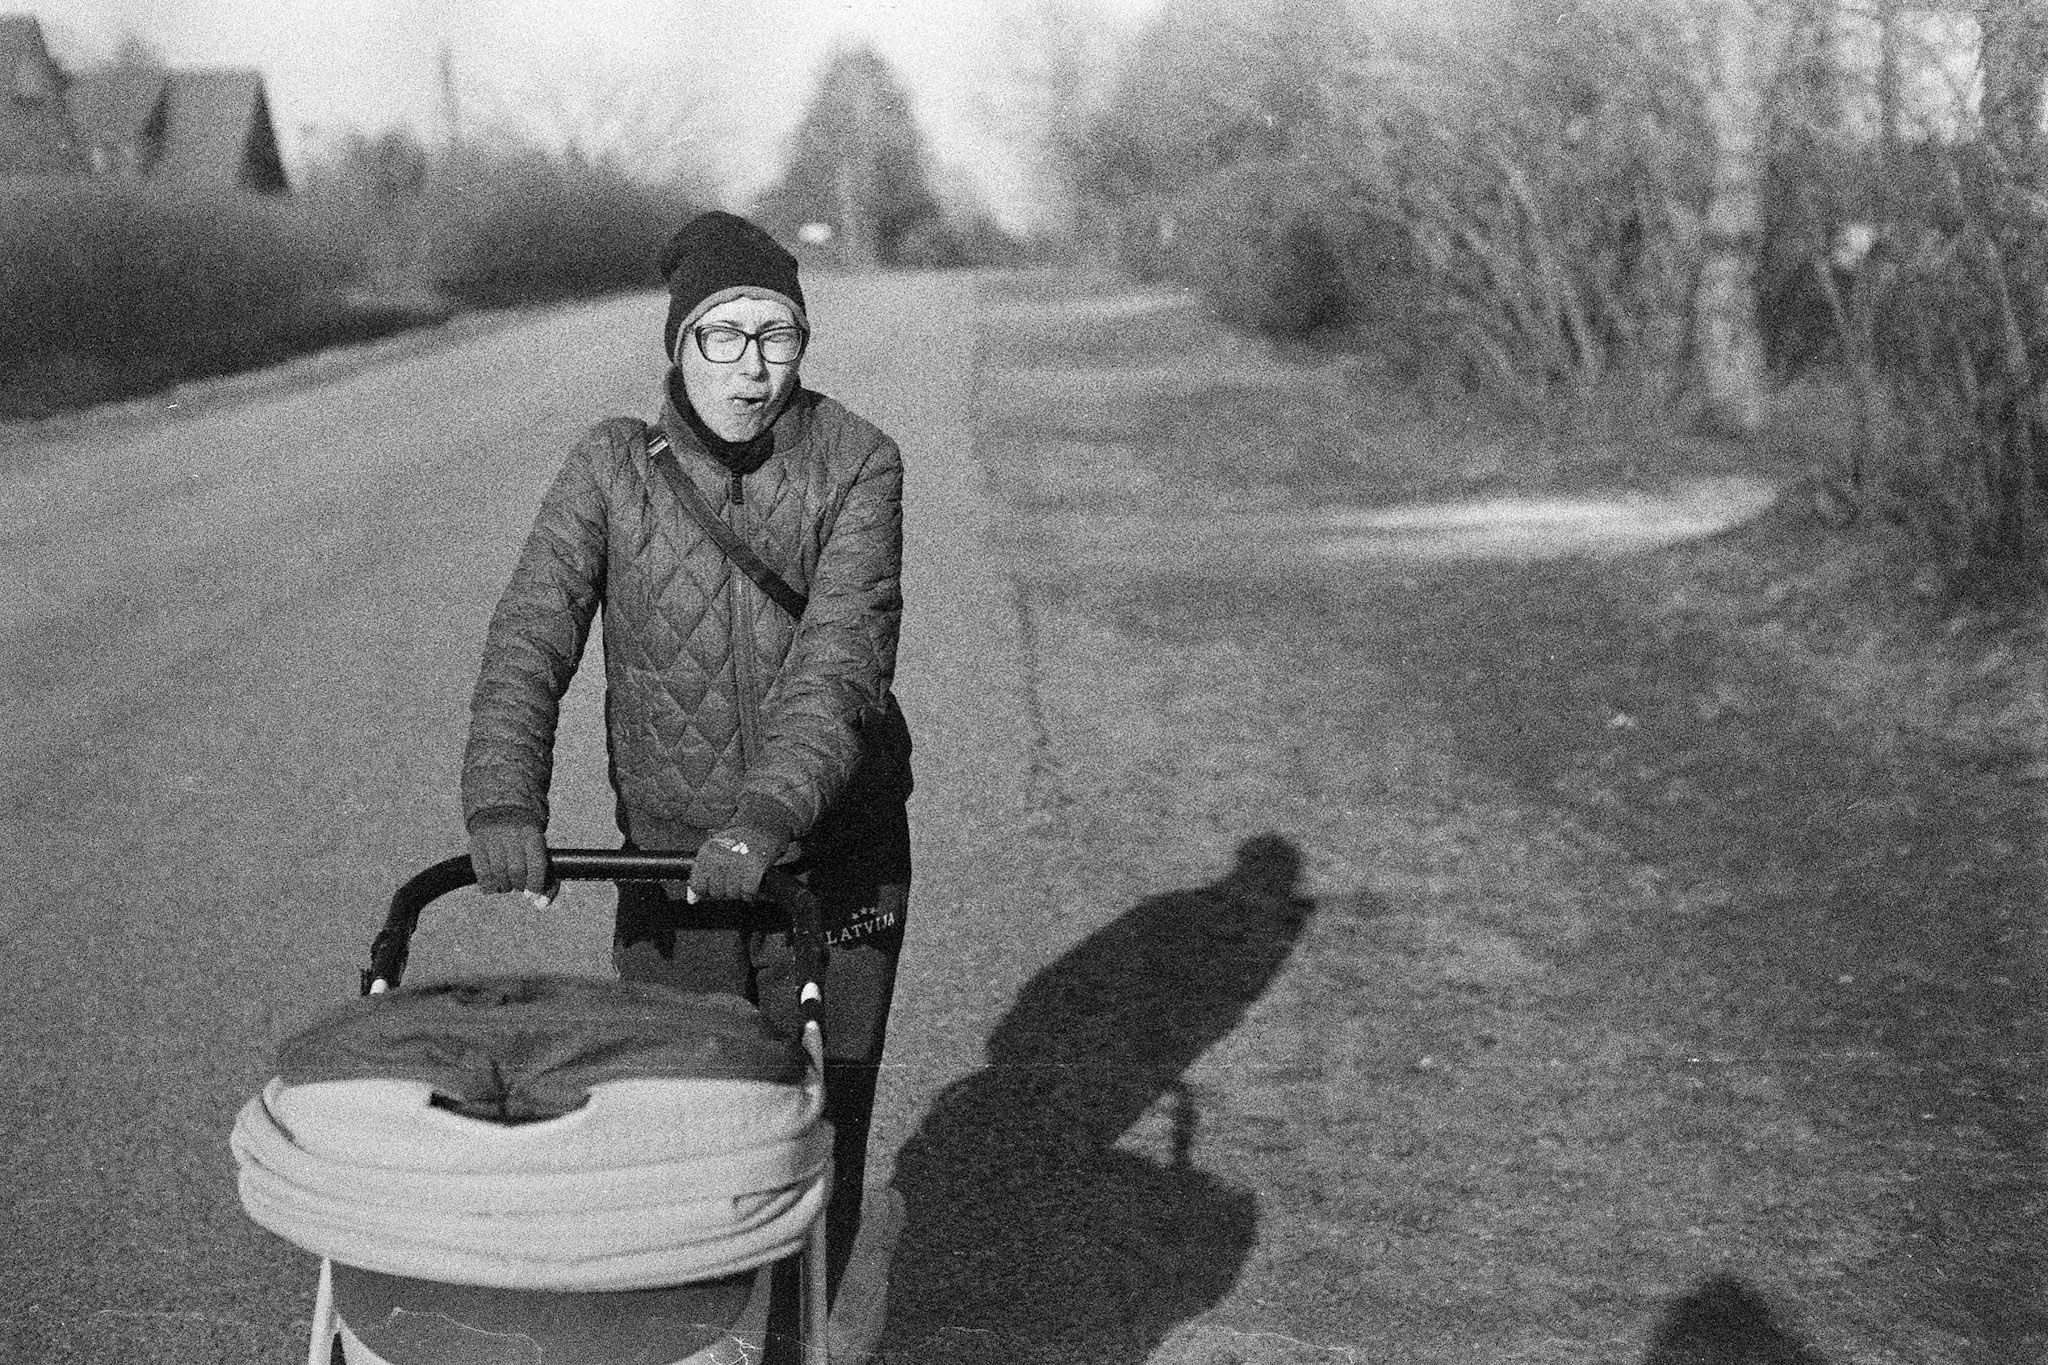
I think you'll agree that the film doesn't really lack any contrast.
Also - is it a face of a person who has just learned of the film I'm using or just a well timed sneeze?
Camera: Leica M3
Lens: 7Artisans 50mm f1.1
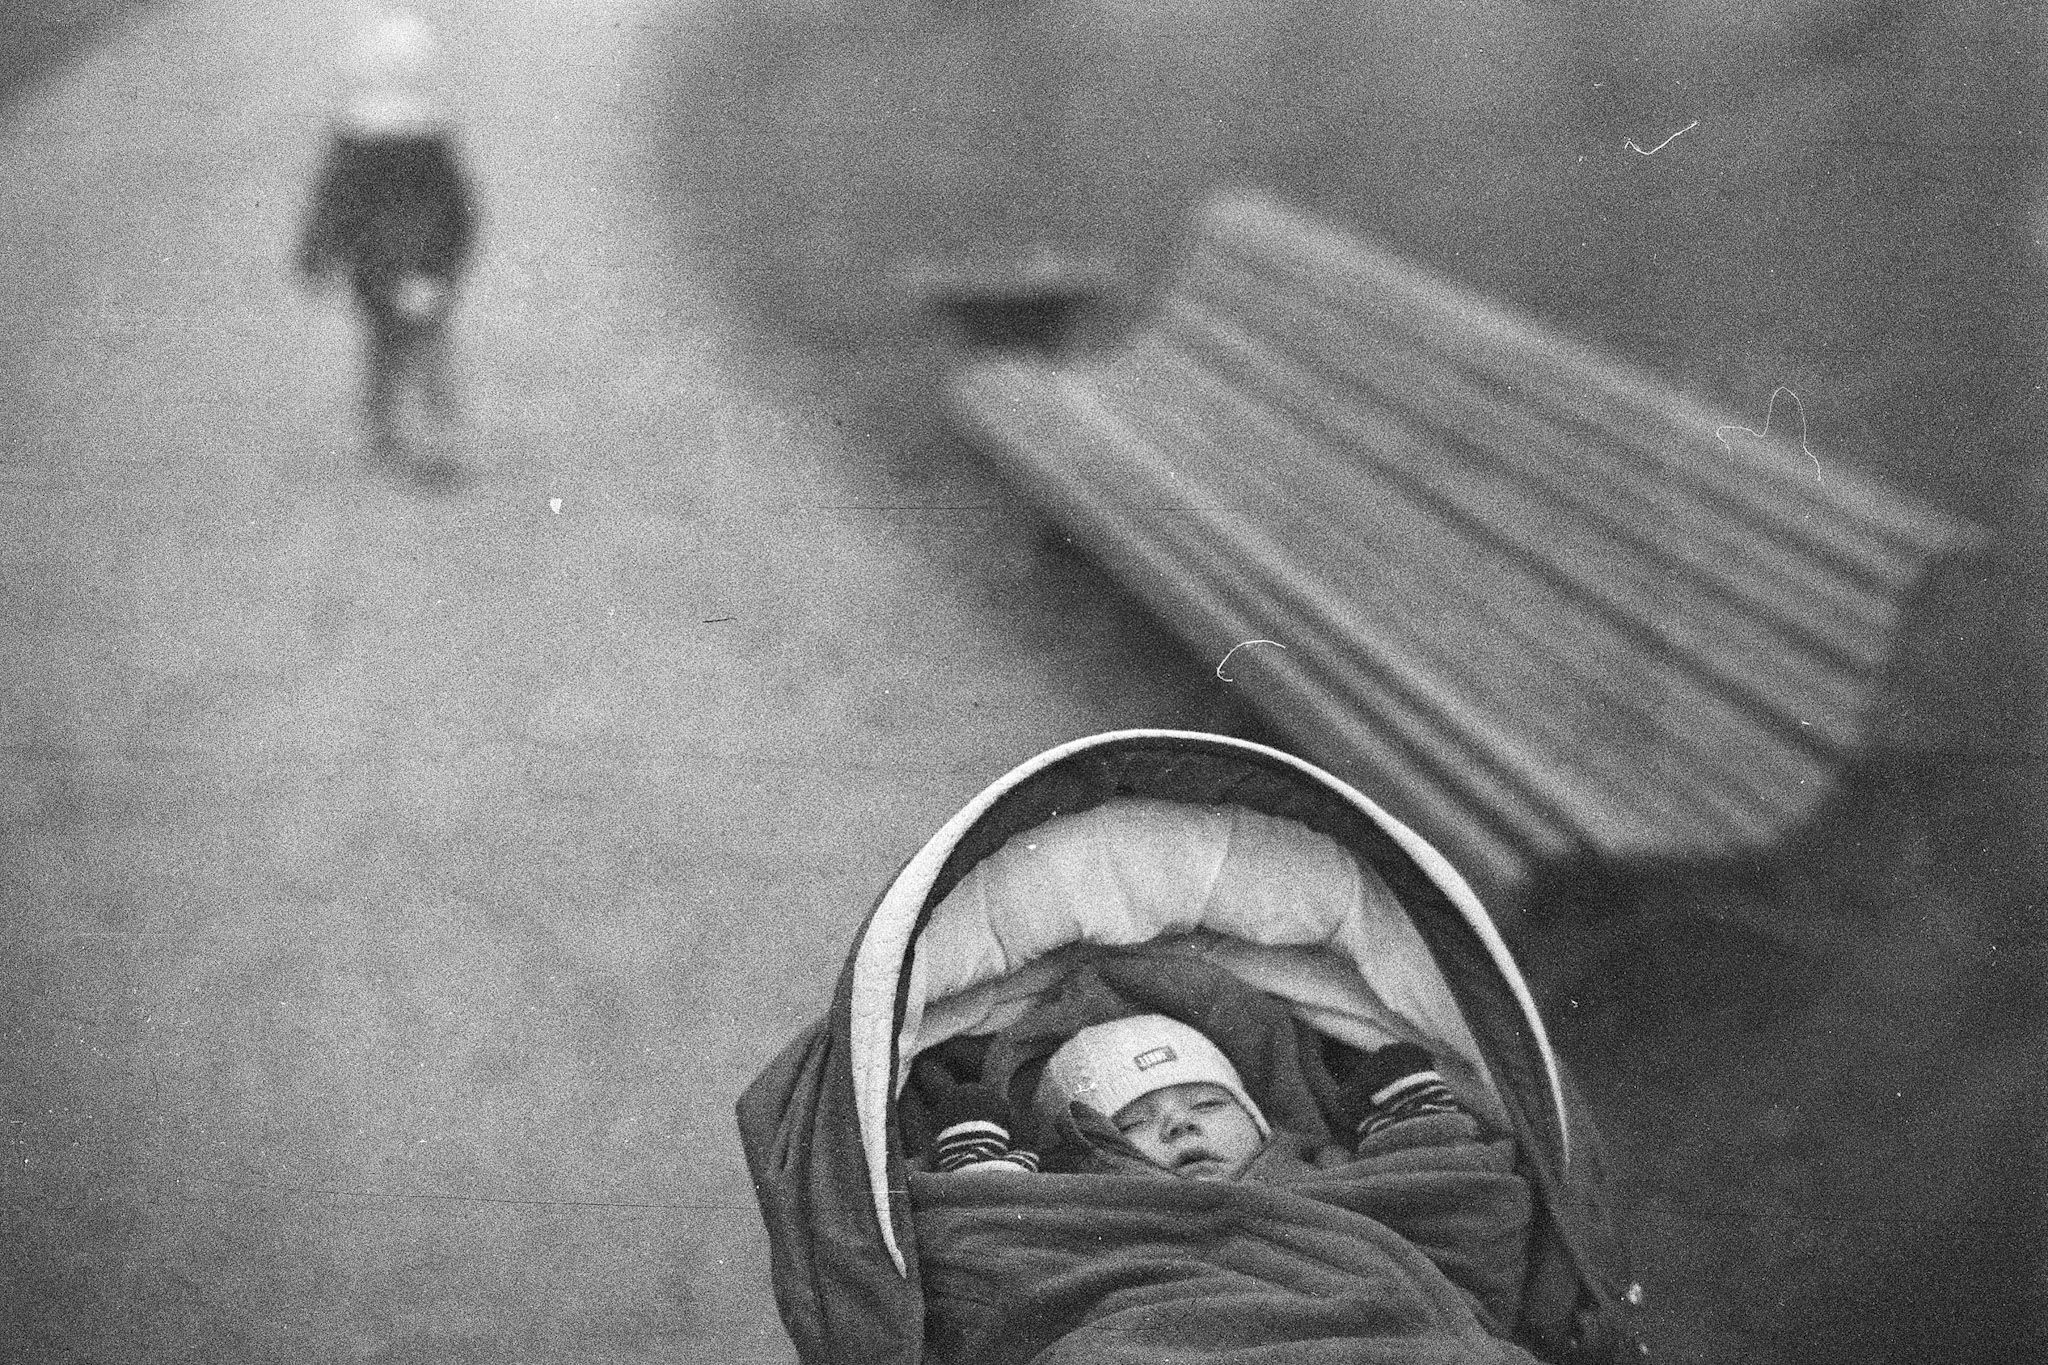
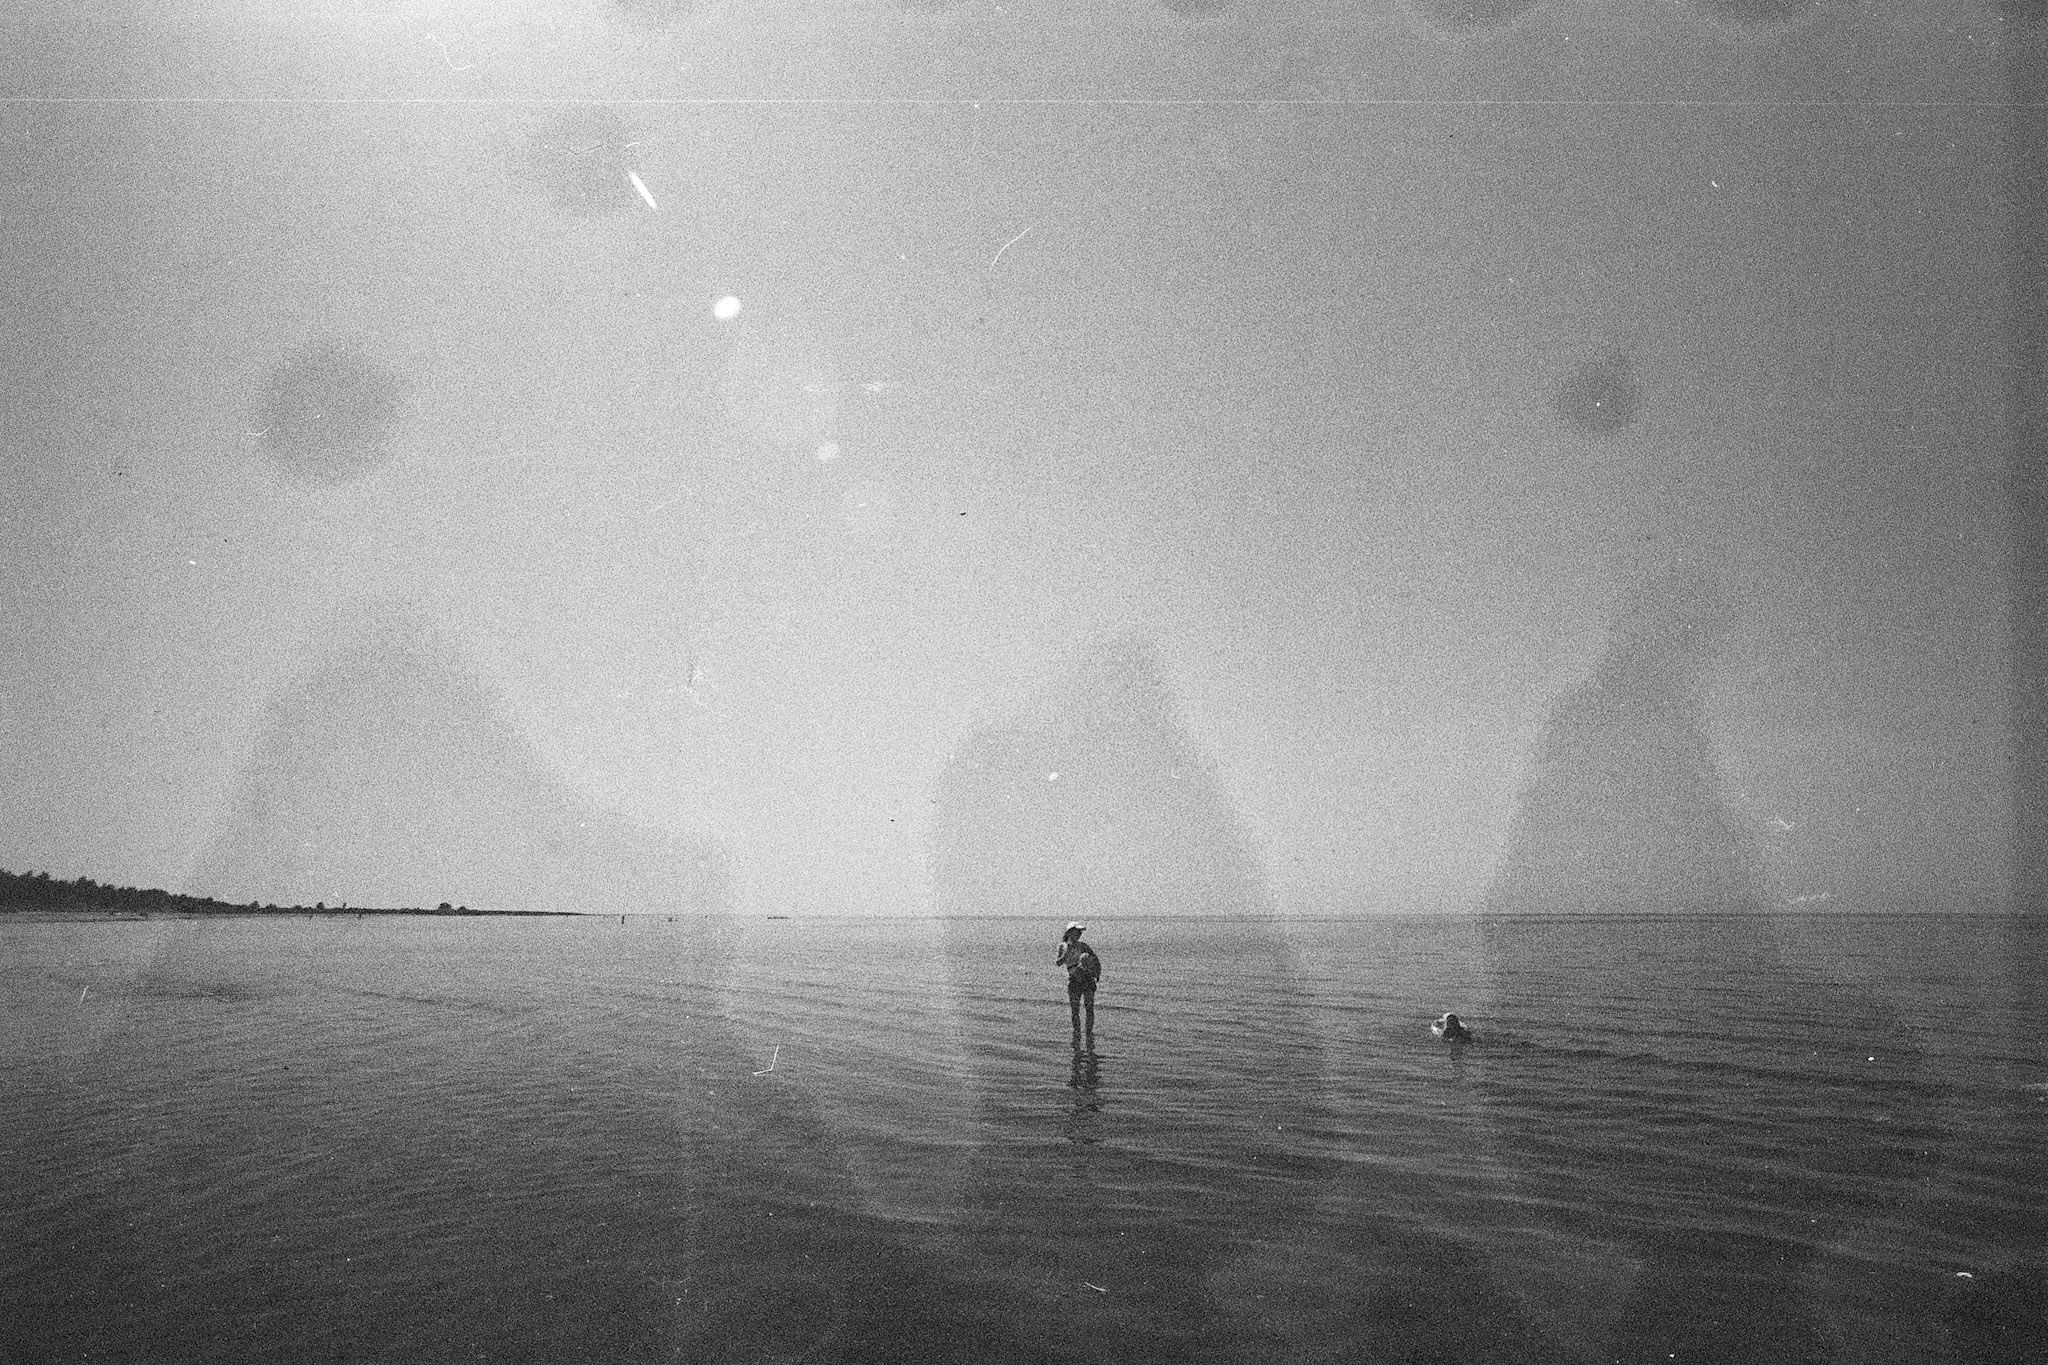
It looks like ISO25 is pretty much the correct rating for this film now. Anything underexposed gets muddy really quick. If anything it could probably benefit from a half stop more light but I'll keep it at ISO25 as most of my metering is an approximation anyway.
An example where lack of light really compresses shadows where not much is resolvable.
Camera: Leica M3
Lens: 7Artisans 50mm f1.1
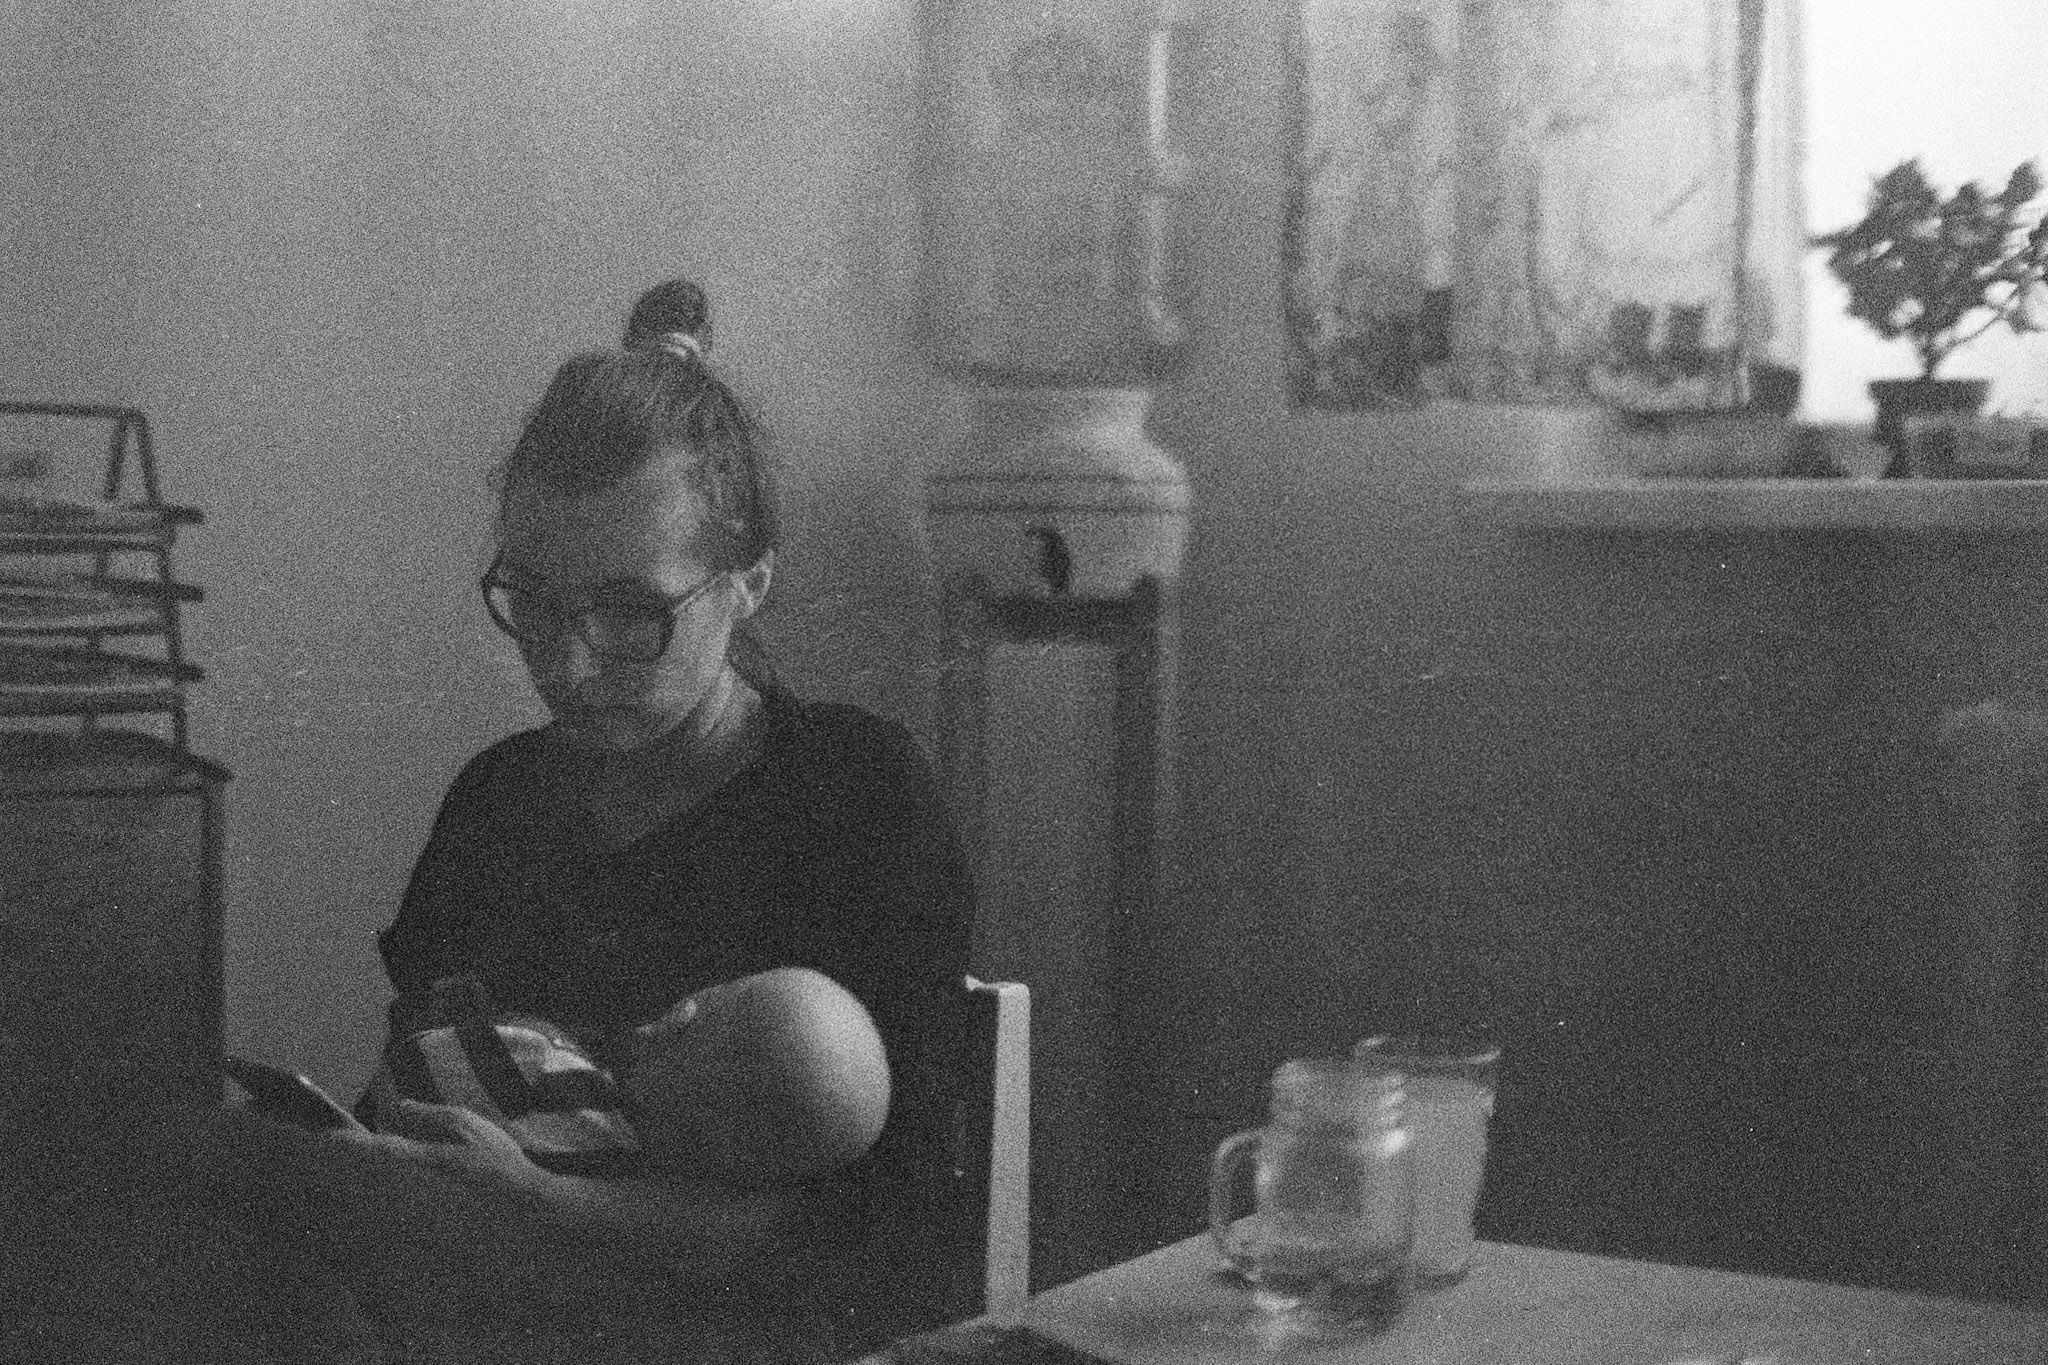
Dynamic range isn't great but also isn't terrible. It handles highlights quite well. Shadows do have quite little detail though. It's also not easy recoverable with scanning techniques so it looks like that shadow detail is mostly gone. It's totally usable still. I don't really need detail in both highlights and shadows as that can sometimes make things a bit too chaotic in picture and also boring but that's just me, probably. Also since it's not easy to blow highlights you can just expose for shadows if you need the detail and it will likely mostly work out fine with some light blowage. It's better than HP5+ @ EI3200 :)
There isn't too much dynamic range. Shadows are pretty much gone. It was quite a contrasty scene but I'm sure less expired and more modern films could get more data out of the shadows.
Camera: Leica M3
Lens: 7Artisans 50mm f1.1
Grain...is there. It's not terrible but it is more noticeable than most in-date ISO400 films I would say. I'm sure Rodinal doesn't help there so there's likely a different developer that could handle the grain better to output cleaner results. I don't mind grain that much myself so it's perfectly acceptable.
It's really not that grainy. And the grain that exists gives a nice "old" look to the photos that it's pleasant.
Camera: Leica M3
Lens: 7Artisans 50mm f1.1
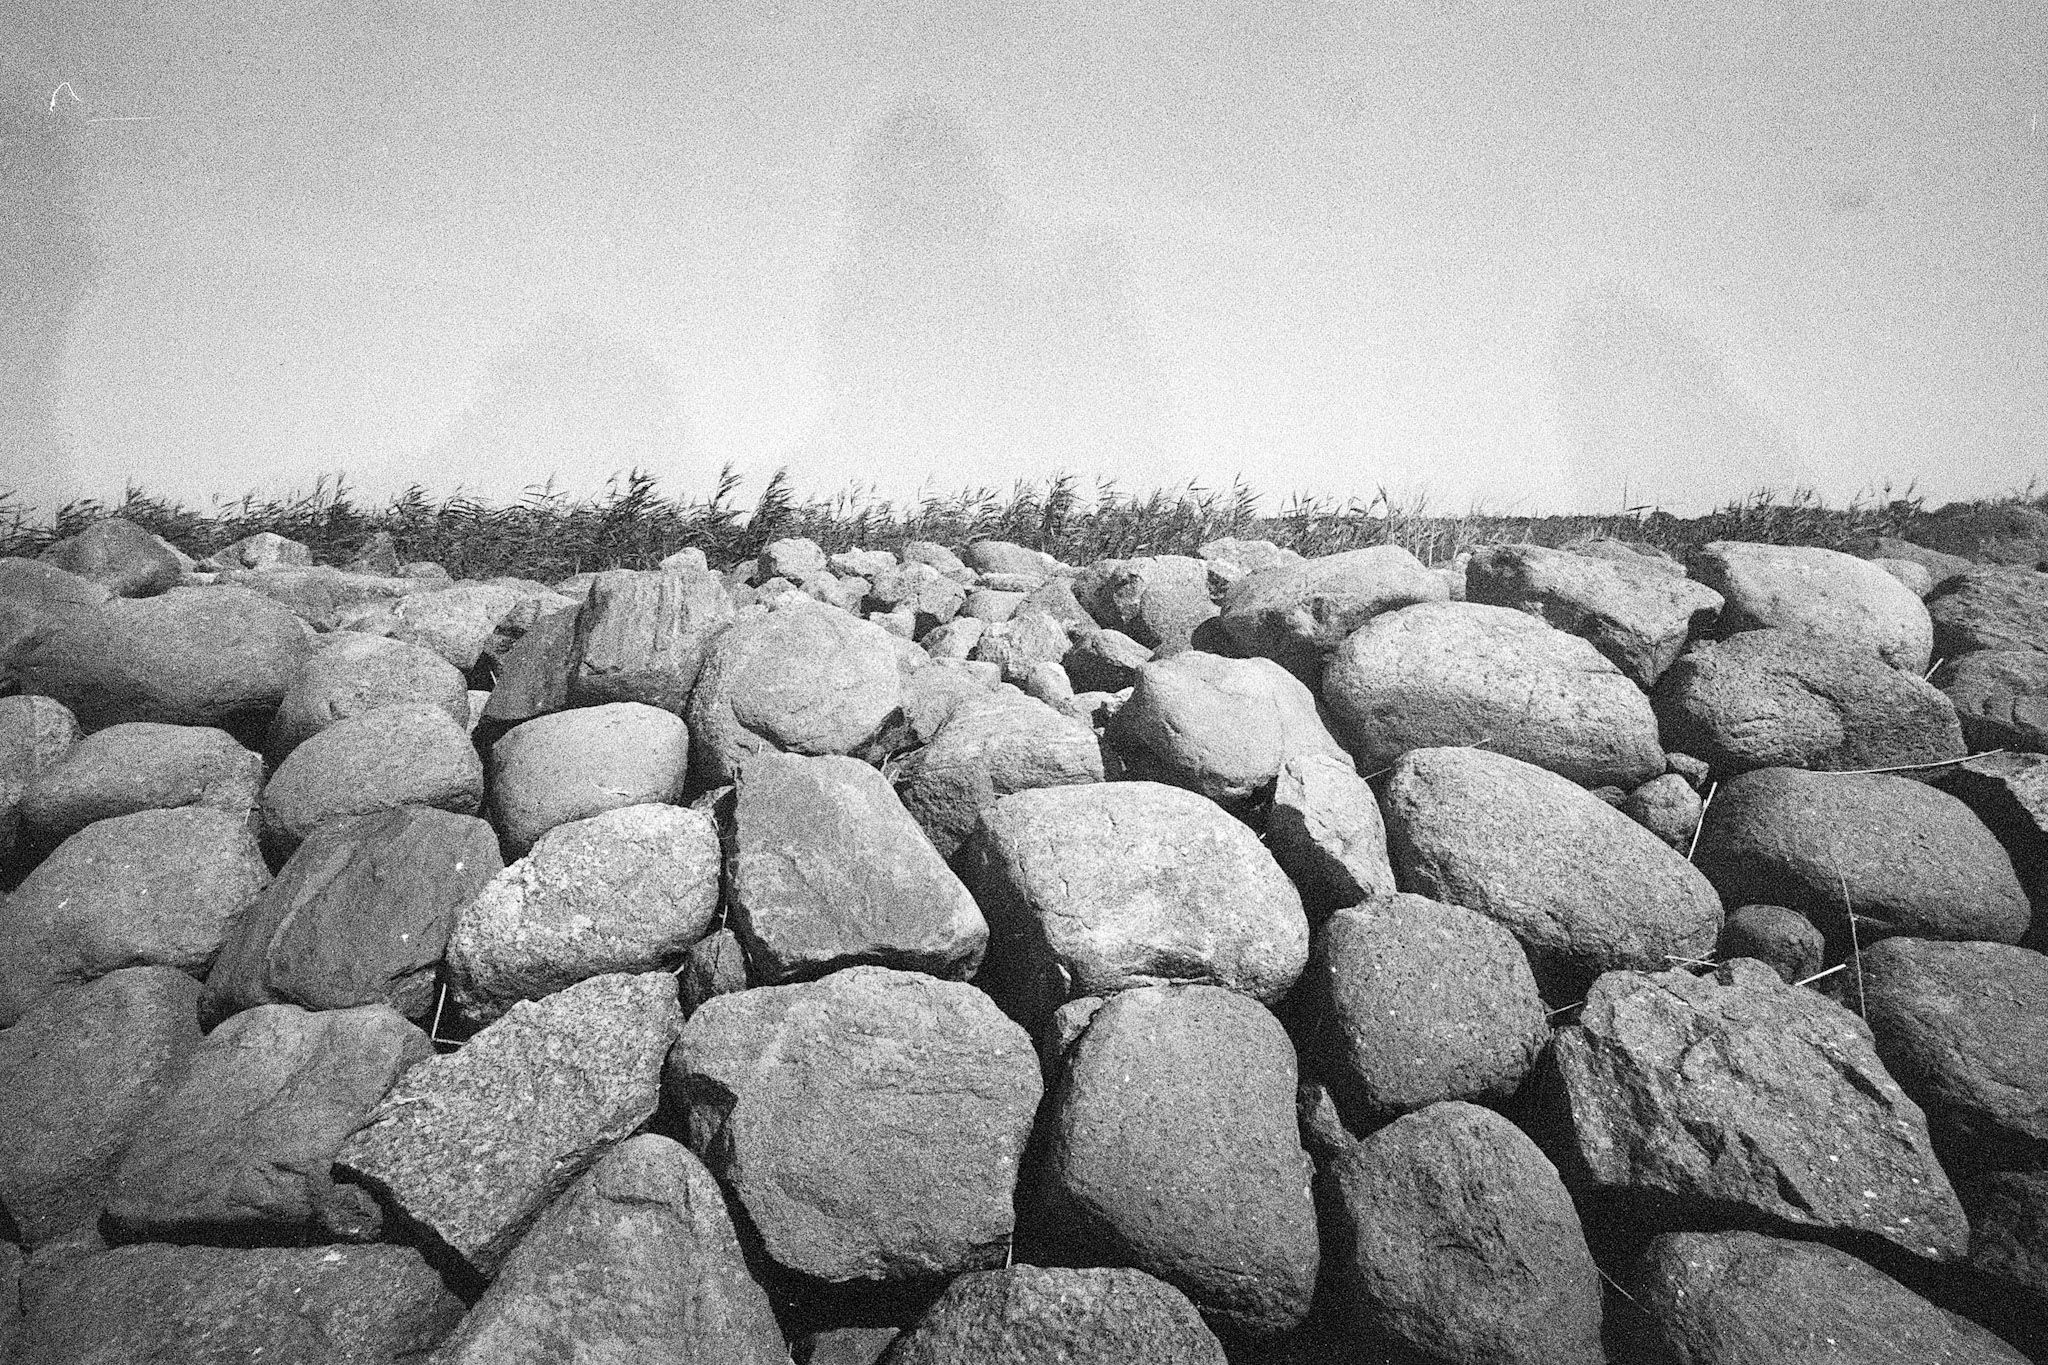
The biggest issue is the weird drying marks and dust attraction. It was honestly too much dust to fully clean in post ( but I'm also lazy so there's that ). And the drying marks are not really cleanable in post. I'm sure you could improve them as it covers mostly large areas uniformly but I didn't bother. If you need clean results - this film is definitely not for you.
You can see the crazy drying marks and the havoc that it brings. It's especially visible on pretty homogenous pictures.
Camera: Leica M3
Lens: Voigtlander 15mm f4.5
Sharpness. It's sharp enough. If you need razors - use digital. If properly exposed then it's plenty sharp.

There's plenty of sharpness to be had on this film. Especially on sunny, slightly contrasty scenes where light itself generates pretty sharp and hard edges.
Camera: Leica M3
Lens: 7Artisans 50mm f1.1
Overall Impressions
Quite happy. For 1 EUR it's a good deal. My plan is to use this mostly for highly documentary family photography. Like small trips to the beach or something where I've been many times and don't necessarily want clean results that I'll put up on the wall.
Biggest annoyance is getting the film in canister. I should really just pre-canisterise them so that when the need comes I just need to put it in camera. But that means sacrificing an hour or more of tedious work which I'm not looking forward to. Also I don't have that many free canisters and would rather use them for more interesting film. Ehh...film life is difficult sometimes.
Anyway. If you happen to find this film somewhere I can recommend getting it if it doesn't cost you more than 2 - 3 EUR for film. If you know that it's properly stored and film from the same batch has been tested - maybe 4 EUR just to try some Soviet film.
Finally here's a photo that shows most of the strengths and weaknesses of this film. It's plenty sharp and contrasty. Dynamic range is decent. But it has dust and drying marks.
Camera: Leica M3
Lens: Voigtlander 15mm f4.5