Ricoh R1 / R1S / Rollei Prego Micron Compact Film Camera Review
I have an Fujifilm XF10 which was intended to be my "carry around everywhere" camera. I say was because I never carry it with me. Instead I carry around nothing if I don't expect to have an opportunity to take a photo. Or I take a bigger camera with me. I'm not sure why it turned out this way as I definitely did want the XF10 to be a camera that's always with me. But I didn't bond with it so it sits on a shelf. It's so unused that the dedicated SD card it had, has been given to a different camera. Sad times for XF10.
I'm not into compact film cameras as most of them are overpriced. At least the good ones. And objectively it seems that a digital camera would work better as a camera that's always with me as it's a lot more flexible. In practice that doesn't appear to be the case so I started keeping an eye open for some compact film cameras. Maybe they would work better for the destiny that XF10 was meant to fulfil.
Most good compact film cameras cost a lot of money. I won't even mention the likes of Contax T2. Even the not so good compact cameras start to rise in price. To find a cheaper compact camera that would still yield decent results I limited my search to "just below premium" cameras with a fixed focal length lens. Ricoh R1 fit the bill.
Most people will be familiar with the Ricoh GR series of cameras. One of the more popular compact cameras. Often used for street photography. A line of cameras that is still active today in a digital format. The Ricoh R1 removes the G. Removes a few hundred $ from the price. And removes in pretty much all aspects whilst not falling into "garbage camera" territory.
Ricoh R1 was released in 1994. It was also released as Rollei Prego Micron. Because you can't have a camera with only one name. In 1995 Ricoh R1S was released. The "S" standing for "successor", "super" ( and hopefully not "shit" ) tweaked the visual appearance of the camera a tiny bit but that's about it. You won't feel any difference between R1 and R1S in real life. There's also R1E. The "E" standing for "export" and "shitE". It replaced the mostly aluminium body with plastic, removed the 24mm panorama mode and reduced other functionality. I've not seen many R1E's and wouldn't recommend you seek one out.
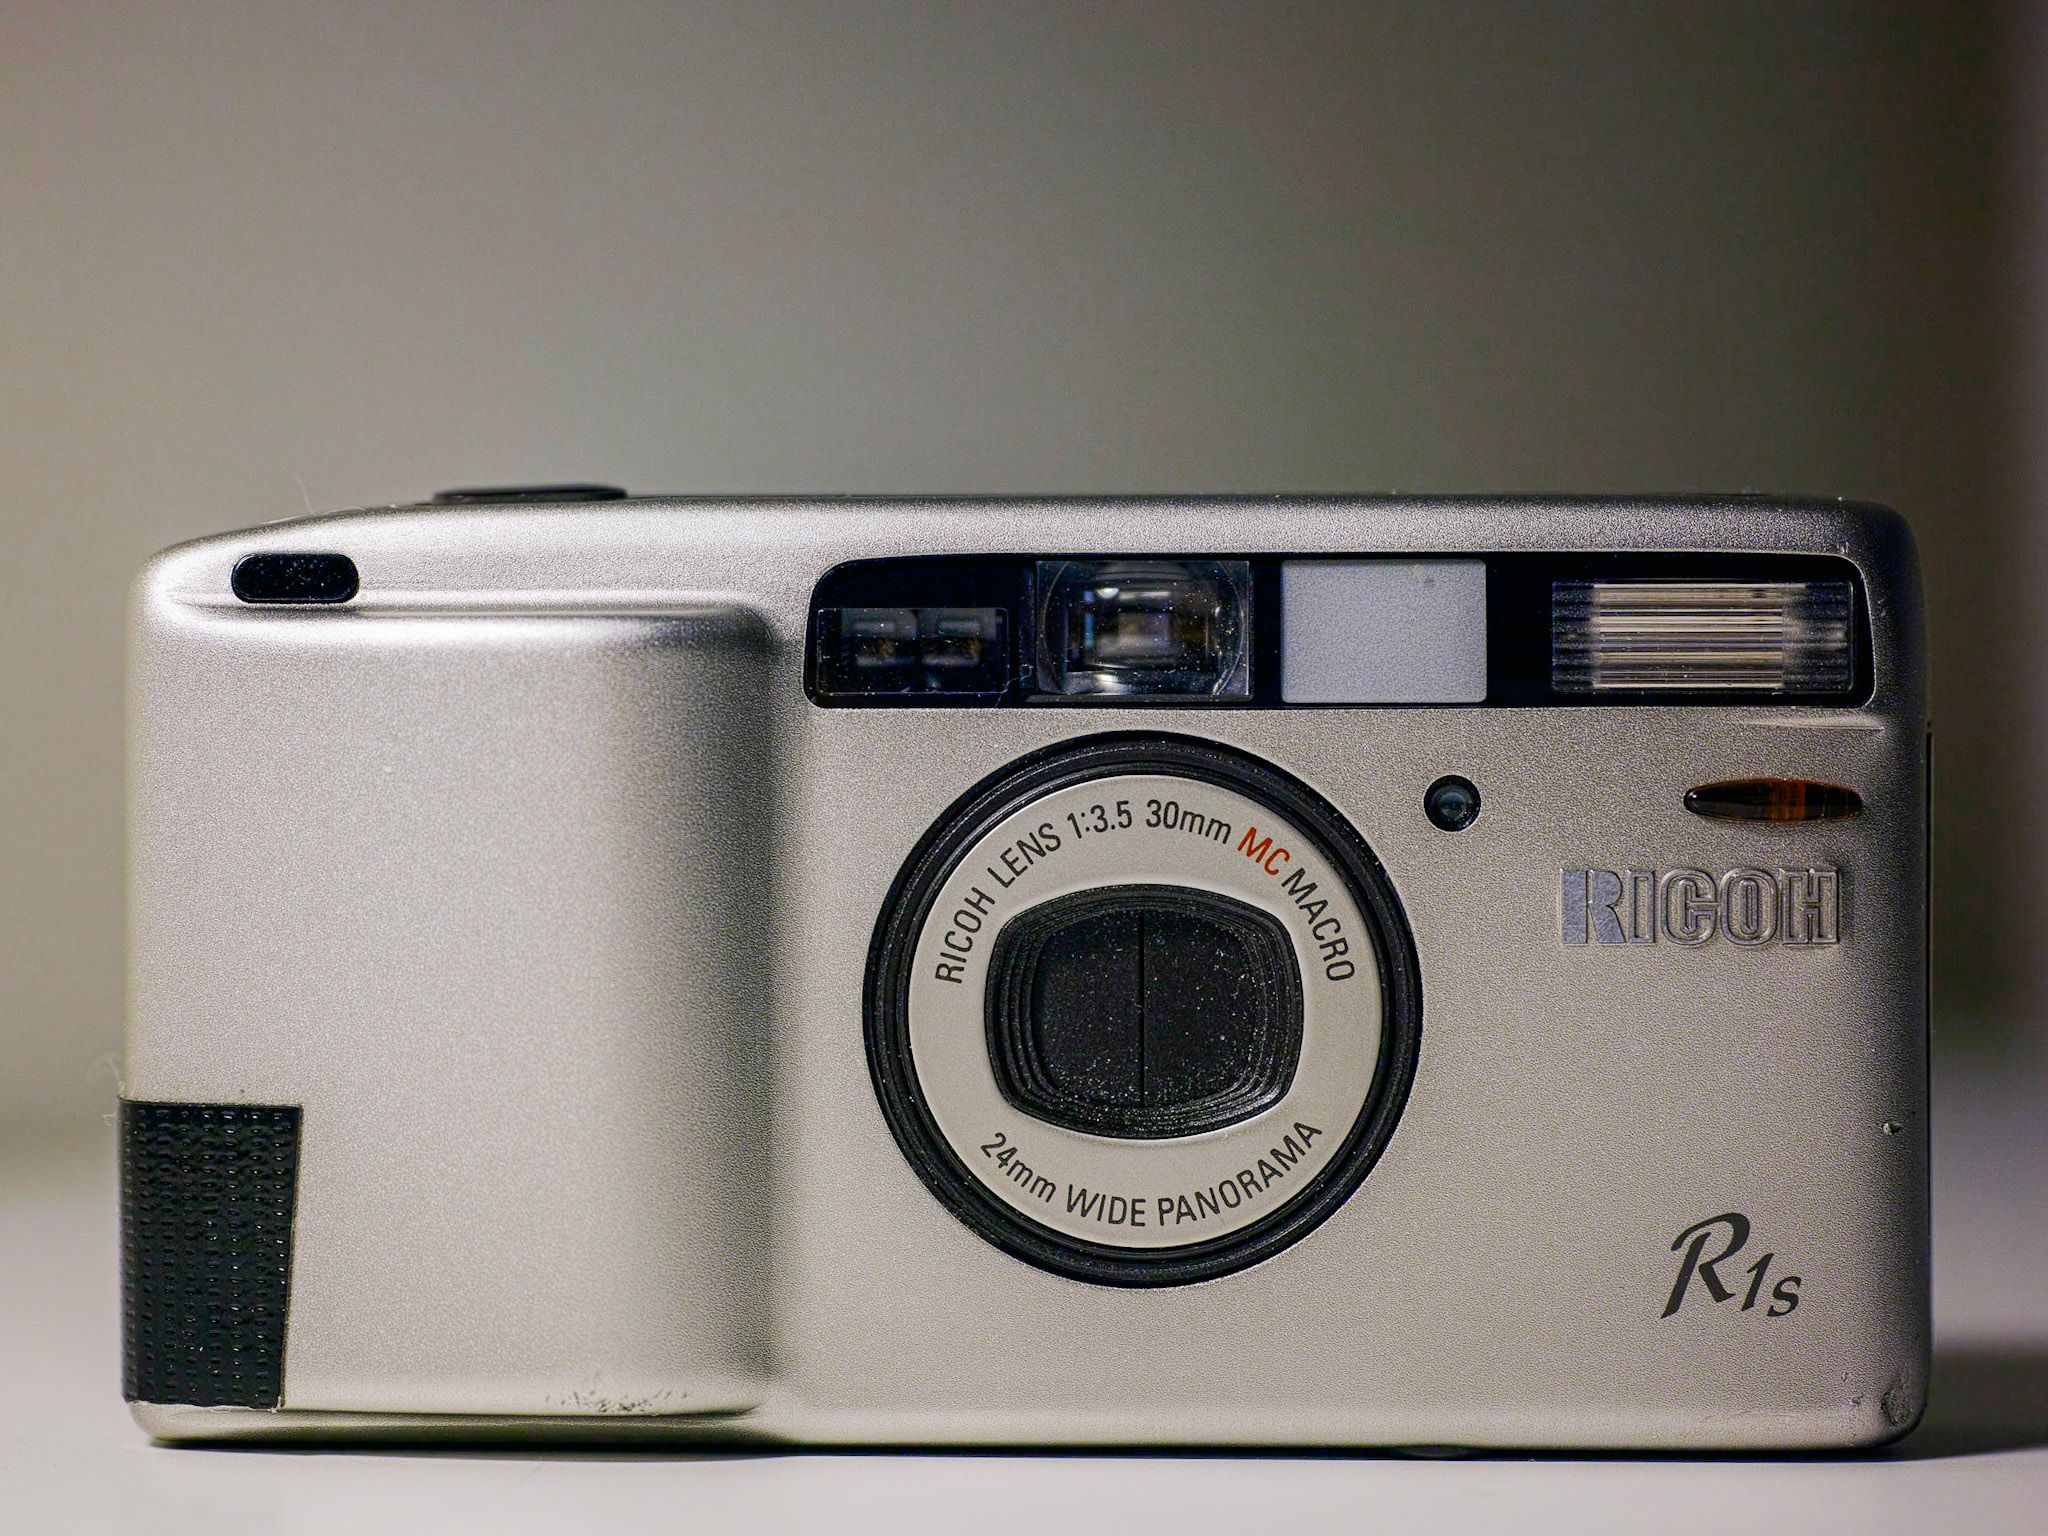
Full frontal view of Ricoh R1S. I will cover the duct tape later in the review.
Ricoh R1 ( I won't use all other names ) has a Ricoh 30mm f3.5 lens. It has red "MC" letters on the lens which must mean "multi-coated" ( and hopefully not "multi-crap" ). It also says "macro" on it. Don't expect 1:1 macro functionality here — you can get as close as 0.35 meters. It also says "24mm wide panorama" on the lens as it has a pretty unique capability to transform from a 30mm lens to a 24mm lens but only in a cropped panorama mode. If you have the Rollei Prego version then the lens will say that it's a Schneider-Kreuznach lens. Although it's the same lens. R1 takes 35mm film and is all automatic.
You can find the camera in the $180 - $250 range. In this price range you must expect the camera to be 100% working. If you don't want to spend as much then you can also find this camera for around $100. What's the trick? Ricoh R1 has an LCD display at the top which allows you to see the various settings and it's common for this LCD to break. The camera will still work but you will have more difficulty in setting the settings. I got my camera for $65 with ( almost ) non working LCD and a dent in the body. And also a light leak and broken battery door.
Let's get into the review part.
Build Quality
Ricoh R1 has a mostly aluminium build although it's not difficult to mistake it for plastic. The aluminium used is very thin and can feel like plastic. Only giveaway is that you can dent the body and it's also cooler to the touch. The back door though is actually made from plastic.
There are 4 main buttons. Shutter button, flash button, self timer / remote button and creative mode button. All of them have the same spongy feel that isn't too great. The shutter button is the best of the buttons. I've never made a shot by accident so it's not bad. The other 3 buttons are a bit worse as it's difficult to tell whether the press has registered or not. The non-working LCD doesn't help. That being said — it always seems to register. In practice you only have to get used to and accept the spongy feel and everything will be OK.
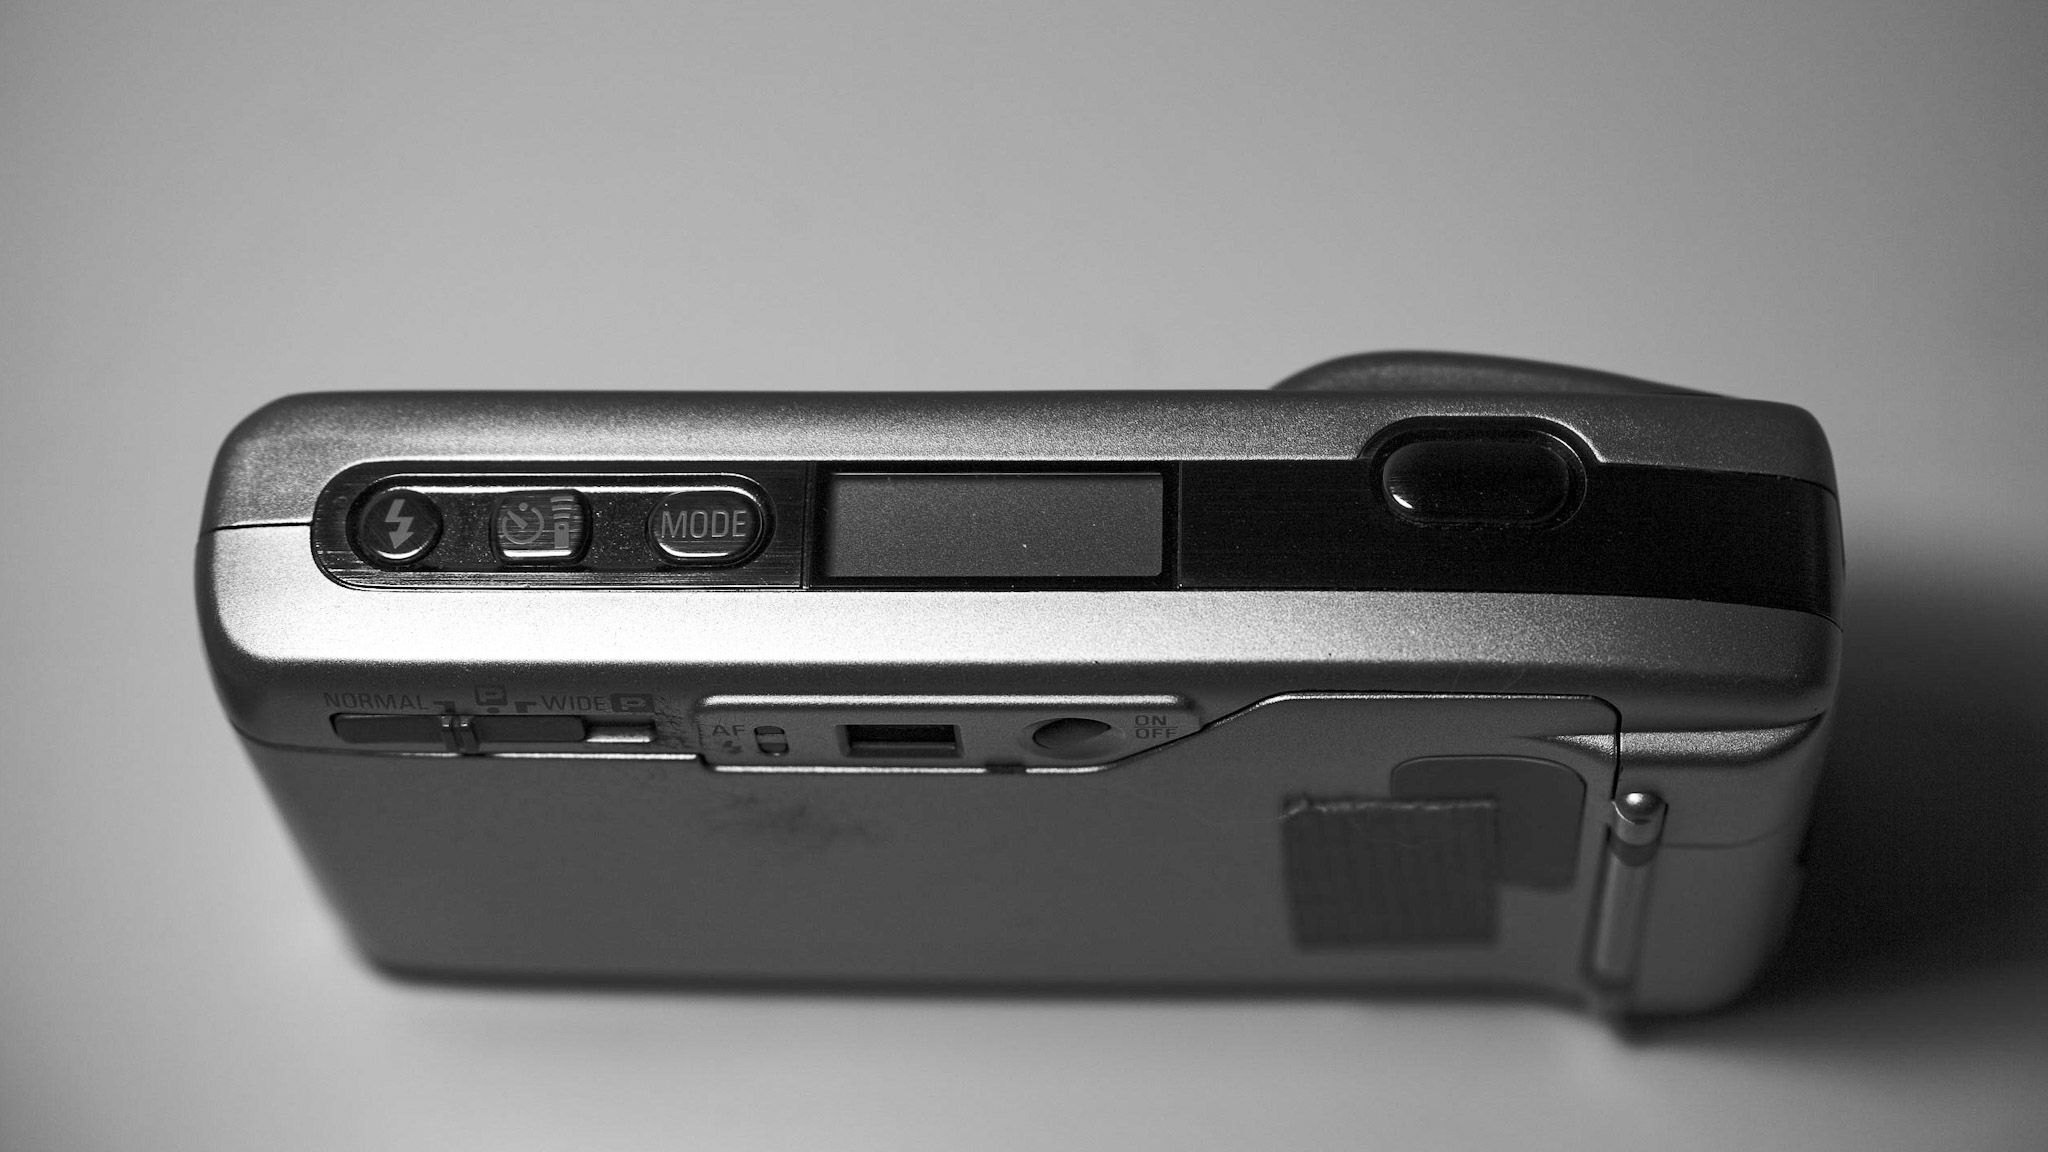
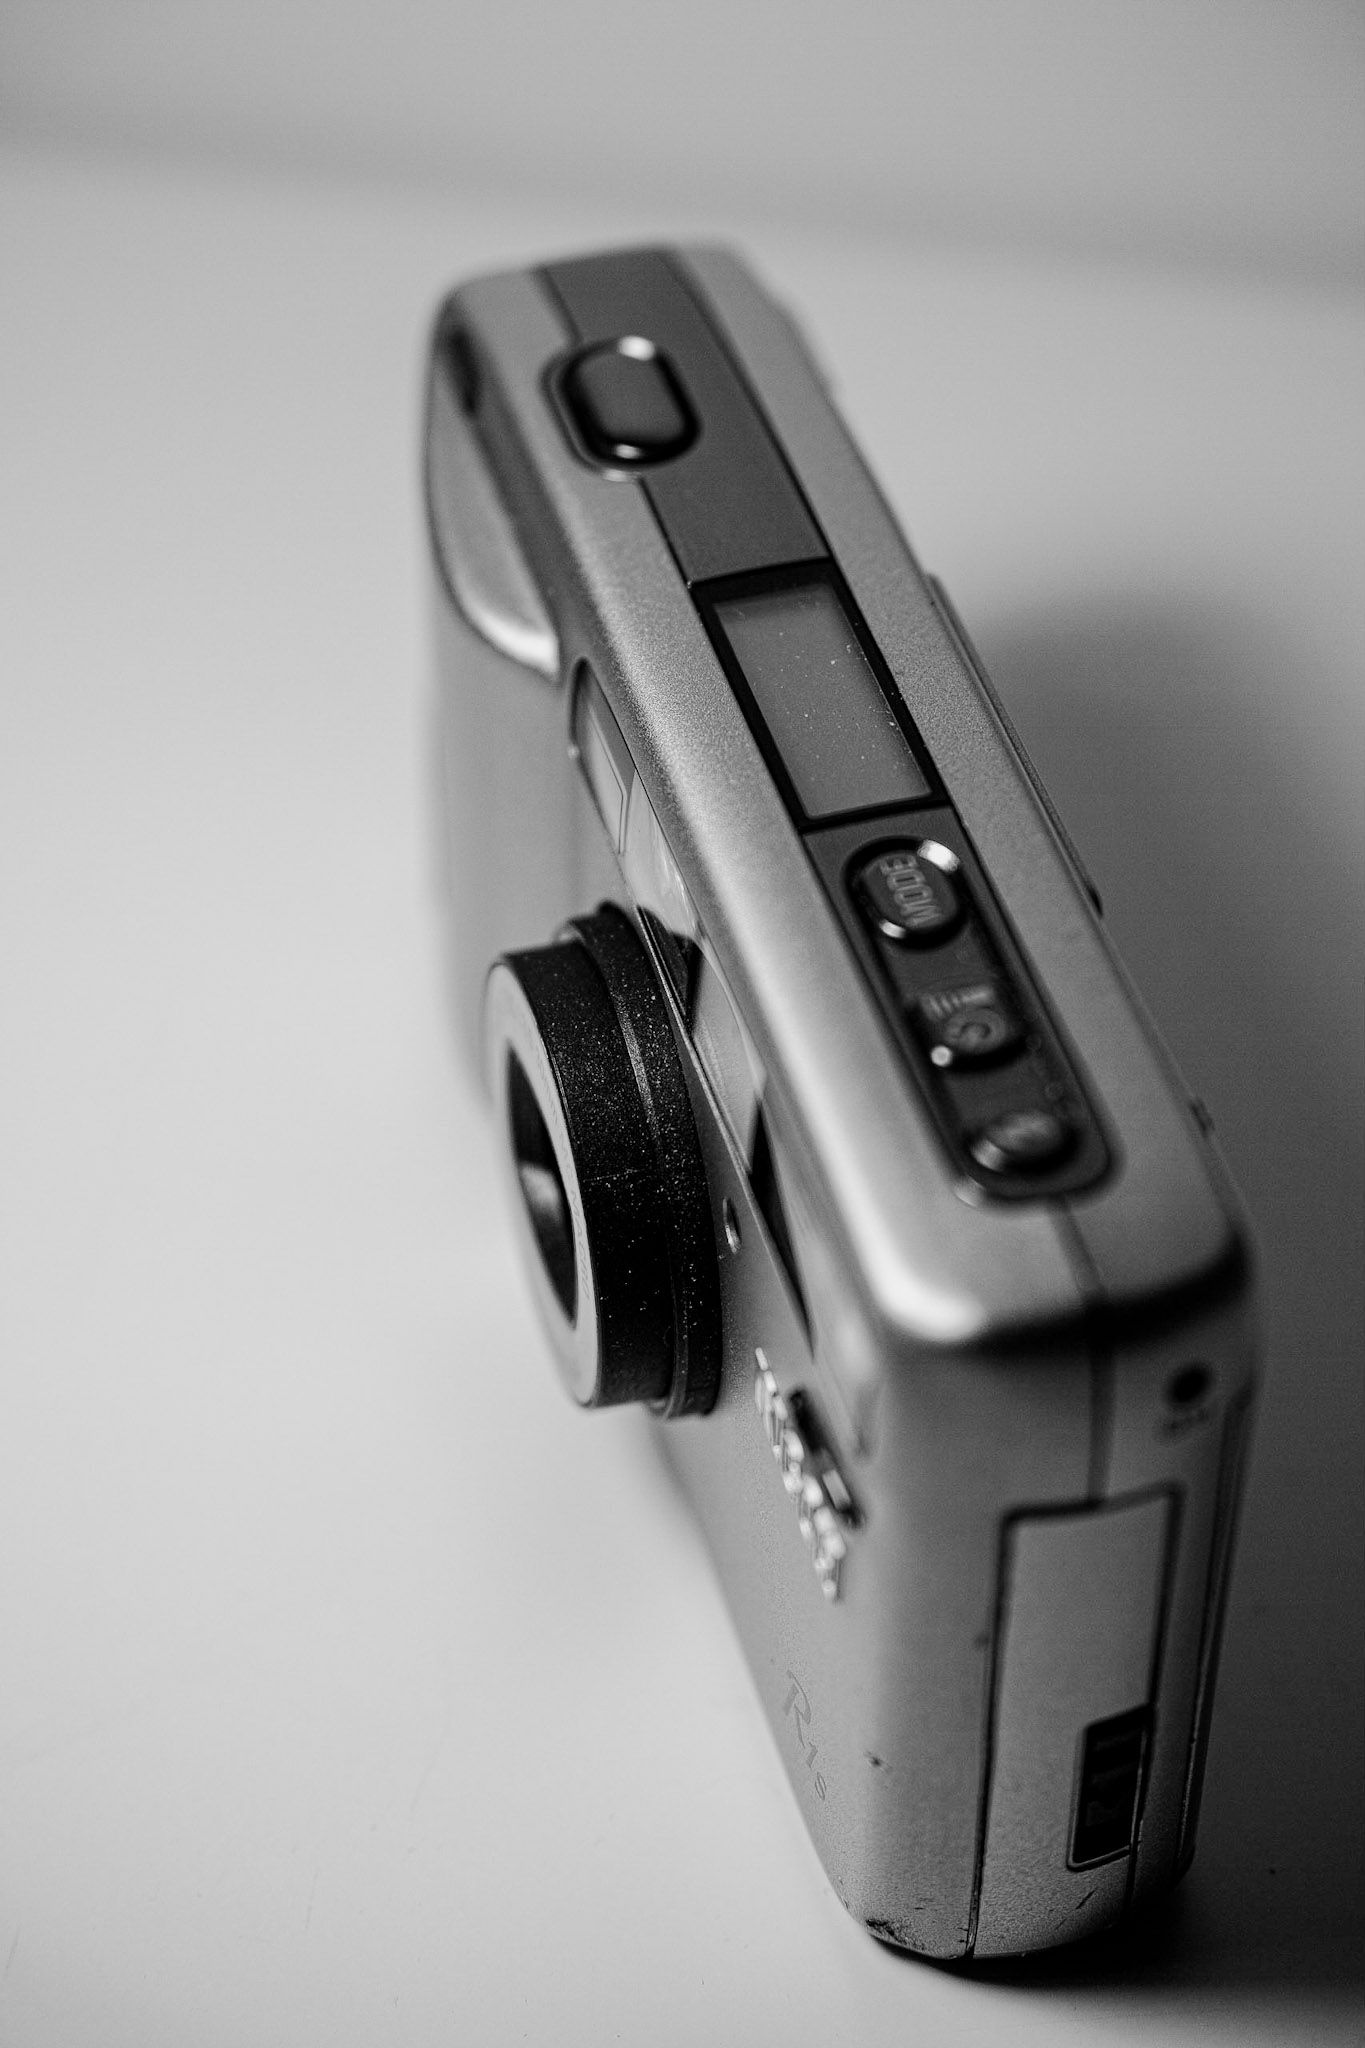
The main 4 buttons can all be found at the top of the camera. Shutter button on the right whilst the rest are on the left.
You might think that shutter button is the most used button on this camera but that may not be correct...
The camera is very light and although I prefer heavier cameras, I support lighter weight for something that lives in your pocket. The build doesn't feel too sturdy and I wouldn't want to throw it around. Usage of real metal does help as there is no creaking when holding the camera which can often be the case with plastic cameras.
Be cautious of the window showing the film loaded in the camera. It's the only place that has light seals and they are about to deteriorate if they haven't already. Mine were definitely deteriorated as I found out after developing the first roll. You can replace the light seals or have someone do it for you. But there is a much easier fix — duct tape. Piece of black ( or pink ) duct tape over the window fixes all the light leaking problems. You won't be able to see what film is in the camera but I see no point in seeing that anyway. It's an all automatic camera that reads the DX code. What is the benefit of knowing what film is in the camera whilst the camera is in use? So be like all the cool kids and use black tape. I hear that it also makes your camera stealthier.
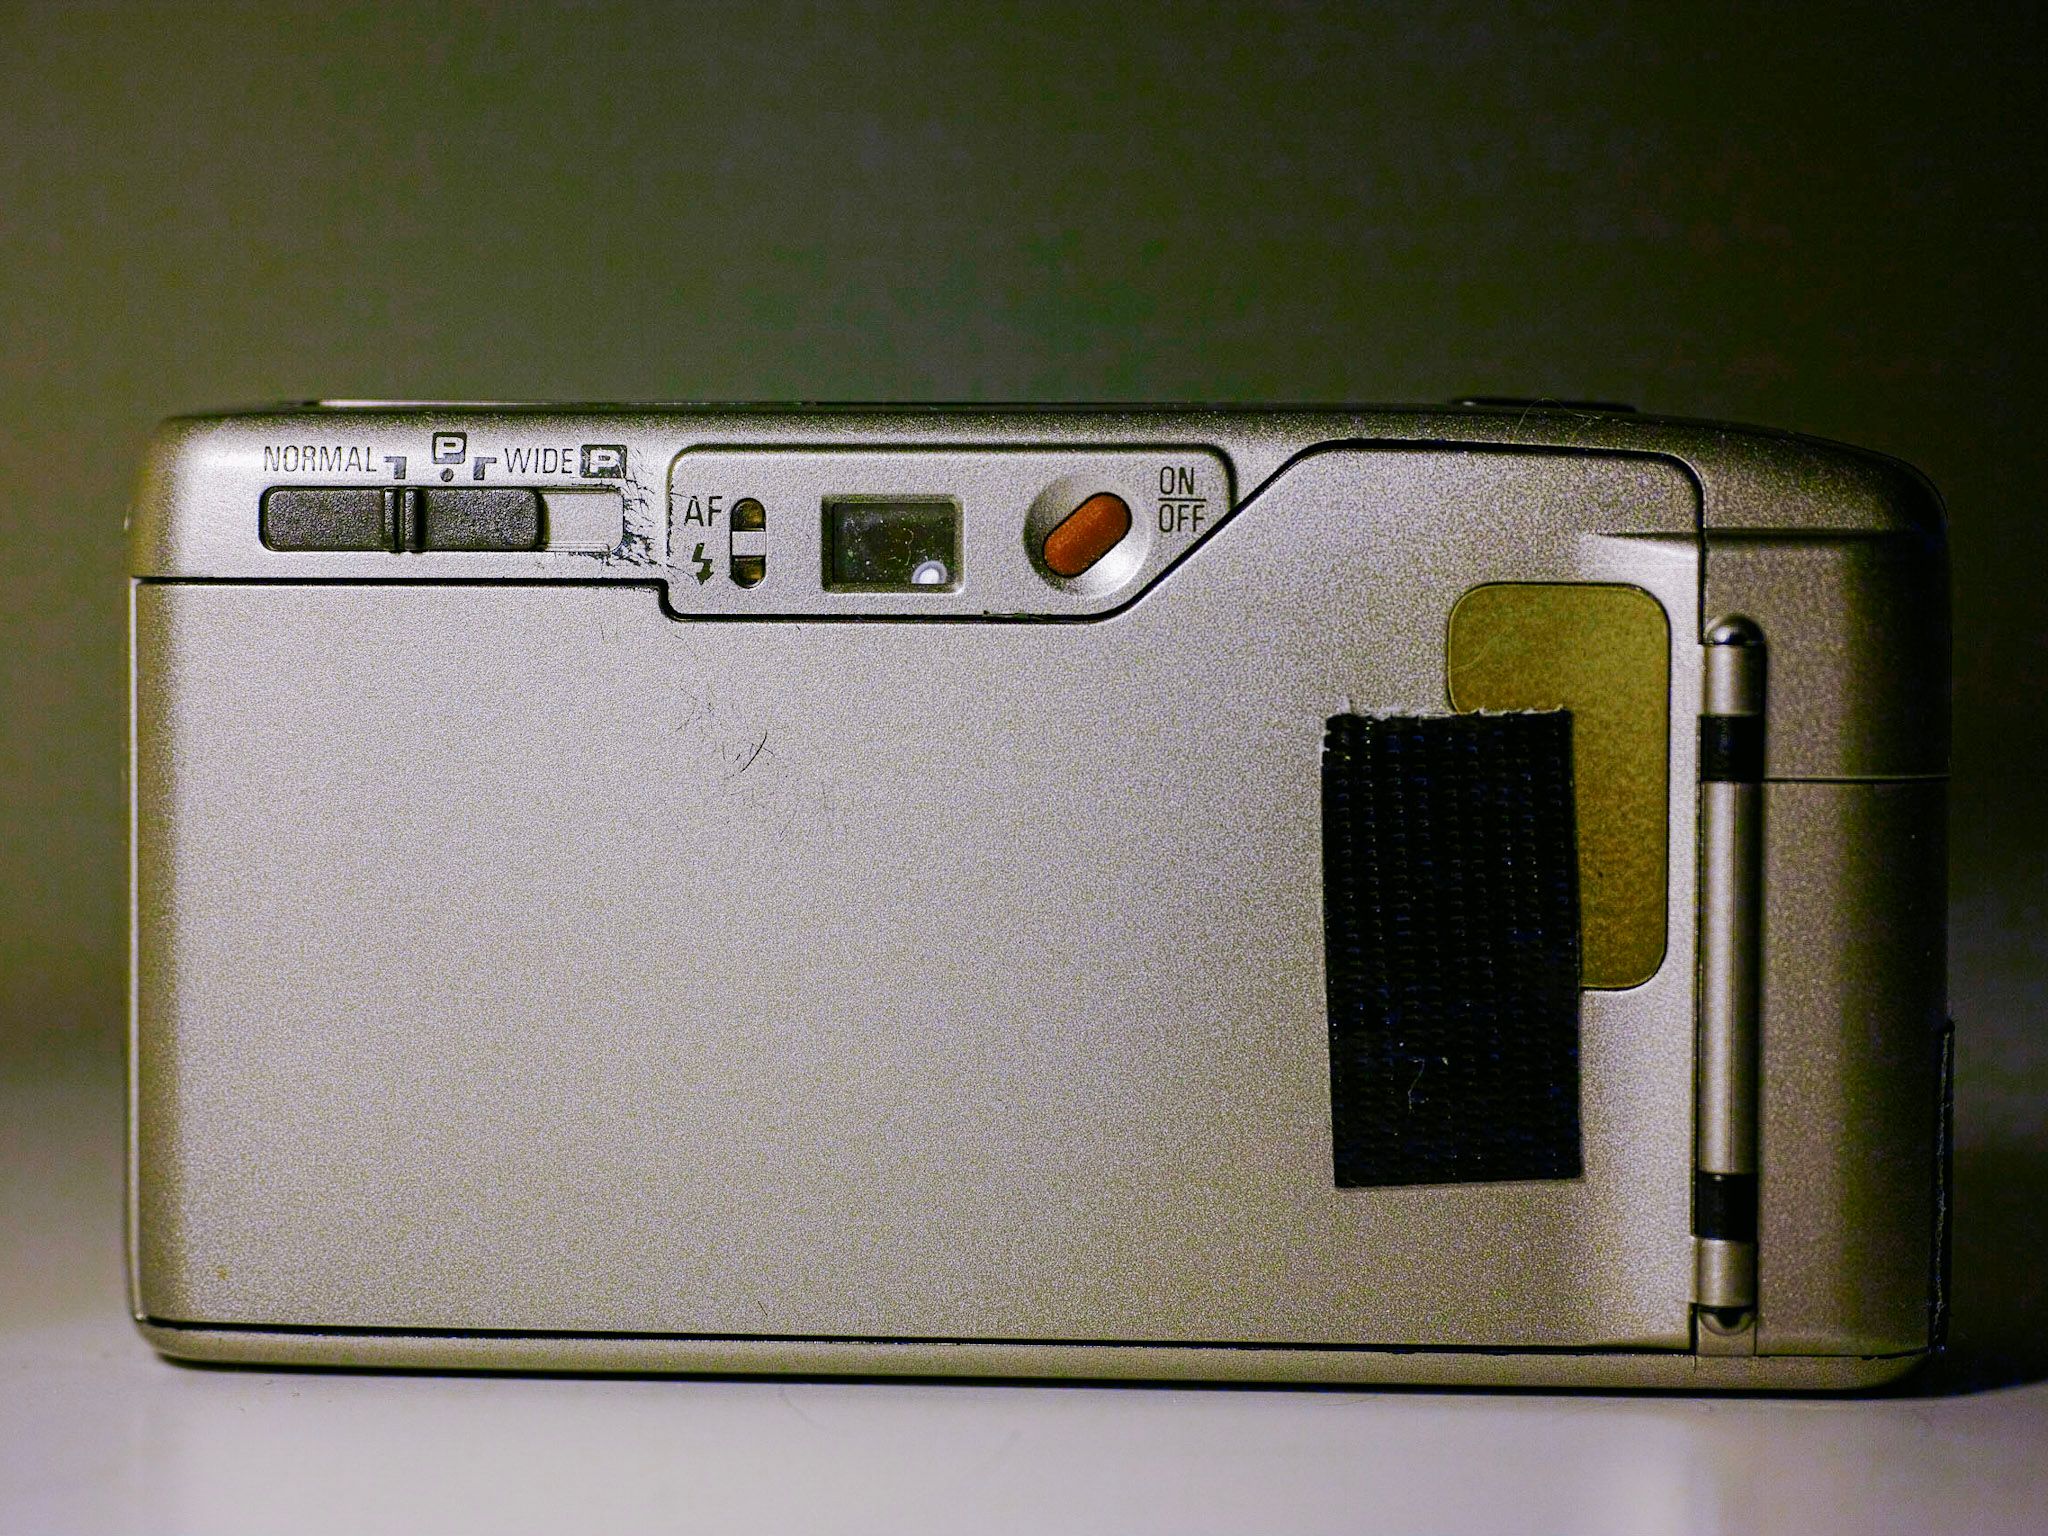
Back of the Ricoh R1S. Most important of all is the duct tape that is blocking all possible light from the universe.
As I mentioned, the LCD is very prone to breaking. Mine is broken and you will find quite a lot of them broken if looking to buy one. It seems to be a common thing for other Ricoh cameras as well. Like the more premium GR series. The display won't go completely. It will start to not show certain sections and at the very end it will only show small bits that aren't helpful. There is also a second LCD that is used to set the date and time to be imprinted on the photos. Since I'm not a masochist, I haven't and won't use this feature so can't confirm or deny whether this LCD works.
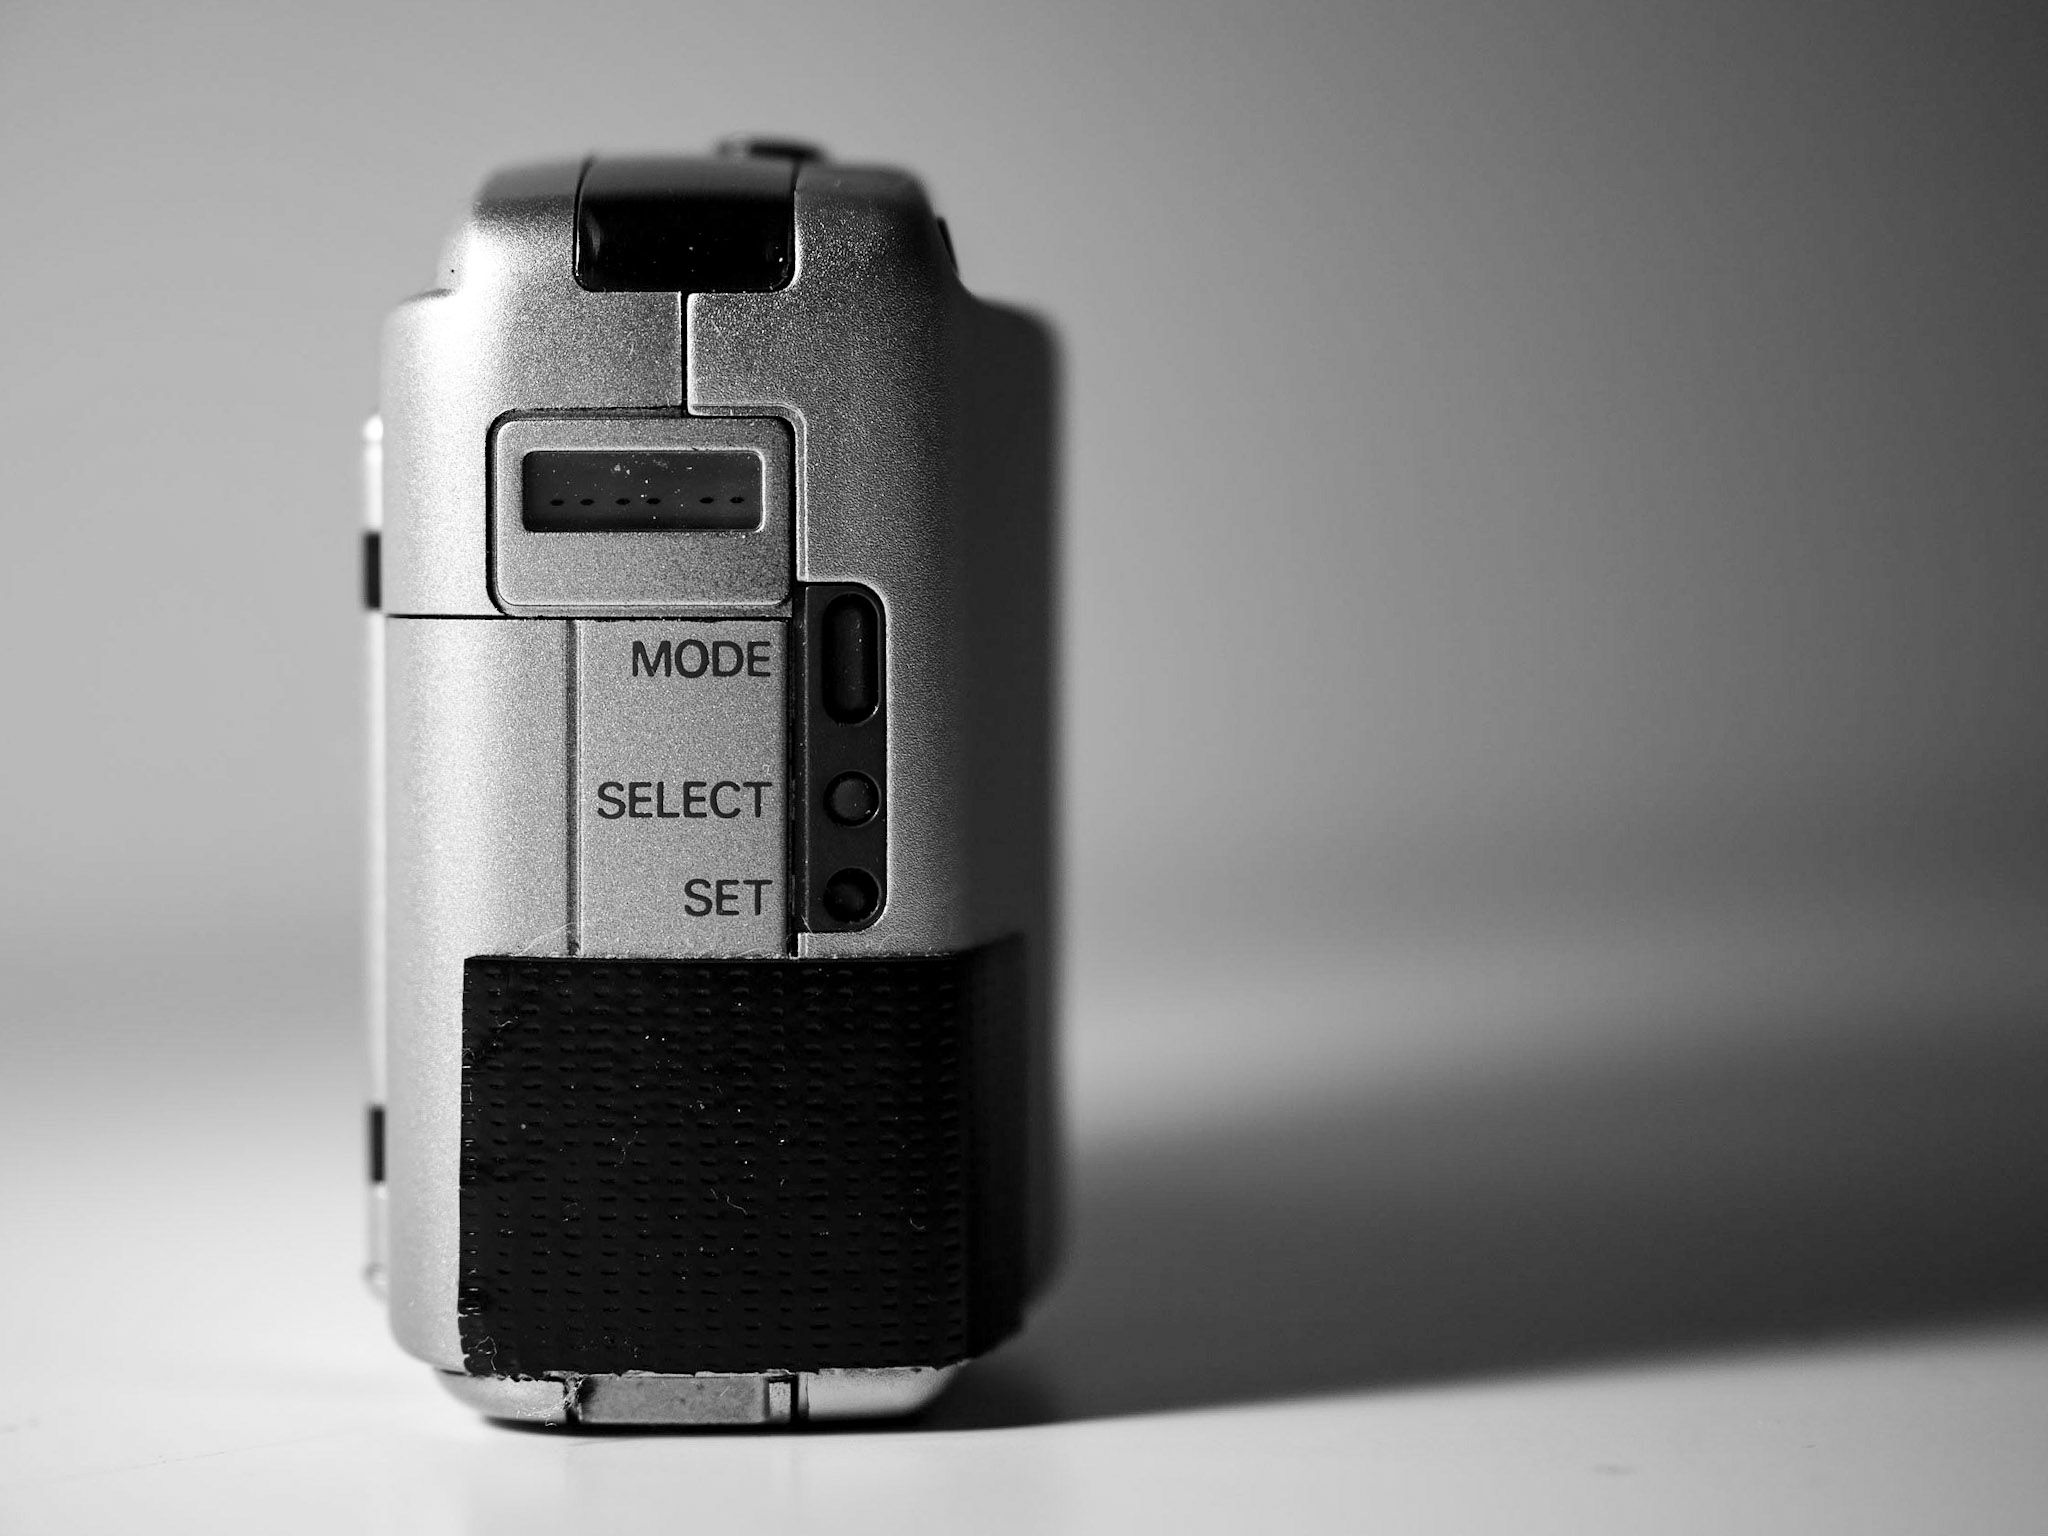
Here is the small LCD used for setting the date. It shows lines so I assume it works to some degree.
You can also see duct tape covering the battery door.
Lastly, the battery cover on my R1 is broken. The door still exists but it doesn't lock. Once again a small piece of duct tape will save the day. Can't say whether this is a common issue or not but I wouldn't worry much about it.
Although I may have been a bit negative here, I do think that the build quality is very acceptable for a compact point-and-shoot camera. It is no premium compact camera made from titanium but it doesn't feel like a cheap plastic toy as well. I feel very comfortable throwing it in my pockets.
Ricoh R1 is small even with the lens extended. The build quality is good enough to not feel like you will squish this tiny thing in your palms.
Usage & Functionality
As Ricoh R1 is an automatic camera, you won't be playing around with many controls as there isn't a need for it. Apart from one control.
A common problem with most compact point-and-shoot cameras is that they will want to use flash when you don't want to. When you turn it on, the flash mode will be set to "automatic" which means that the camera will decide whether to use the flash. I don't like flash and I don't want my camera to use it so I have to turn it off. To turn it off you have to press the flash button twice. Not too difficult. The problem is that when you turn the camera off and on again, you will have to repeat this step. Again. And again. And again. Annoying. This is a plague that haunts many compact point-and-shoot cameras.
- Camera
- Ricoh R1S
- Film
- Fujifilm Reala EI100
- Development
- CineStill CS41 "Color Simplified" 2-Bath Powder Kit
- Scanner
- Reflecta ProScan 10T
Here's a photo that's too dark because I had forgotten to turn off the flash and was too far away from the subject.

- Camera
- Ricoh R1S
- Film
- Fujifilm Reala EI100
- Development
- CineStill CS41 "Color Simplified" 2-Bath Powder Kit
- Scanner
- Reflecta ProScan 10T
I have to confess that I have used flash intentionally as well. I don't plan to make a habit out of it though.
The camera forgetting it's settings applies to all settings. Apart from one — red eye reduction mode. You enable it by pressing the flash button once. When you turn the camera off and on again, it will magically remember the setting! This is aggravating. Not a big deal if your LCD works but when it doesn't you can get out of sync with your flash settings. The only way to set flash settings in "blind" / no LCD mode is to count the button presses. Since the camera resets all settings you can always count from the same initial state. Two button presses disables the flash. But not always! If the camera was left in red eye reduction mode then it would be one button press to disable flash. I'm not insane, I would never enable the red eye reduction mode intentionally. But I could do it by accident and wouldn't know it as I have no LCD! I haven't actually had this problem in real life yet but knowing that it is a possibility scares the living flash out of me.

- Camera
- Ricoh R1S
- Film
- Fujifilm Reala EI100
- Development
- CineStill CS41 "Color Simplified" 2-Bath Powder Kit
- Scanner
- Reflecta ProScan 10T
Funnily enough my daughter did have red eyes in this photo ( thanks flash ). I used the powers of Lightroom to resolve this issue.
The flash button is the most used button on the camera. More used than the shutter release button I imagine. What other buttons are there? The self timer / remote button exists but I have never used it so use it at your own peril.
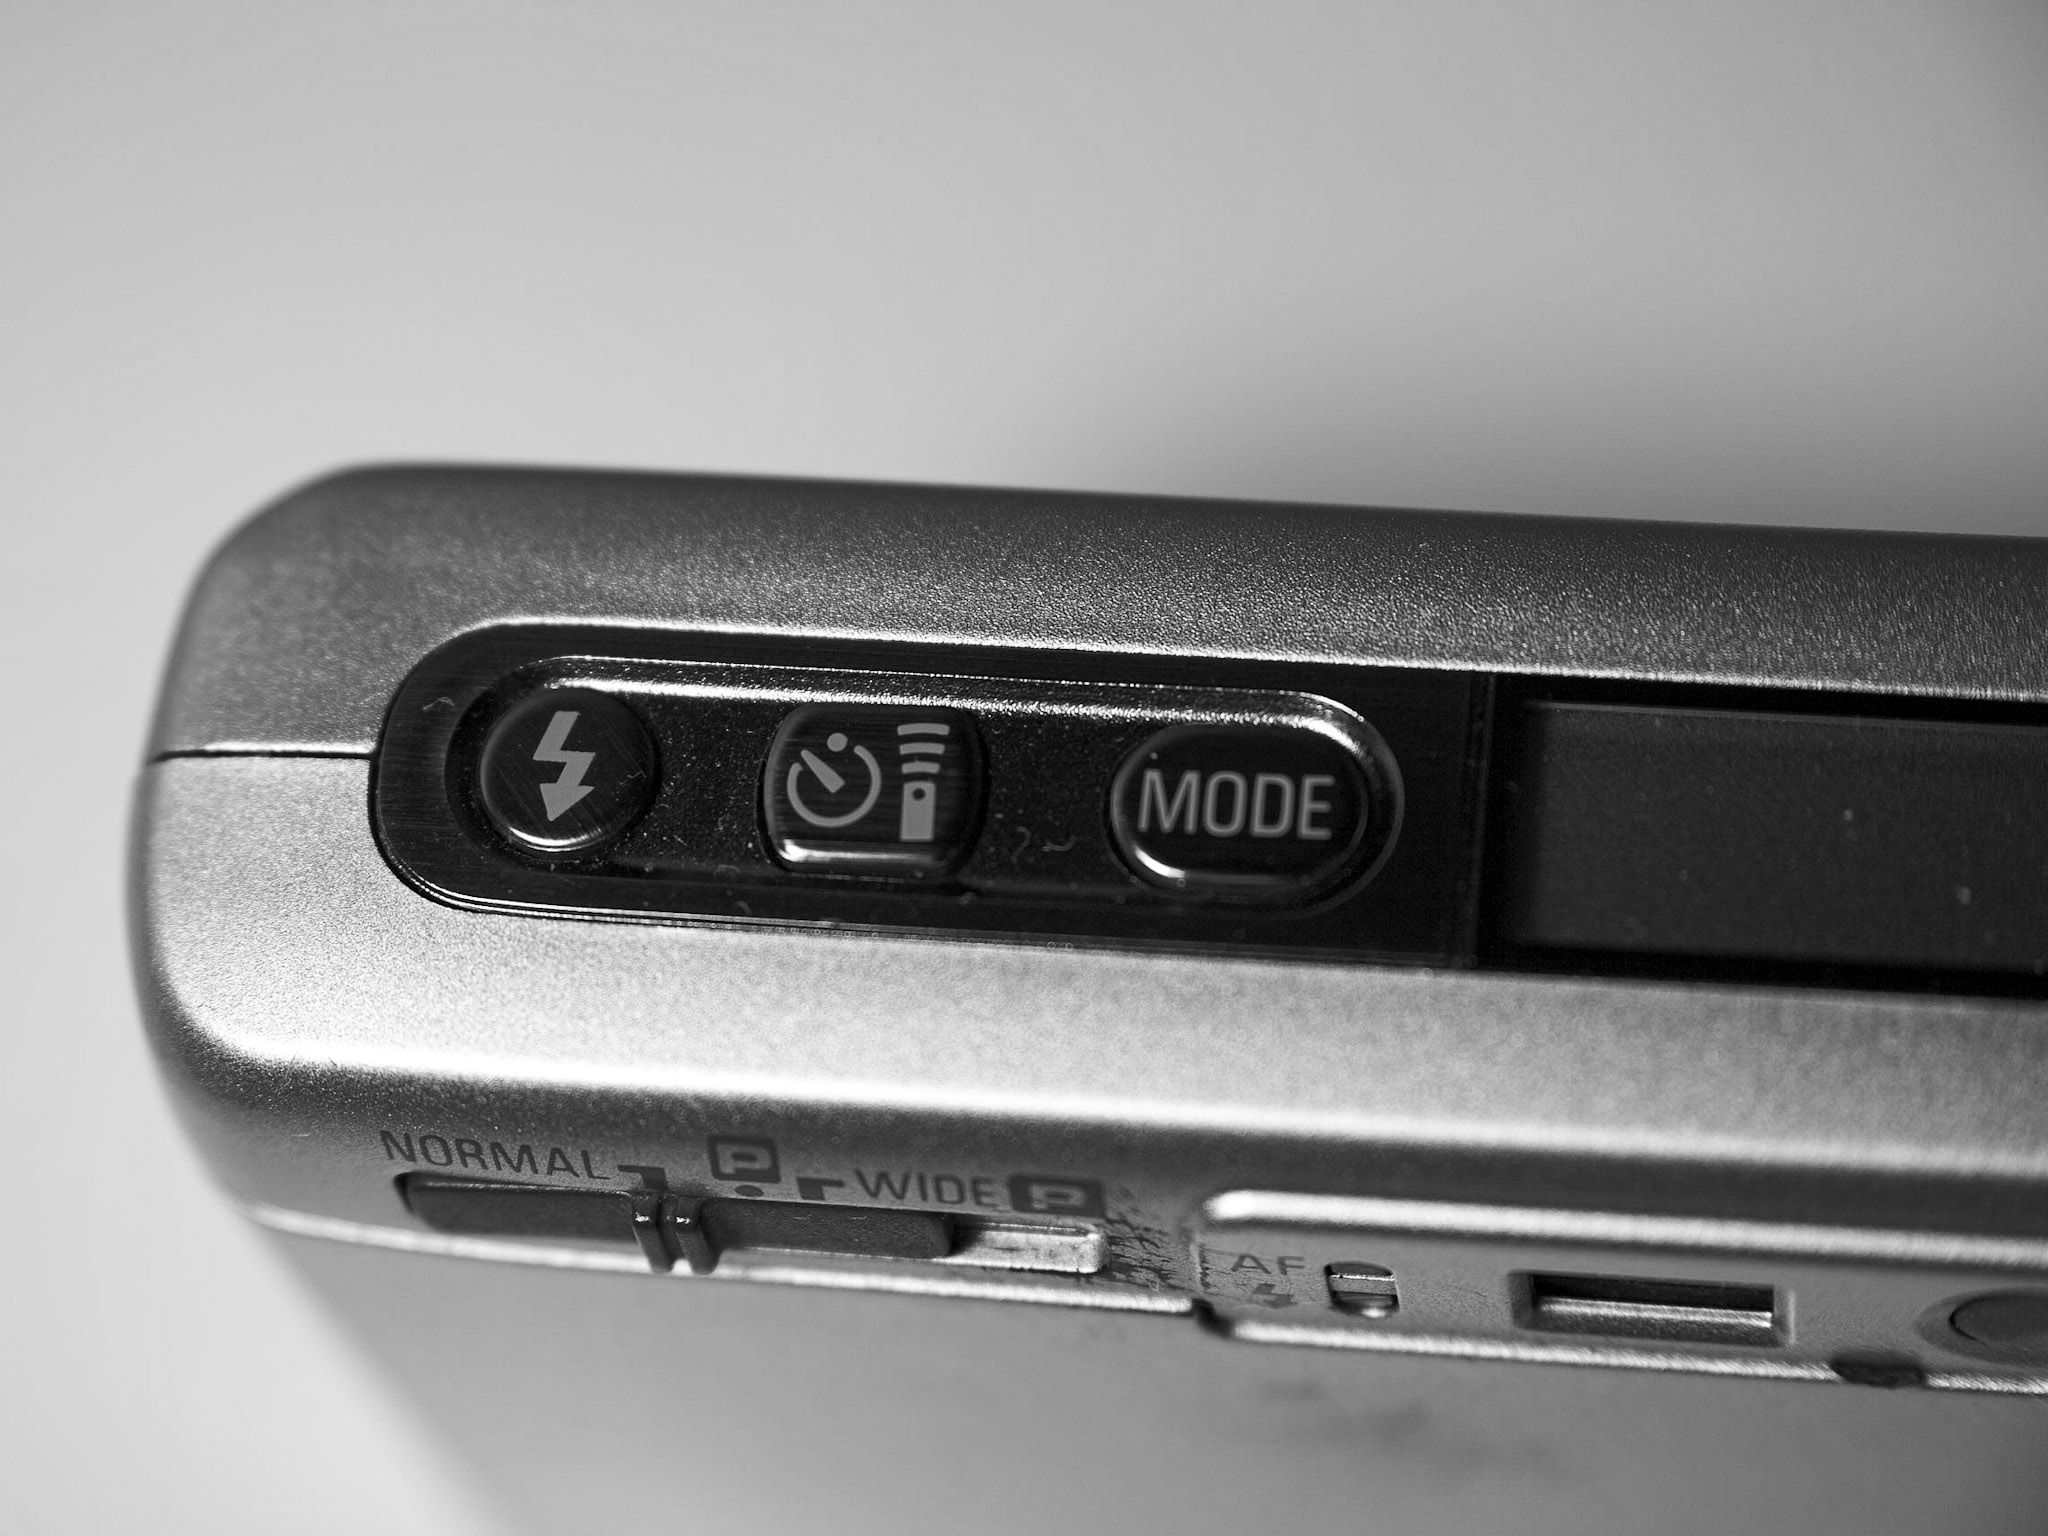
The three settings buttons. They all have unique shapes for whatever reason.
There is also the creative mode button which gets used less regularly but I've grown to use it more often than in the beginning. It has 4 states:
- Default state where the camera uses the 3 ( I think ) focus points and chooses the one it thinks works the best.
- Super Night Mode which sounds interesting on paper but I haven't tried it as it uses a flash that is against my religion. It's meant for dark / night photos. It takes one photo with flash and another without but with a longer exposure. Both of the shots are taken in the same frame so you get a flashed subject and something in the background as well.
- Infinity. It pre-sets the focus to infinity and also disables flash. Useful for when you know that you want the focus to be set at infinity which is quite often. You won't risk the camera choosing a weird place to focus on. It's also nice that this mode can be enabled with two presses on the mode button so it mimics the flash button. Two presses on each will disable flash but one will also set the focus to infinity.
- Single AF. More commonly known as spot autofocus where it only enables the center autofocus and whatever is there will be focussed on. In the default mode the focussing actually happens when you take the picture ( and not on a half press ). In this mode focussing happens at a half press. This allows you to pre-focus and re-frame. I find this useful for when I want to ensure that a specific thing is in focus.
I find myself using the mode button quite a lot. Having the Infinity and Single AF modes is a good extra to have as it gives some control back to the user of the camera.
- Camera
- Ricoh R1S
- Film
- Kodak T-MAX 400 EI400
- Development
- Kodak HC-110; Dilution B; 6:30
- Scanner
- Reflecta ProScan 10T
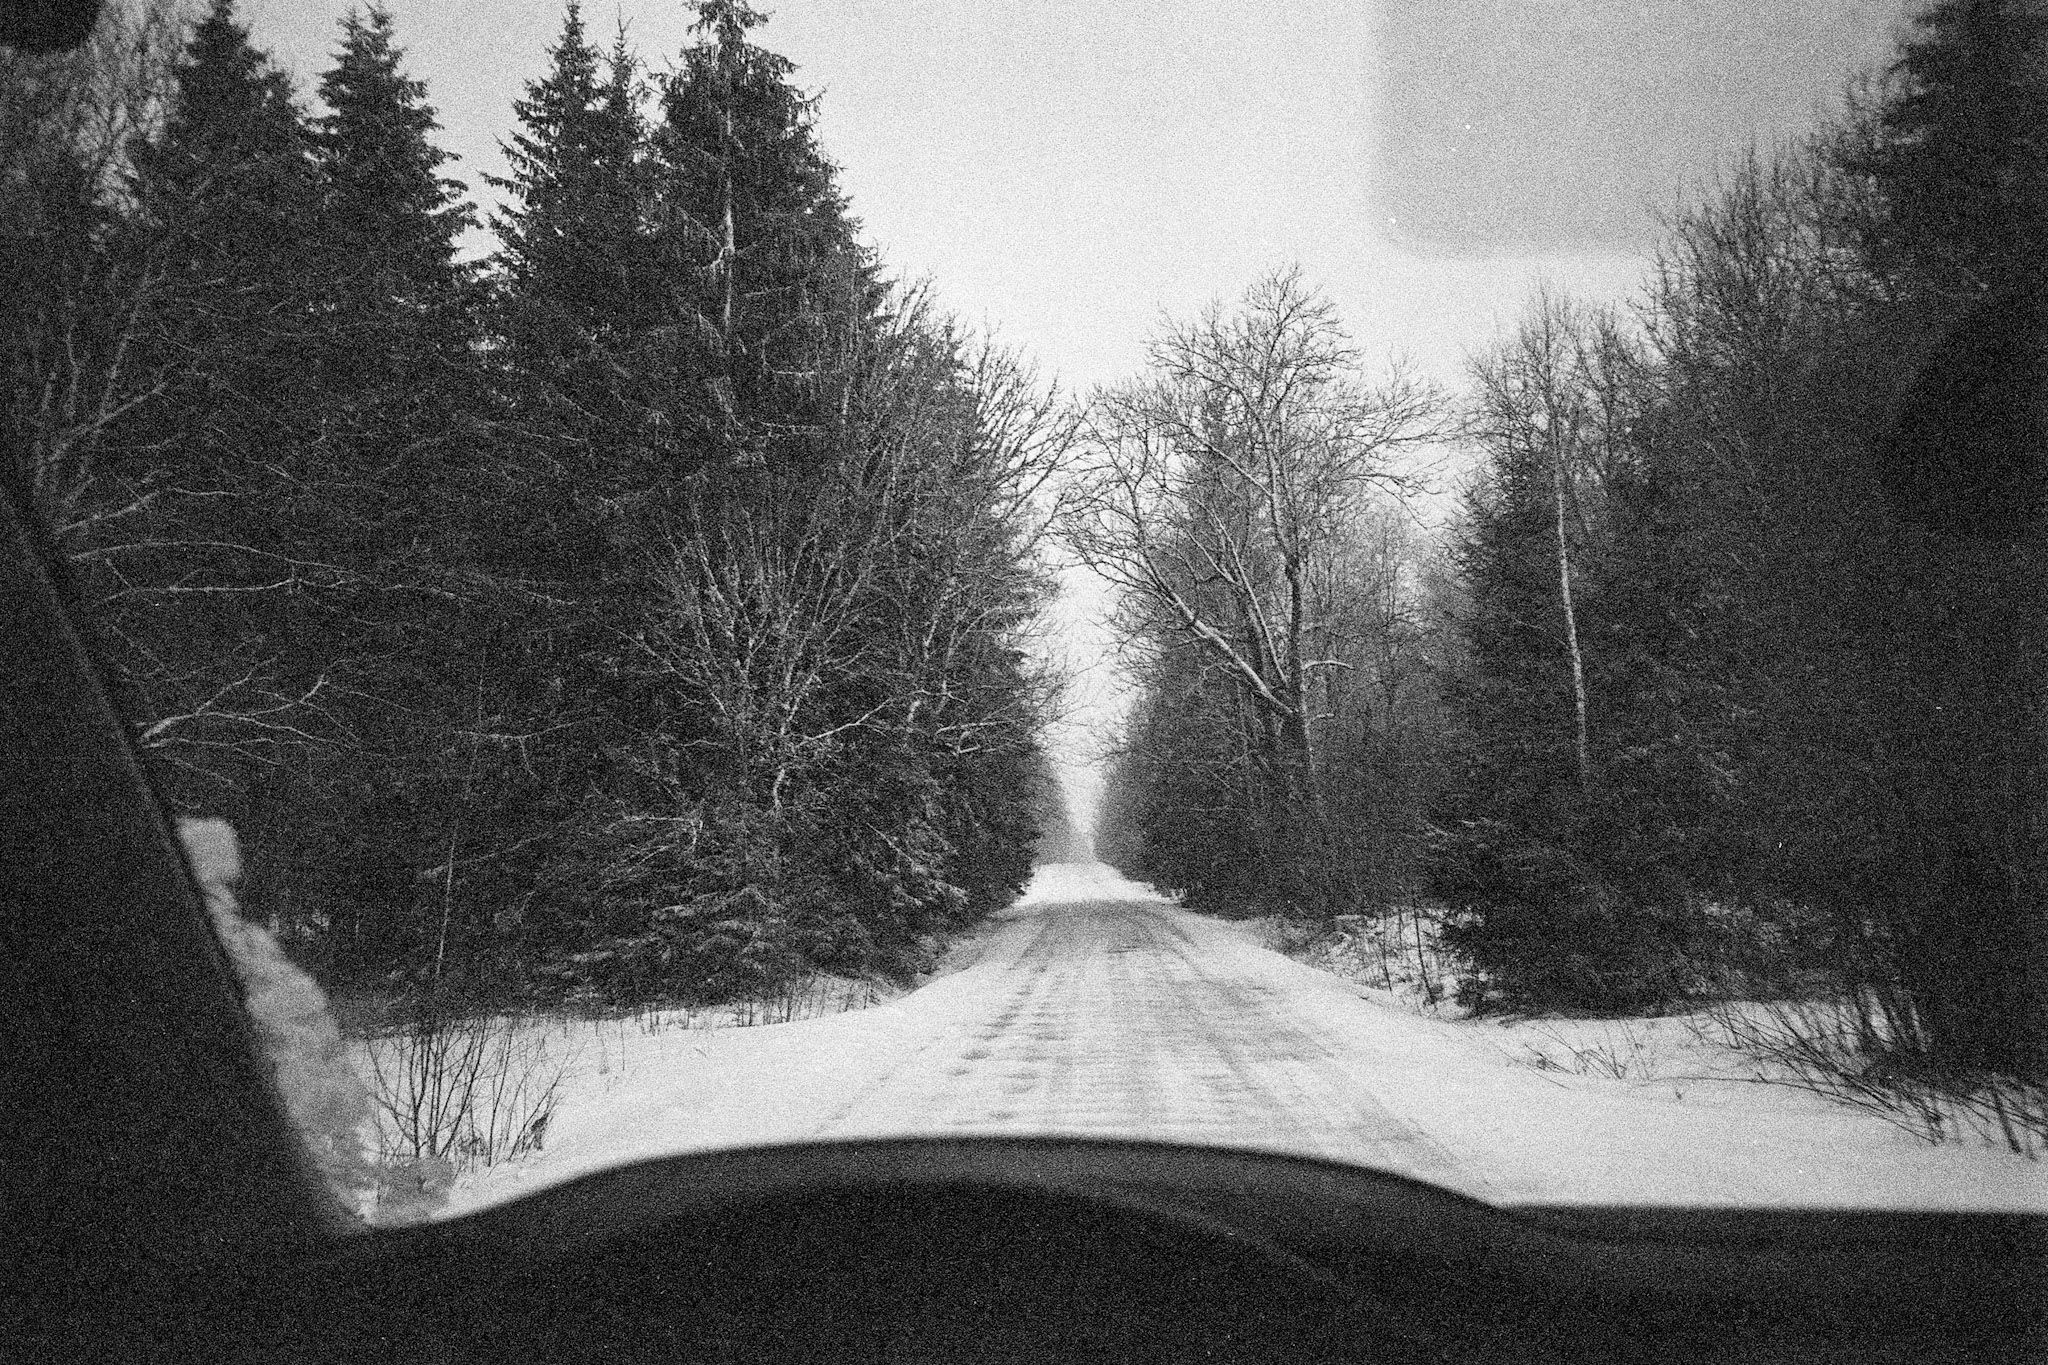
In this photo I've told the camera to focus on infinity. I wouldn't trust it to not focus on windscreen or something else that's closer.
Autofocus itself is tolerable but it can make mistakes. It doesn't seem slow but maybe it should be slower to ensure a higher success rate. There aren't too many mistakes and a wider and slower lens tends to hide some focussing issues but it can be annoying.

- Camera
- Ricoh R1S
- Film
- Kodak T-MAX 400 EI400
- Development
- Kodak HC-110; Dilution B; 6:30min
- Scanner
- Reflecta ProScan 10T
As you can guess, I didn't want to focus on where the camera decided to focus.
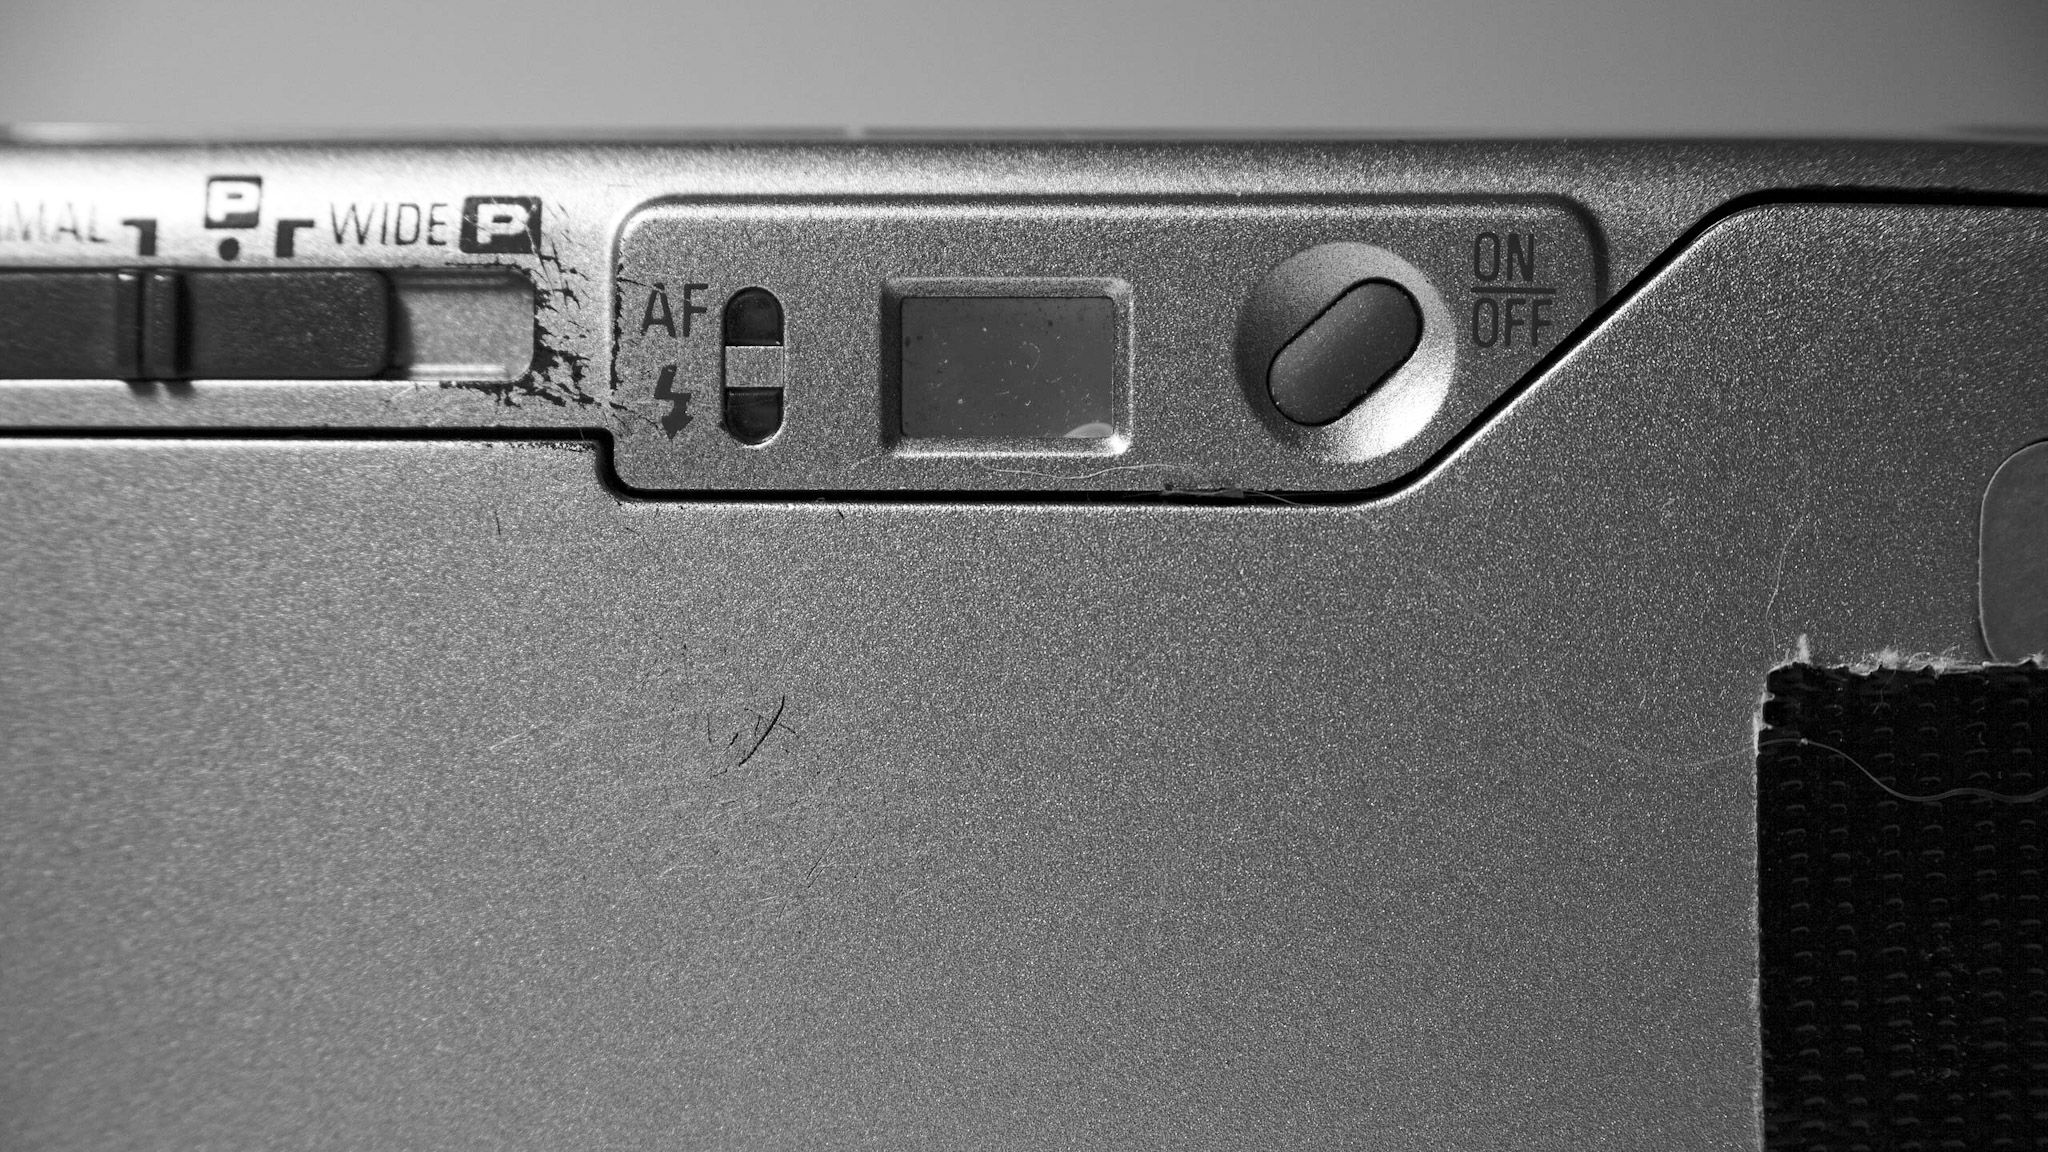
Ricoh R1 also has a panoramic mode. Two of them actually. One is a regular panorama mode that crops a bit from the top and bottom making the aspect ratio more "cinematic". The other panorama mode does the same and also makes the lens wider. It's not a zoom lens and instead it uses optical hacks to achieve this wider view. The aperture in this mode is set to f8 ( in normal mode f3.5 is the widest aperture ) and the lens becomes a 24mm lens instead of a 30mm one. That gives you quite a lot more world in the frame and it is nice in theory. Wide angle lenses work well in panorama modes.

Panorama mode switch. The regular parking spot is for a regular panorama mode using the 30mm lens. Wide parking spot is for the wide panorama mode using 24mm lens. Flicking between no parking and regular parking won't do anything with the lens. Moving to wide parking will trigger a movement of the lens.
Framing happens through quite a small and not super bright viewfinder. The viewfinder looks smaller when you don't look through it. When put against an eye, the actual size of the world is not that bad. You do lose some light but it hasn't been a problem in real life. There are framelines inside the viewfinder to help you frame your photo which is super cool. You get framelines for panoramic modes as well. The framelines will even attempt to fix the parallax errors for you based on where the camera focuses. The main issue with all of this is that the framelines are not bright. And sometimes they are not visible at all.
Framelines are illuminated by a window at the front of the camera but some of the "frameline logic" must also happen electronically. And that is the part that is not working as well as the camera ages. Like the LCD, parts of the framelines won't be visible at random times and sometimes not visible at all. This is annoying as you're left with no way to frame with any sort of precision. As you use the camera more, you get used to what the camera "sees" so having the framelines is not as essential but it's still not great. This also seems to be an issue that is not unique to my camera and other copies have similar issues.

- Camera
- Ricoh R1S
- Film
- Kodak T-MAX 400 EI400
- Development
- Kodak HC-110; Dilution B; 6:30min
- Scanner
- Reflecta ProScan 10T
Invisible framelines made this dreadful framing instead of me. I promise.
There are also two LED lights next to the viewfinder. One for autofocus and one for flash. Autofocus light can light up in red or green. Green means all good — the camera has acquired focus. Or at least it thinks that it has. It might not have picked the right thing to focus on. Red means that it couldn't find anything to focus on. Flash LED light will blink when flash will be used when taking the photo. This can be useful to remind you that you haven't turned the flash off. LED lights are activated on the shutter button half press.
You can see the autofocus and flash lights here next to the small looking viewfinder. The small size of the viewfinder means that you can see the lights when holding your eye against the viewfinder.
You can also see the on/off switch. It has a weird shape and the position is weird as well but it works well in practice. I have only accidentally turned it on once.
That is all. Everything else is handled by camera. No way to impact shutter speed, aperture, exposure compensation or even the ISO of the film. ISO will be read from the DX code on the film canister. Keep that in mind when using bulk rolls. To power all this automation the camera requires you to sacrifice one CR2 battery. It's not the cheapest and most available battery but it makes sense on a compact camera as it's quite space efficient.

- Camera
- Ricoh R1S
- Film
- Kodak T-MAX 400 EI400
- Development
- Kodak HC-110; Dilution B; 6:30min
- Scanner
- Reflecta ProScan 10T
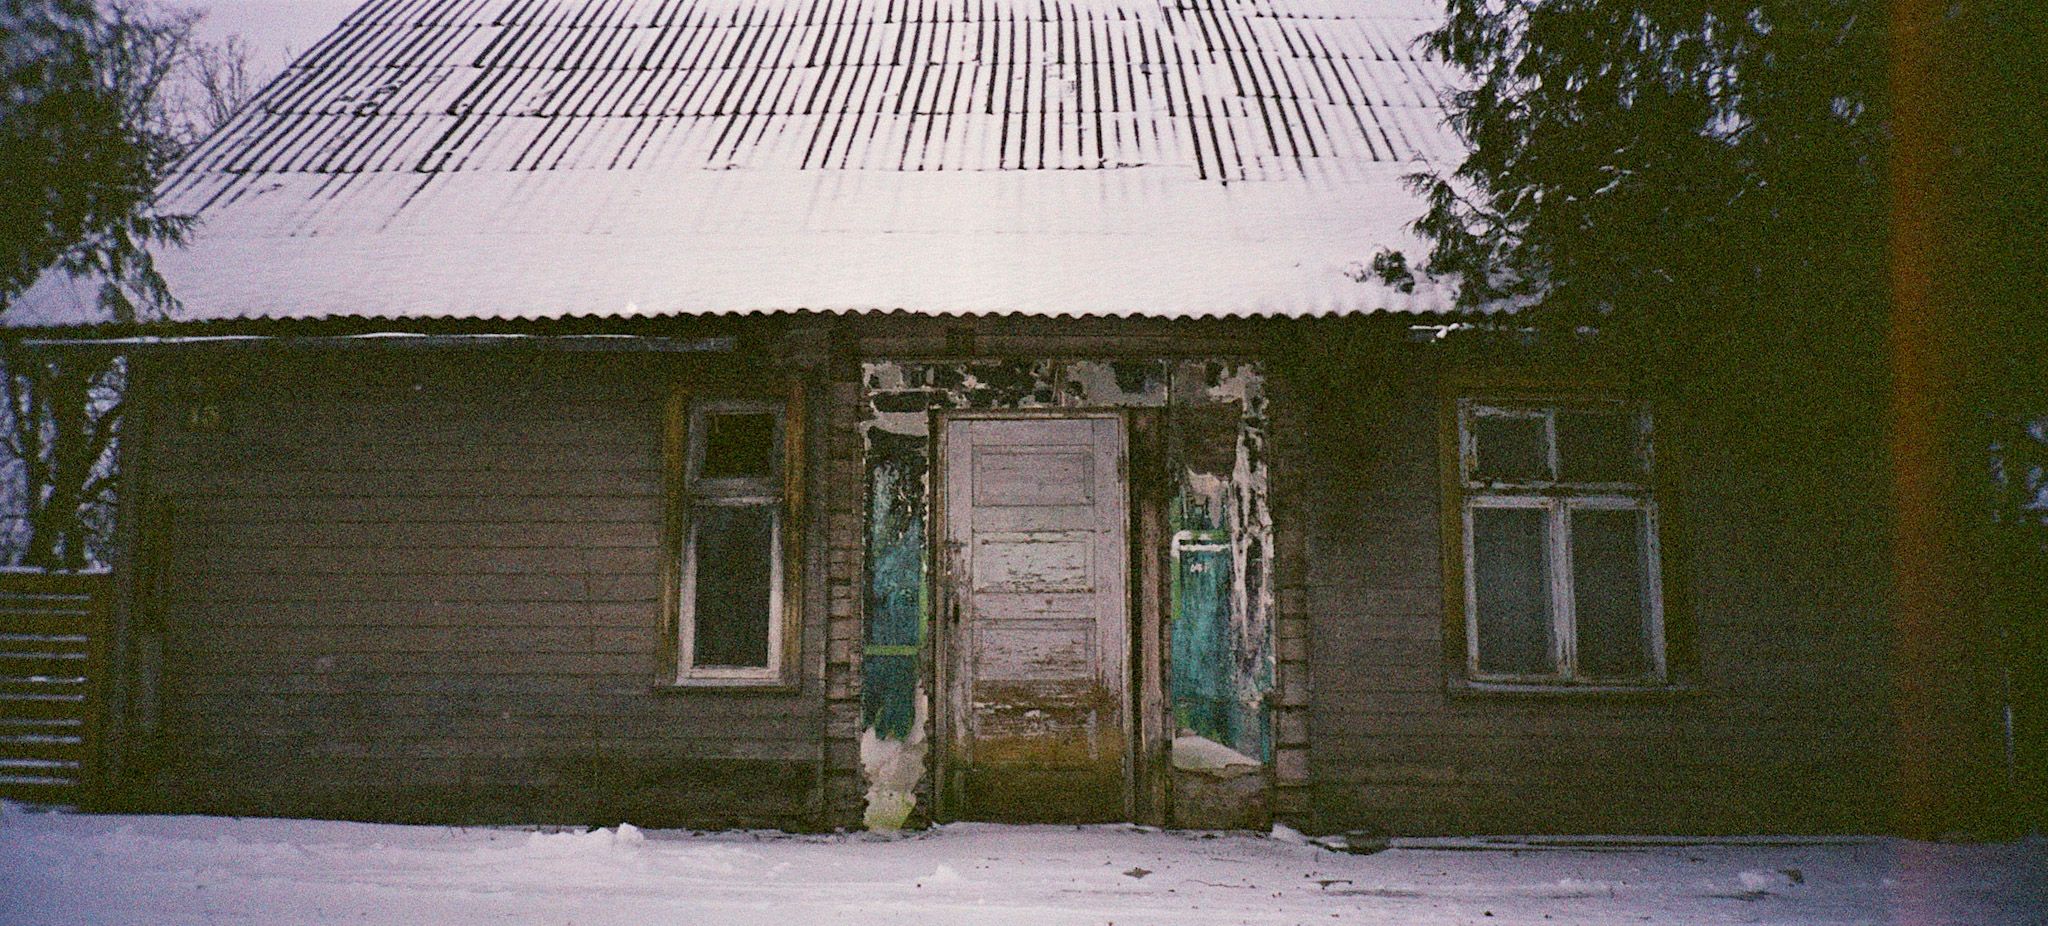
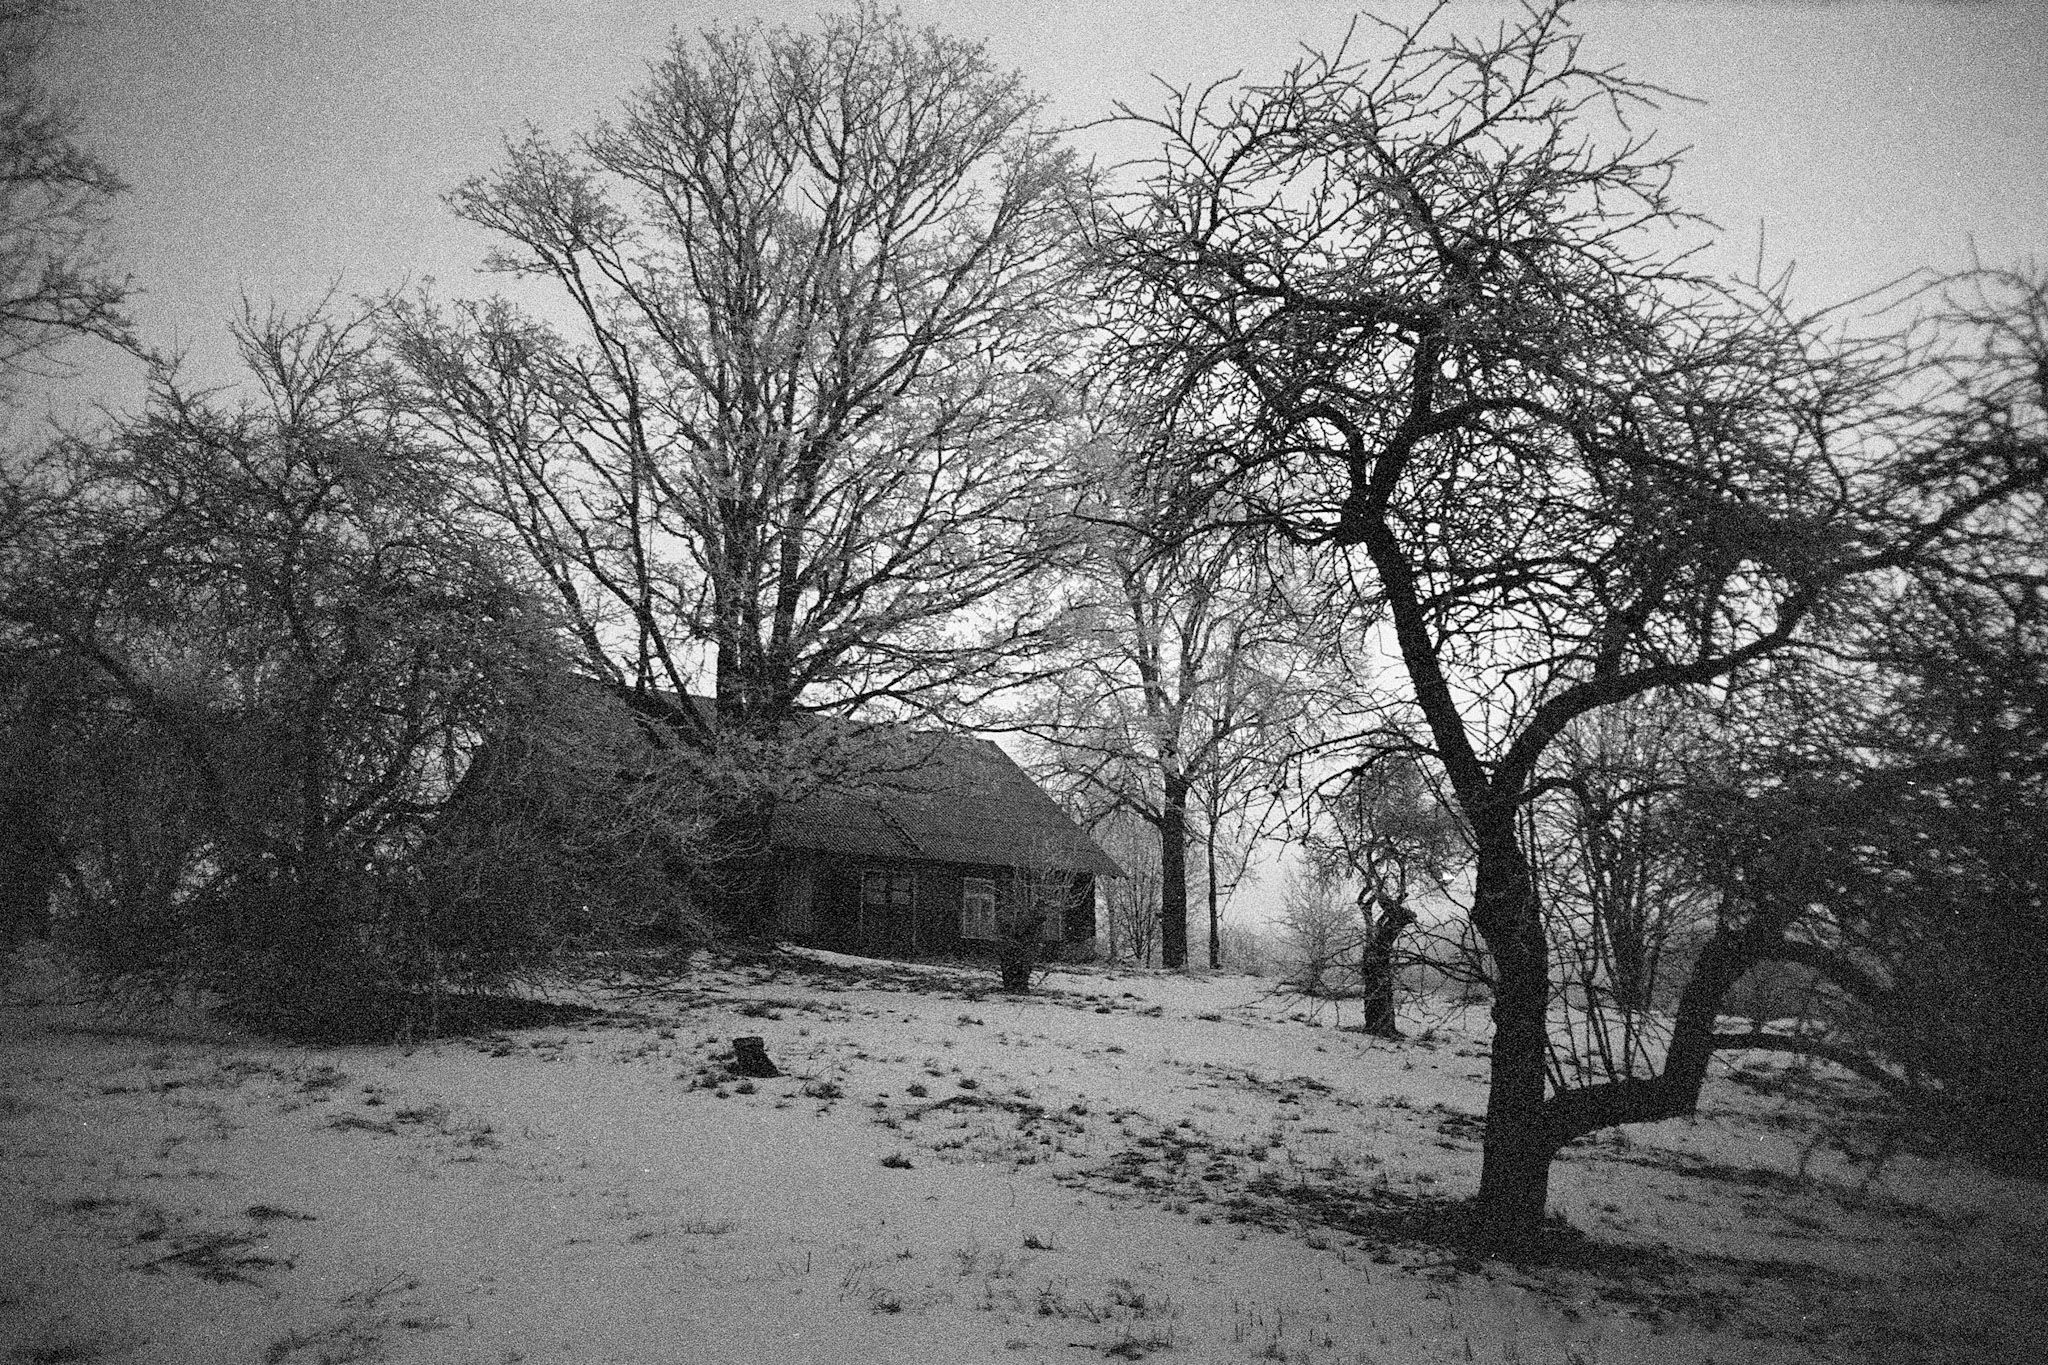
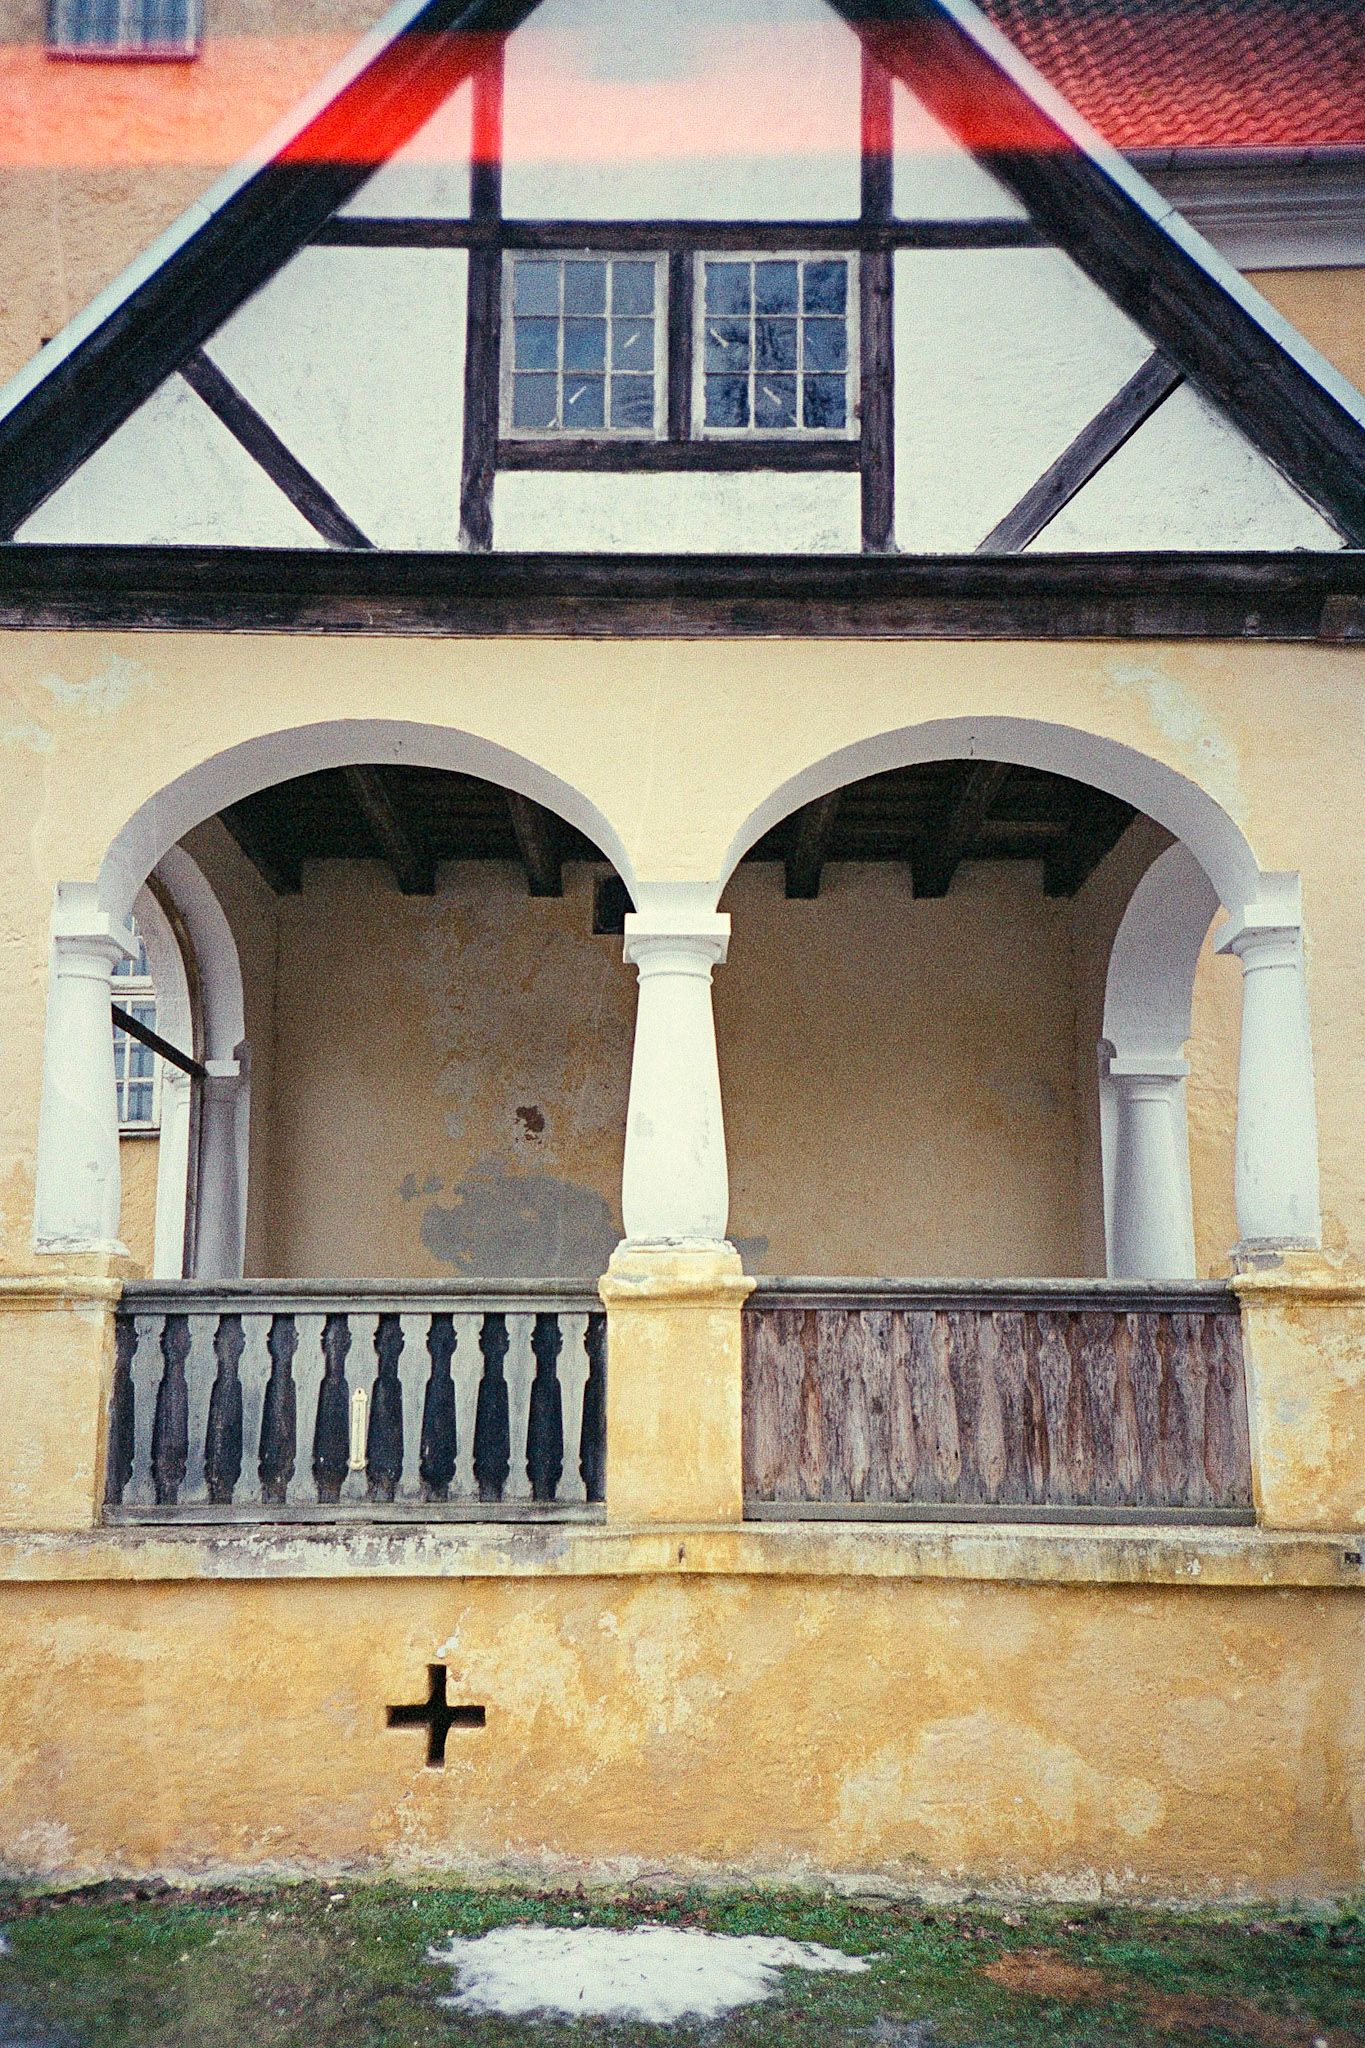
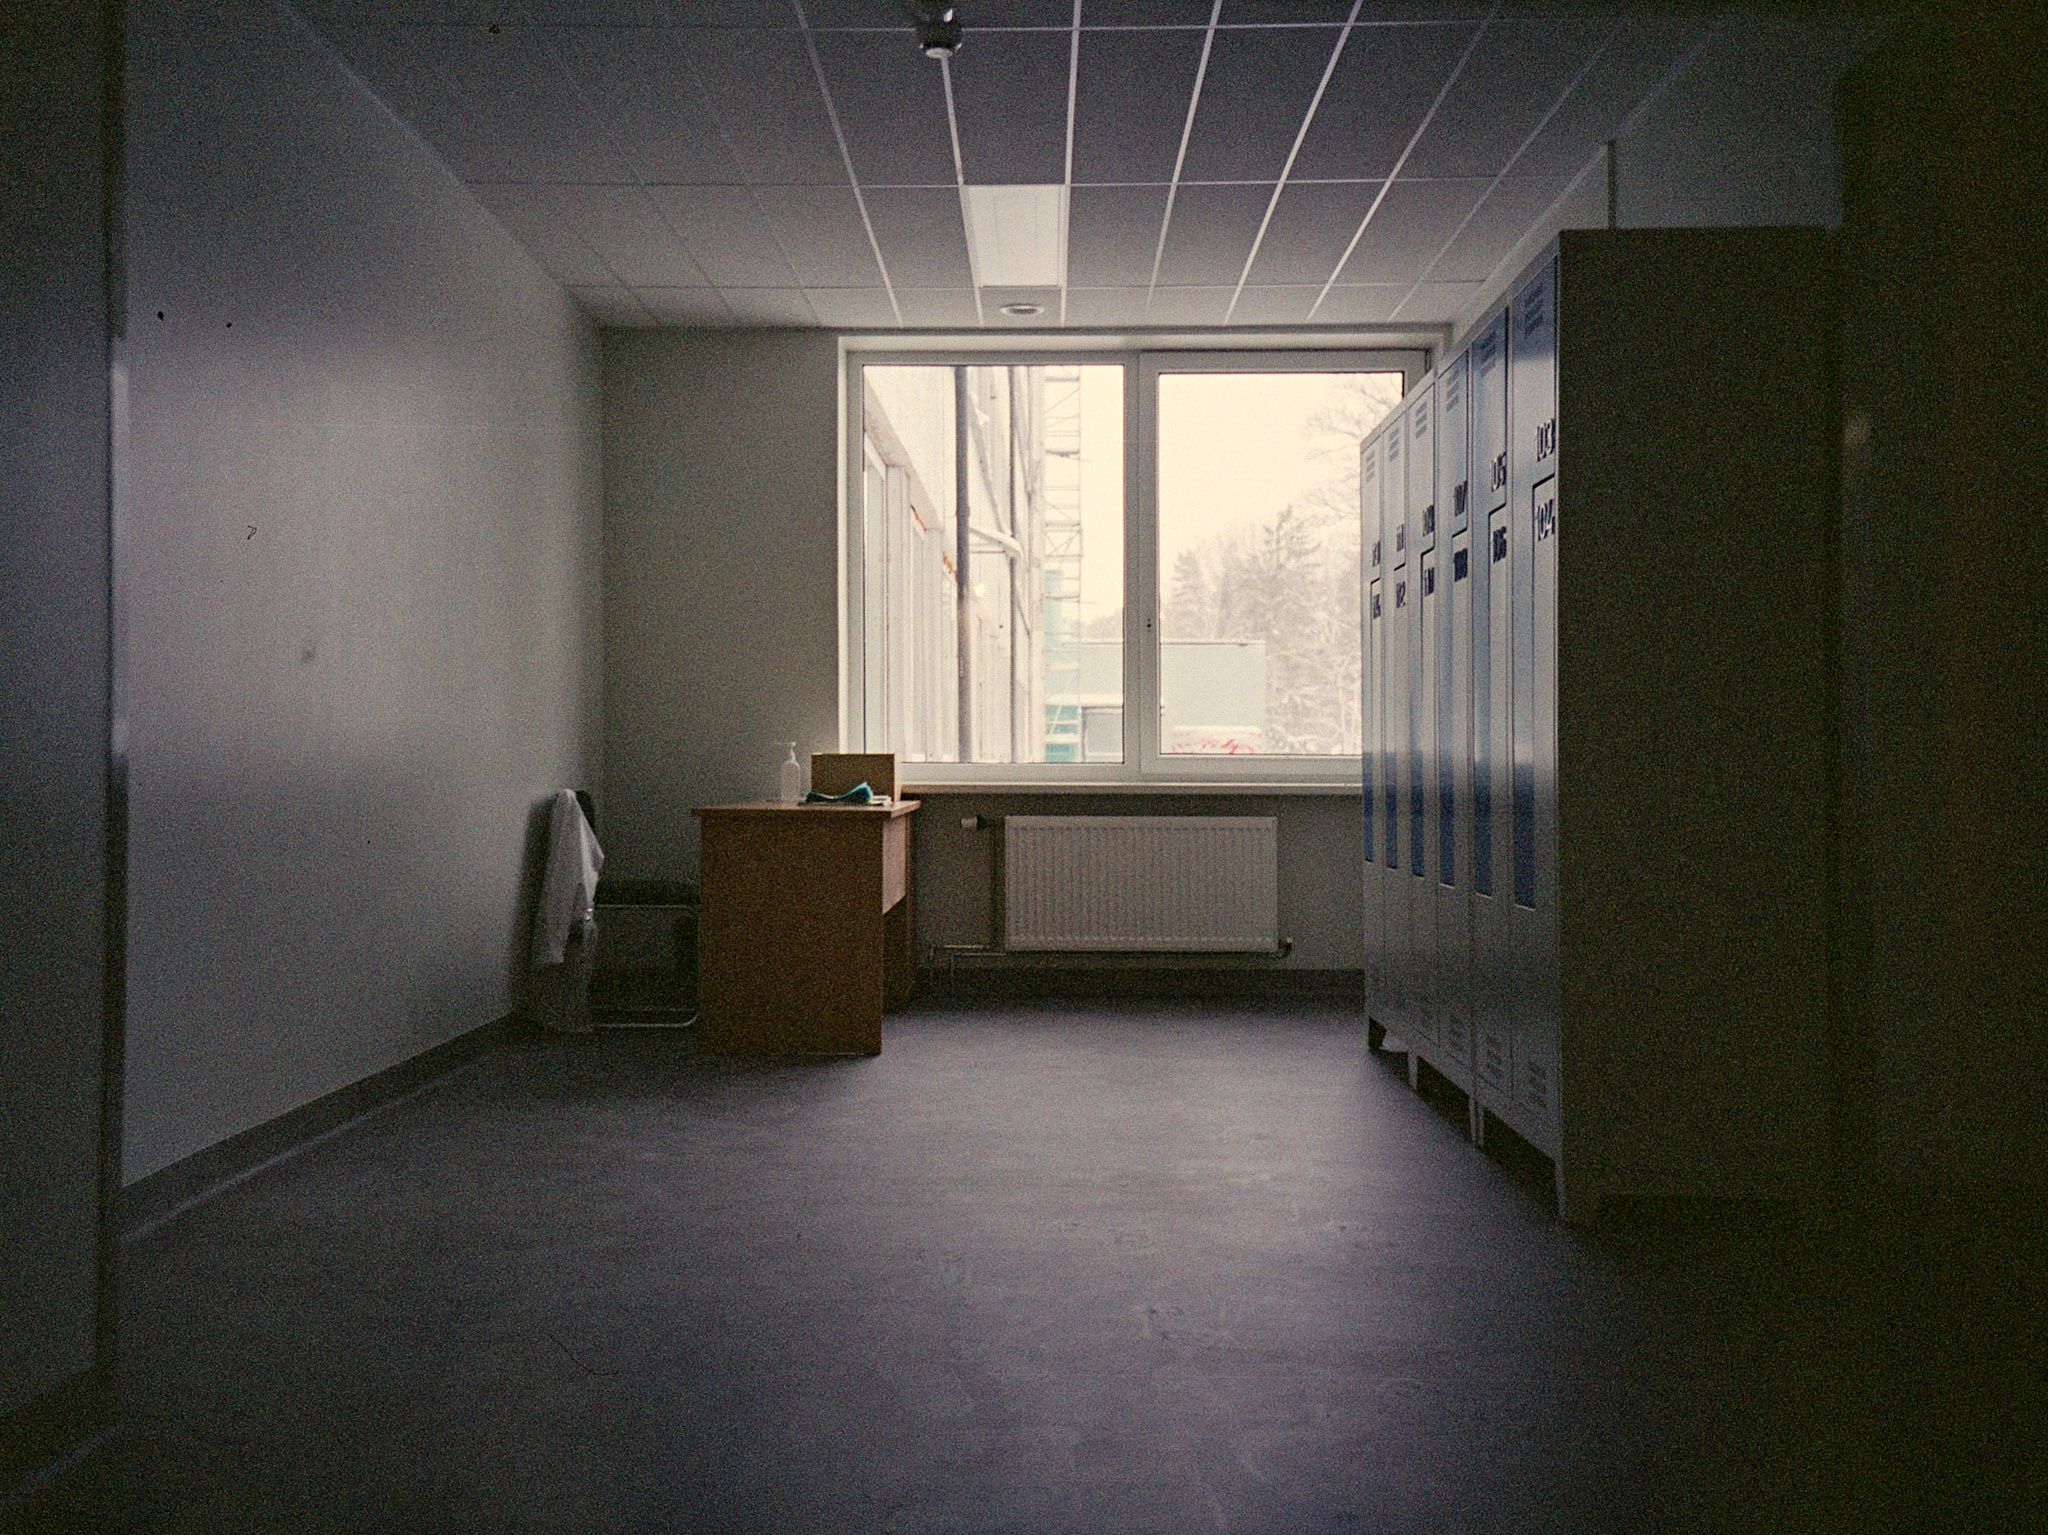
The metering works well most of the time but it can be fooled. In here the photo is underexposed as the camera got confused with the bright-ish light behind the house.
It happens to work well in this photo though so not much to complain about.
- Camera
- Ricoh R1S
- Film
- Fujifilm Reala EI100
- Development
- CineStill CS41 "Color Simplified" 2-Bath Powder Kit
- Scanner
- Reflecta ProScan 10T
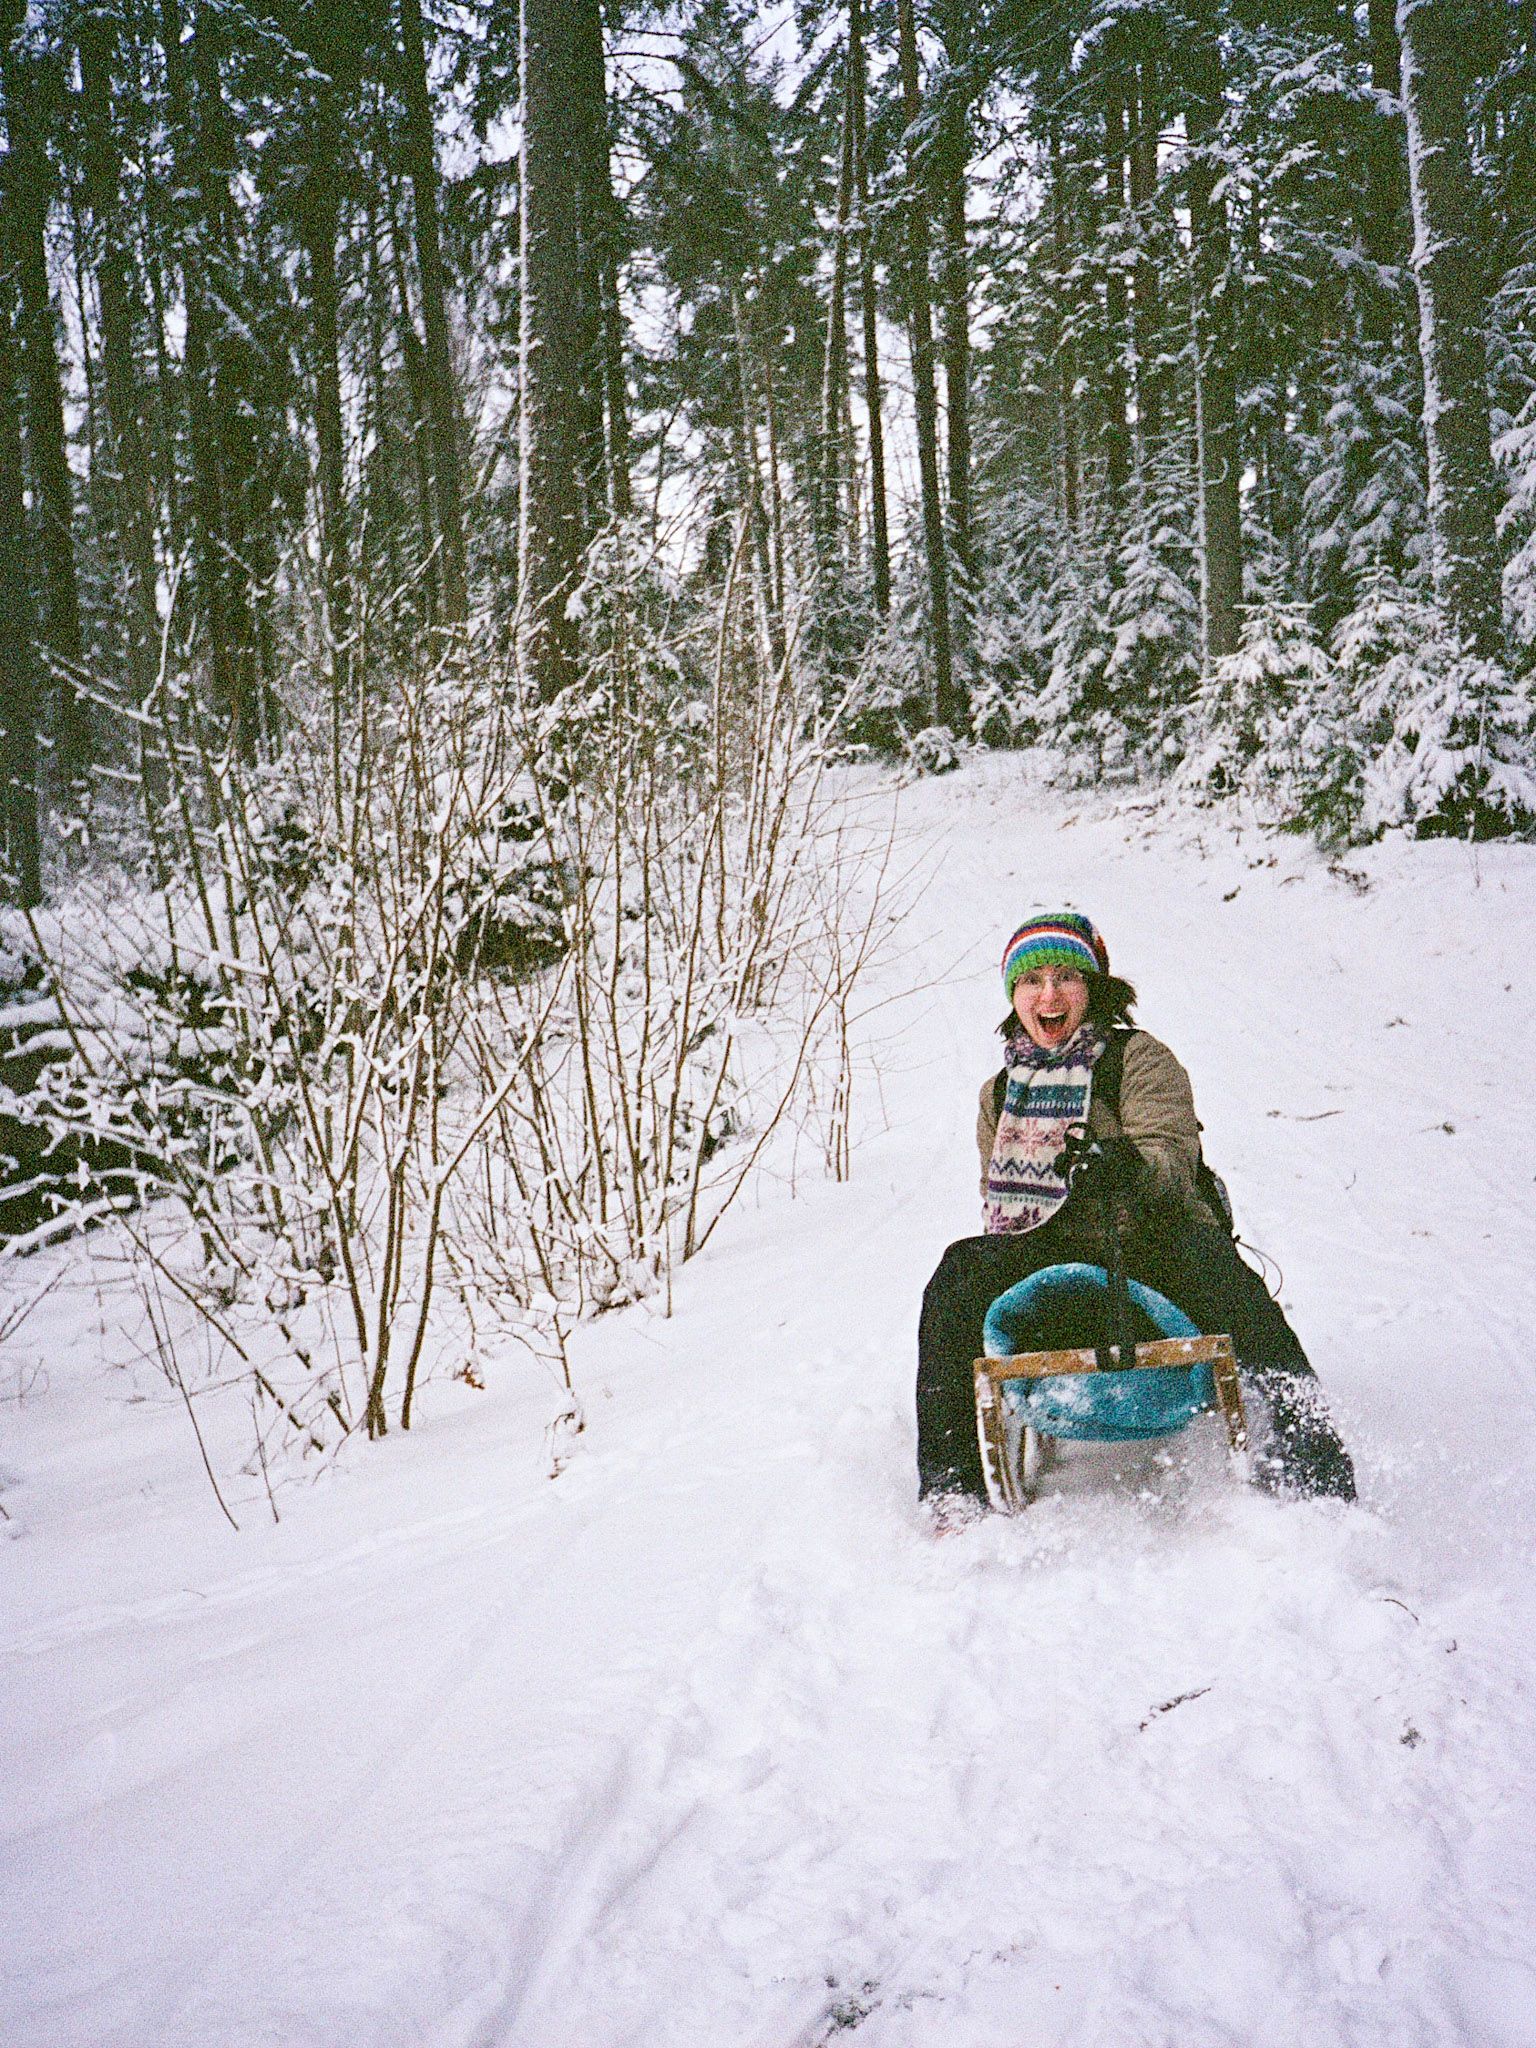
The camera can be used for super-high-speed action photography as well. As you can tell, my fast moving wife has been captured with ease.
Question is — did I manage to get out of the way in time?
Film is advanced automatically as well. The camera will spool out the whole film first. As you take the photos, the exposed film will be rolled into the canister. The upside is that in case of an accidental back opening, the exposed photos won't be ruined as they will be in the safety of the film canister. The downside is that you will get exactly 36 photos from a 36 photo roll. Normally you can squeeze out 1 or 2 more. Even more if you bulk rolled your film.
Speaking of bulk rolling. As long as you have the DX code on the canister set to what you need it to be, the advancing motor is not strong enough to break the film from where it's taped together. I haven't had any problems with film tearing when using my own rolled film.
Image Quality
Now that I have spent way too much time on the physical side of the camera. let's move on to the images it can create. The image quality will depend on the aperture the camera decides to use. Close to wide open the center will be sharp and detailed enough but the sides will turn into mush. I'm not talking only about the corners. Actual frame sides will mash some potatoes together with the corners.
- Camera
- Ricoh R1S
- Film
- Kodak T-MAX 400 EI400
- Development
- Kodak HC-110; Dilution B; 6:30min
- Scanner
- Reflecta ProScan 10T
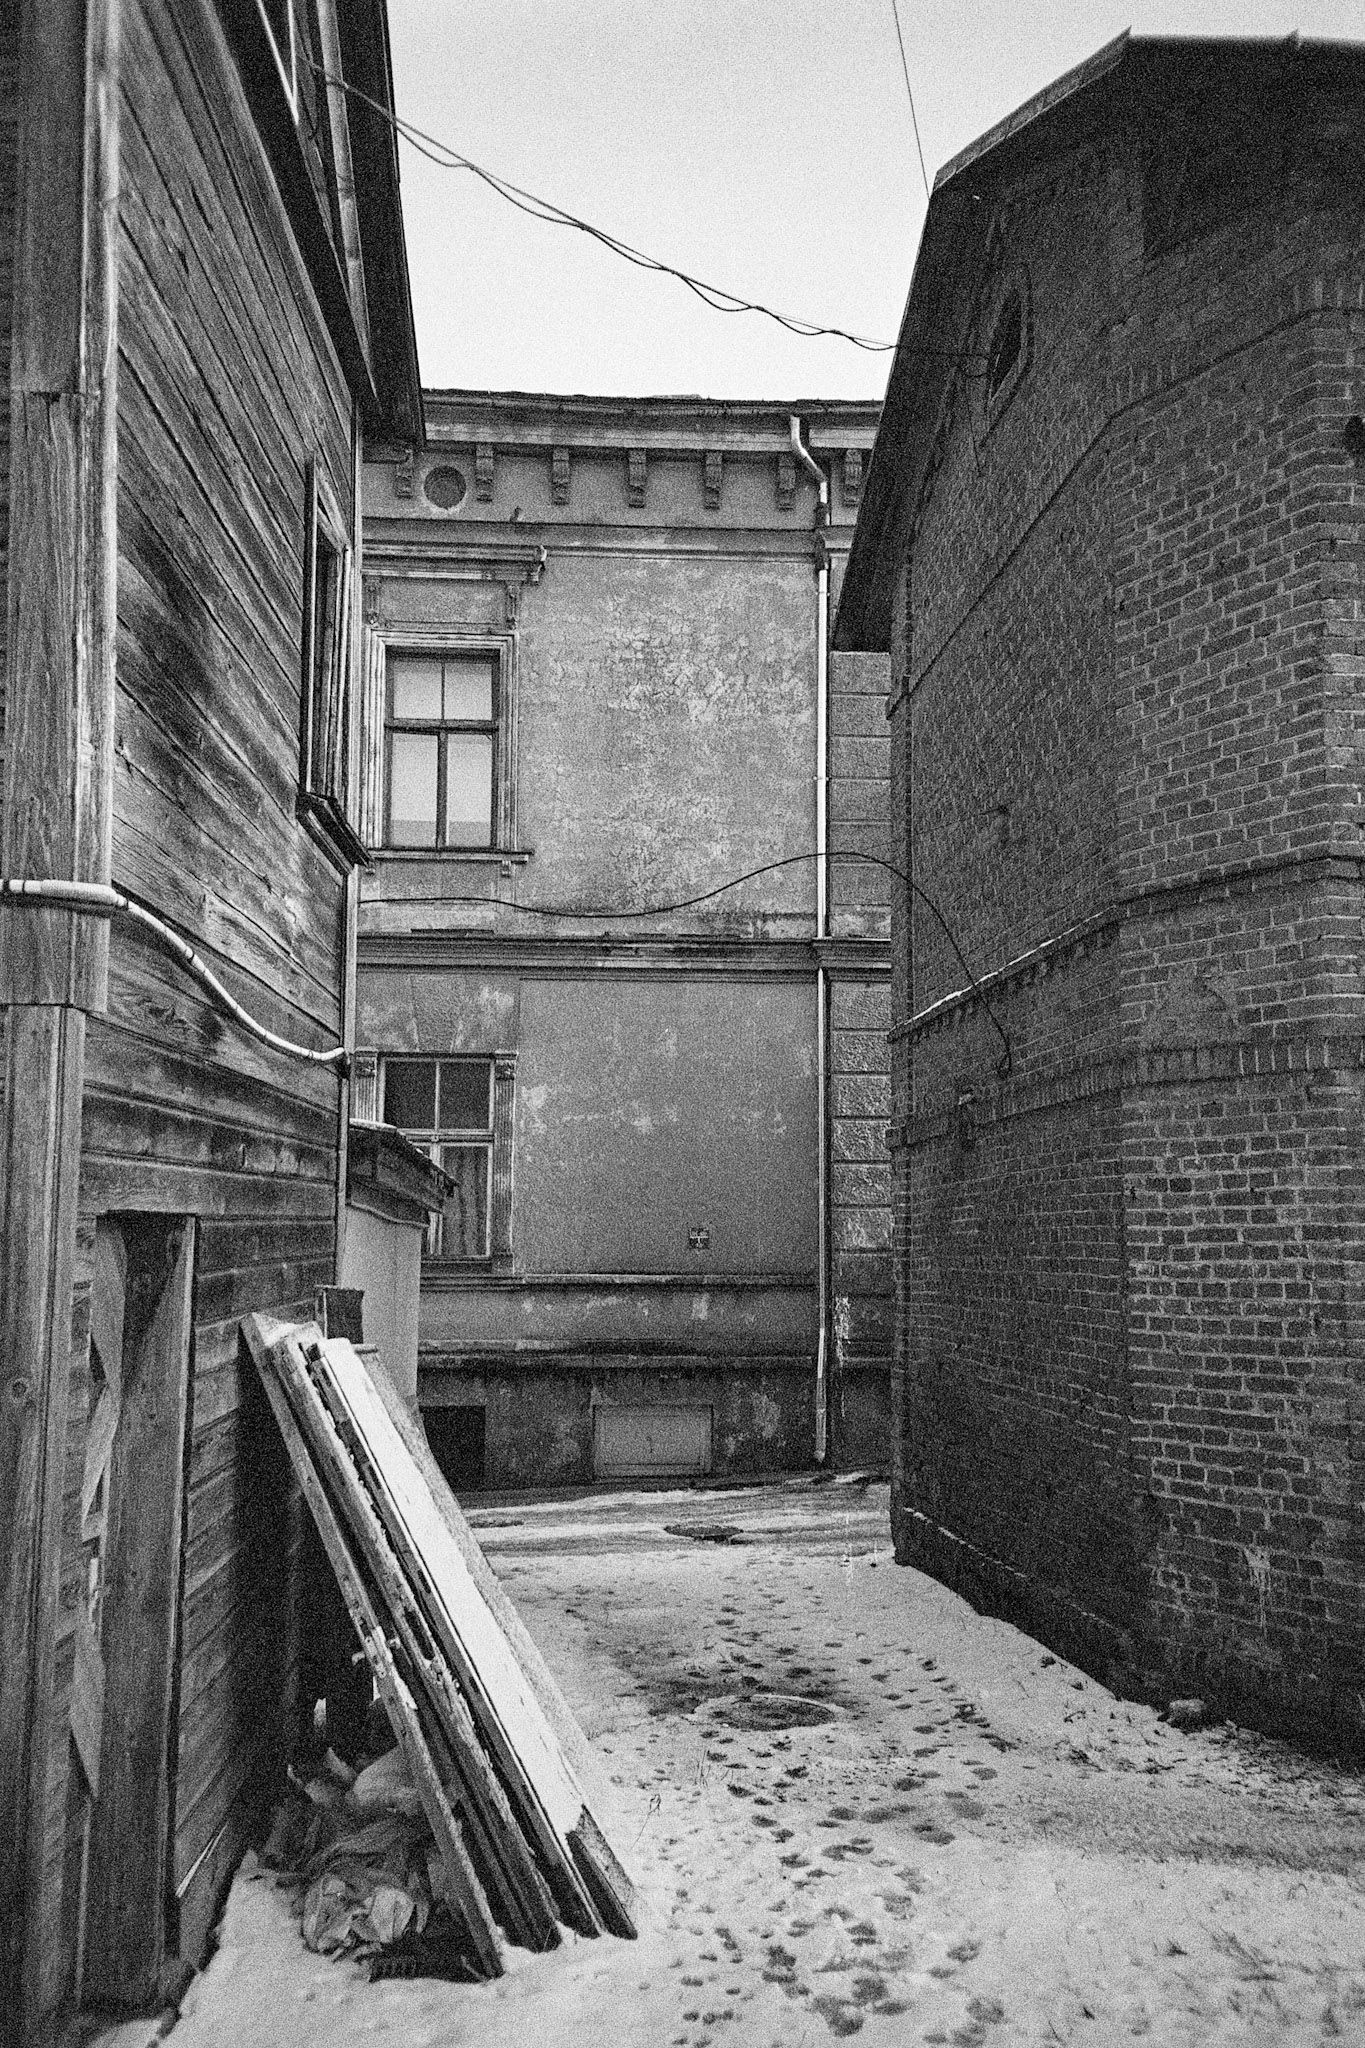
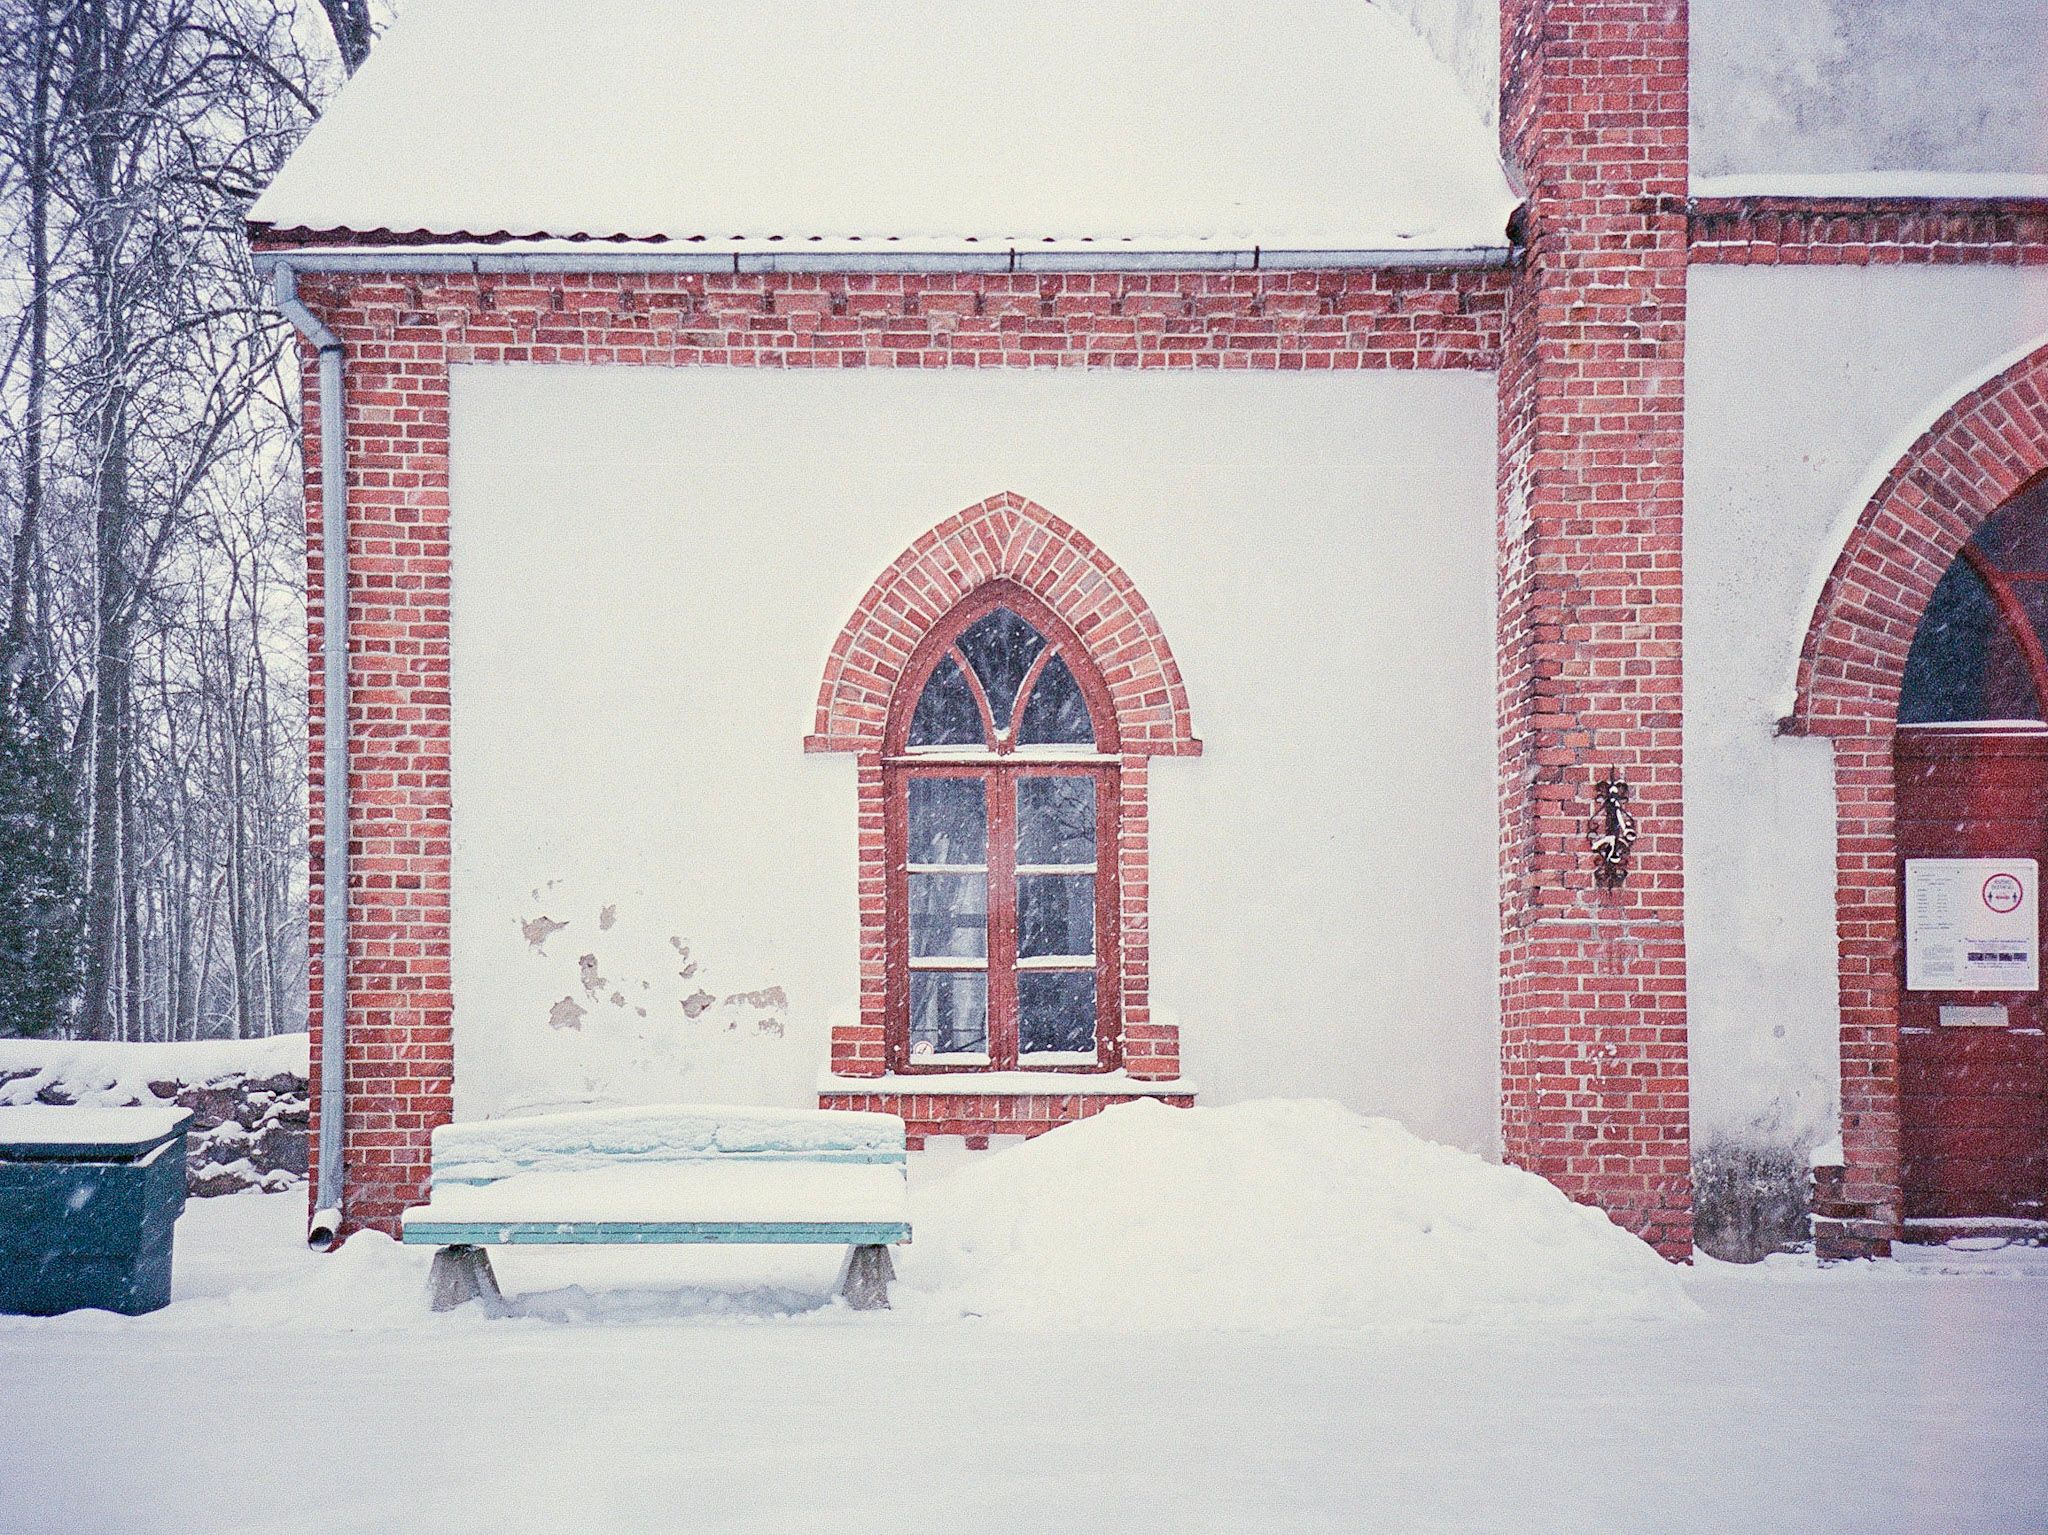
A strong vignette will provide some calm darkness for the potatoes to be mashed in the corners and sides.
I have to say that this look does work well for certain circumstances. Here it gives the photo an eerie feel.
When the camera closes the aperture down, the images look good and resolve plenty of detail. Smaller details can still become a bit mushy as the lens likely doesn't have the best resolution. But it's not bad. Because of this, I recommend using a higher ISO film to force the aperture down. Or up. Depends on the perspective but you're looking for higher f numbers.
- Camera
- Ricoh R1S
- Film
- Kodak T-MAX 400 EI400
- Development
- Kodak HC-110; Dilution B; 6:30min
- Scanner
- Reflecta ProScan 10T
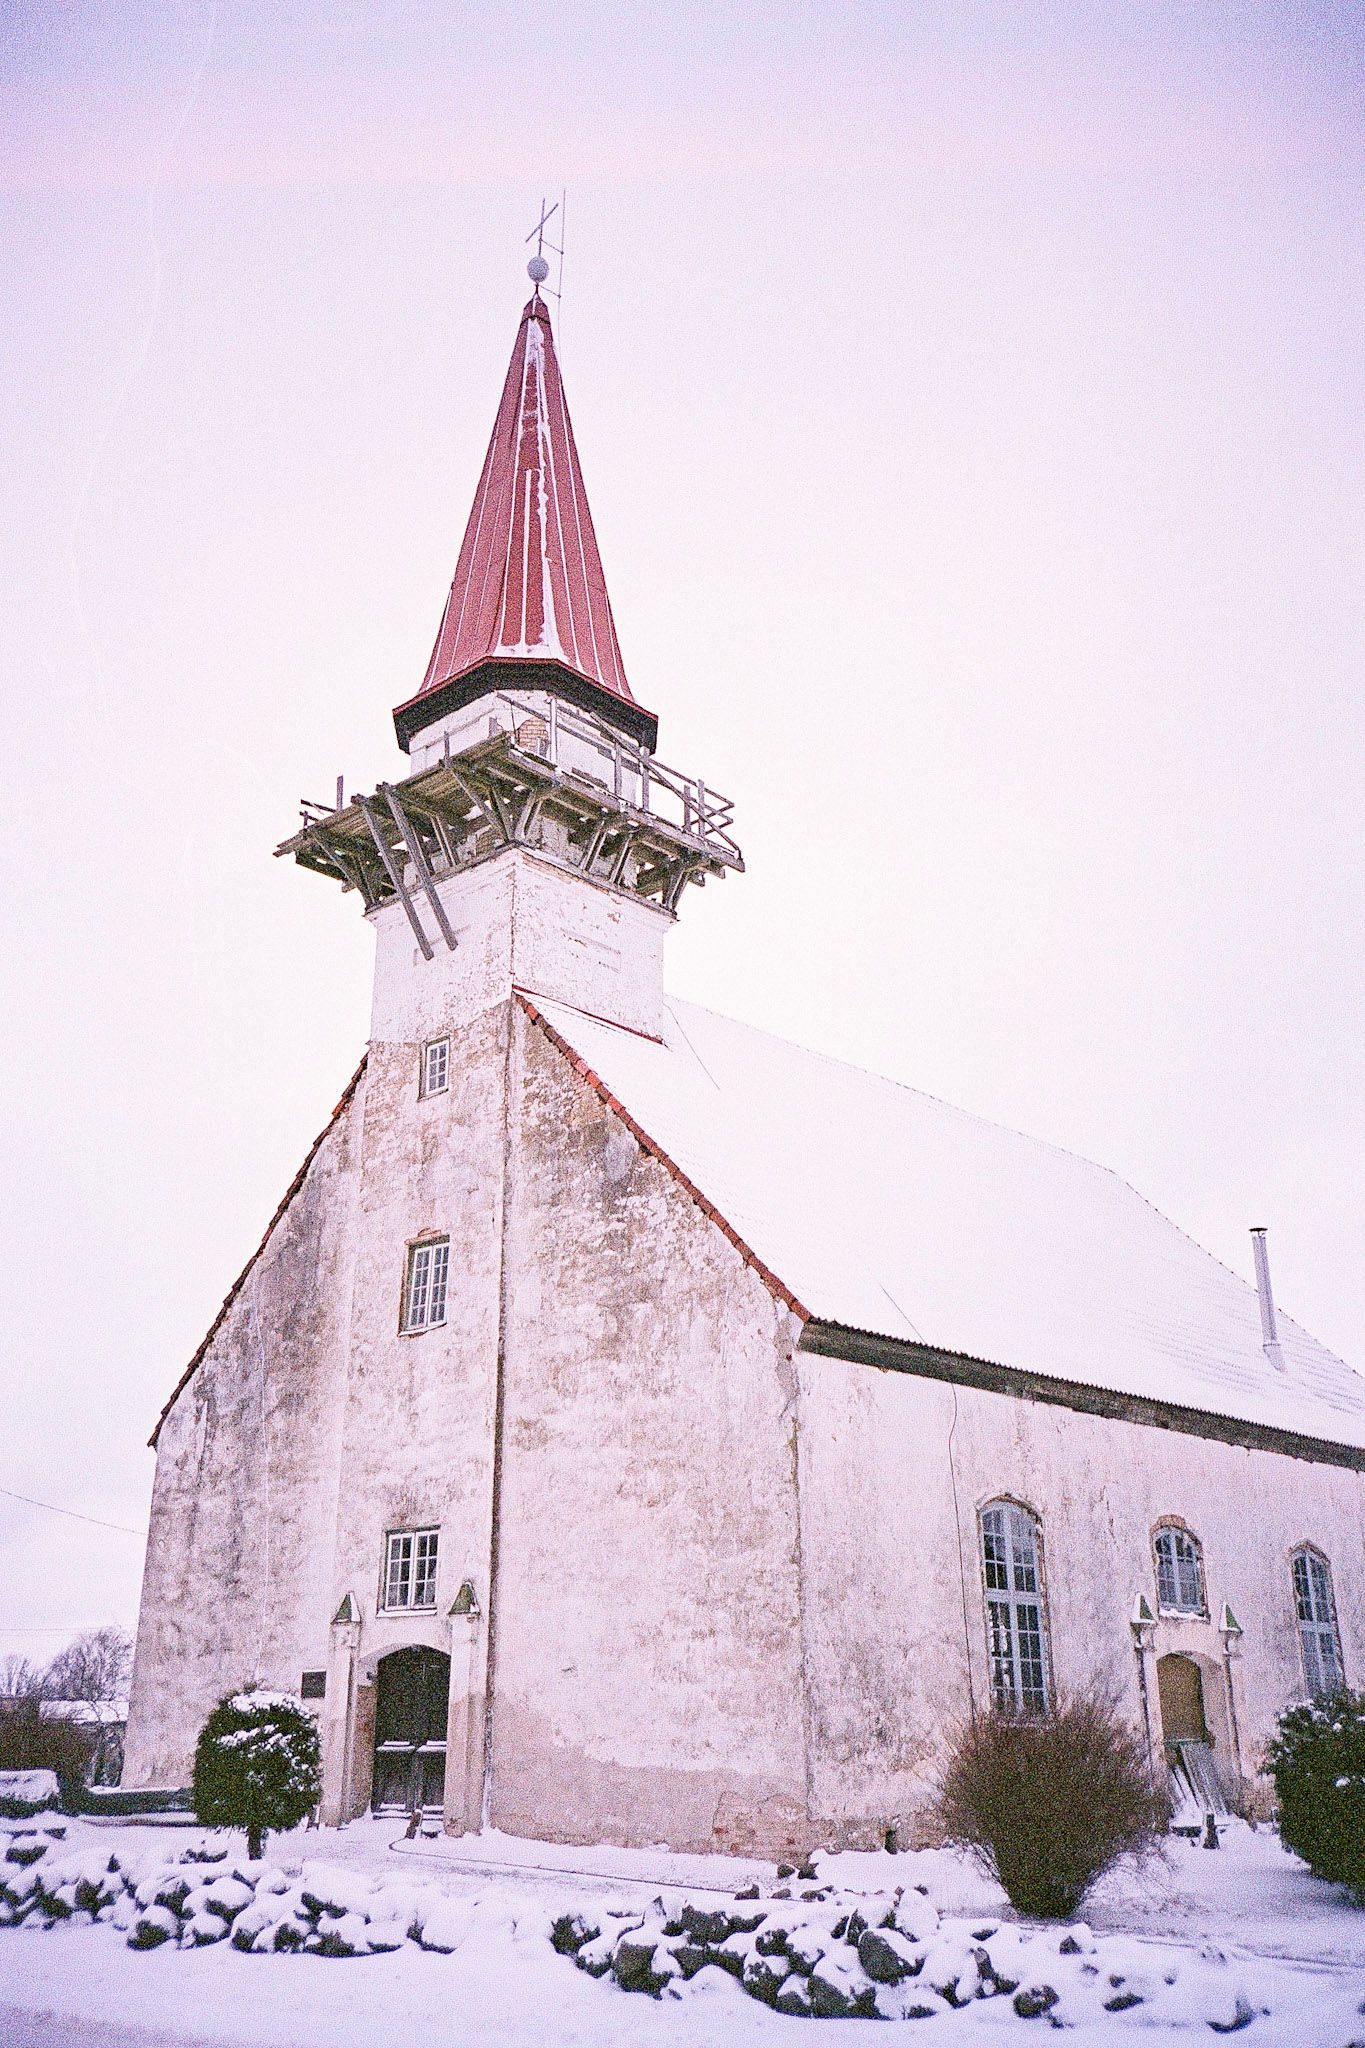
R1 can produce detailed photos as long as the aperture is closed down. There is still some vignette and corners are not 100% there but this is plenty good for my needs.
- Camera
- Ricoh R1S
- Film
- Fujifilm Reala EI100
- Development
- CineStill CS41 "Color Simplified" 2-Bath Powder Kit
- Scanner
- Reflecta ProScan 10T
I don't believe that this has closed the aperture down that much but you can already see improvements. Most of the frame looks very good with the corners and very sides smudging away.

- Camera
- Ricoh R1S
- Film
- Kodak T-MAX 400 EI400
- Development
- Kodak HC-110; Dilution B; 6:30min
- Scanner
- Reflecta ProScan 10T
Even the tree branches don't get lost in smudge here. You can see some smudging in the top right corner but it's tolerable.
All thanks to the ISO 400 film and some sun.
Using a normal panorama mode will cut most of the mush out leaving only the very sides. Using the wide 24mm panorama mode will bring the mush back to an even higher level. You would think that closing the aperture down to f8 would yield a more even frame but it doesn't. Most of the time at least. The center will remain good but the sides are bad. Some people hack the camera to make it use the full 35mm frame when using 24mm lens but I don't see the reason. Only sadness hides in those corners.

- Camera
- Ricoh R1S
- Film
- Fujifilm Reala EI100
- Development
- CineStill CS41 "Color Simplified" 2-Bath Powder Kit
- Scanner
- Reflecta ProScan 10T
24mm panoramic mode is not spared from the mush. If anything, it's only increased. The light leak doesn't help. This was taken before the duct tape light leak fix.
- Camera
- Ricoh R1S
- Film
- Kodak T-MAX 400 EI400
- Development
- Kodak HC-110; Dilution B; 6:30min
- Scanner
- Reflecta ProScan 10T
For some reason my panorama photos were often way off axis. Not sure if I'm Holding It Wrong™ or there is some other issue.
In any case — the leaning doesn't fix the mushing...
When using the 24mm panorama mode you have to remember that aperture is set to f8. Combine that with a slower ISO film and overcast day and you might introduce motion blur. I know I have. I thought that I would be stable enough to handhold slower shutter speeds on a 24mm lens but I was wrong on several occasions.

- Camera
- Ricoh R1S
- Film
- Fujifilm Reala EI100
- Development
- CineStill CS41 "Color Simplified" 2-Bath Powder Kit
- Scanner
- Reflecta ProScan 10T
Here I have failed to hold the camera steady. With the panoramic aspect ratio it now looks like a still from a movie.
The colors and contrast are all average. Nothing to write home or complain about.
- Camera
- Ricoh R1S
- Film
- Fujifilm Reala EI100
- Development
- CineStill CS41 "Color Simplified" 2-Bath Powder Kit
- Scanner
- Reflecta ProScan 10T
This is not the best scene or light conditions to showcase colors but I still think it's representative. Colors and contrast remain consistent regardless of other conditions.
I'm not the biggest fan of using color negative film in 35mm cameras and I'm even less of a fan using them on R1. The colors are boring and yield no pleasure to me. Black and white works a lot better. It can render some very pleasing images on a black and white film.
- Camera
- Ricoh R1S
- Film
- Fujifilm Reala EI100
- Development
- CineStill CS41 "Color Simplified" 2-Bath Powder Kit
- Scanner
- Reflecta ProScan 10T
This could be my favourite color photo taken with the R1. It's nothing amazing but looks OK. I bet it would look even better in black and white though!

- Camera
- Ricoh R1S
- Film
- Kodak T-MAX 400 EI400
- Development
- Kodak HC-110; Dilution B; 6:30min
- Scanner
- Reflecta ProScan 10T
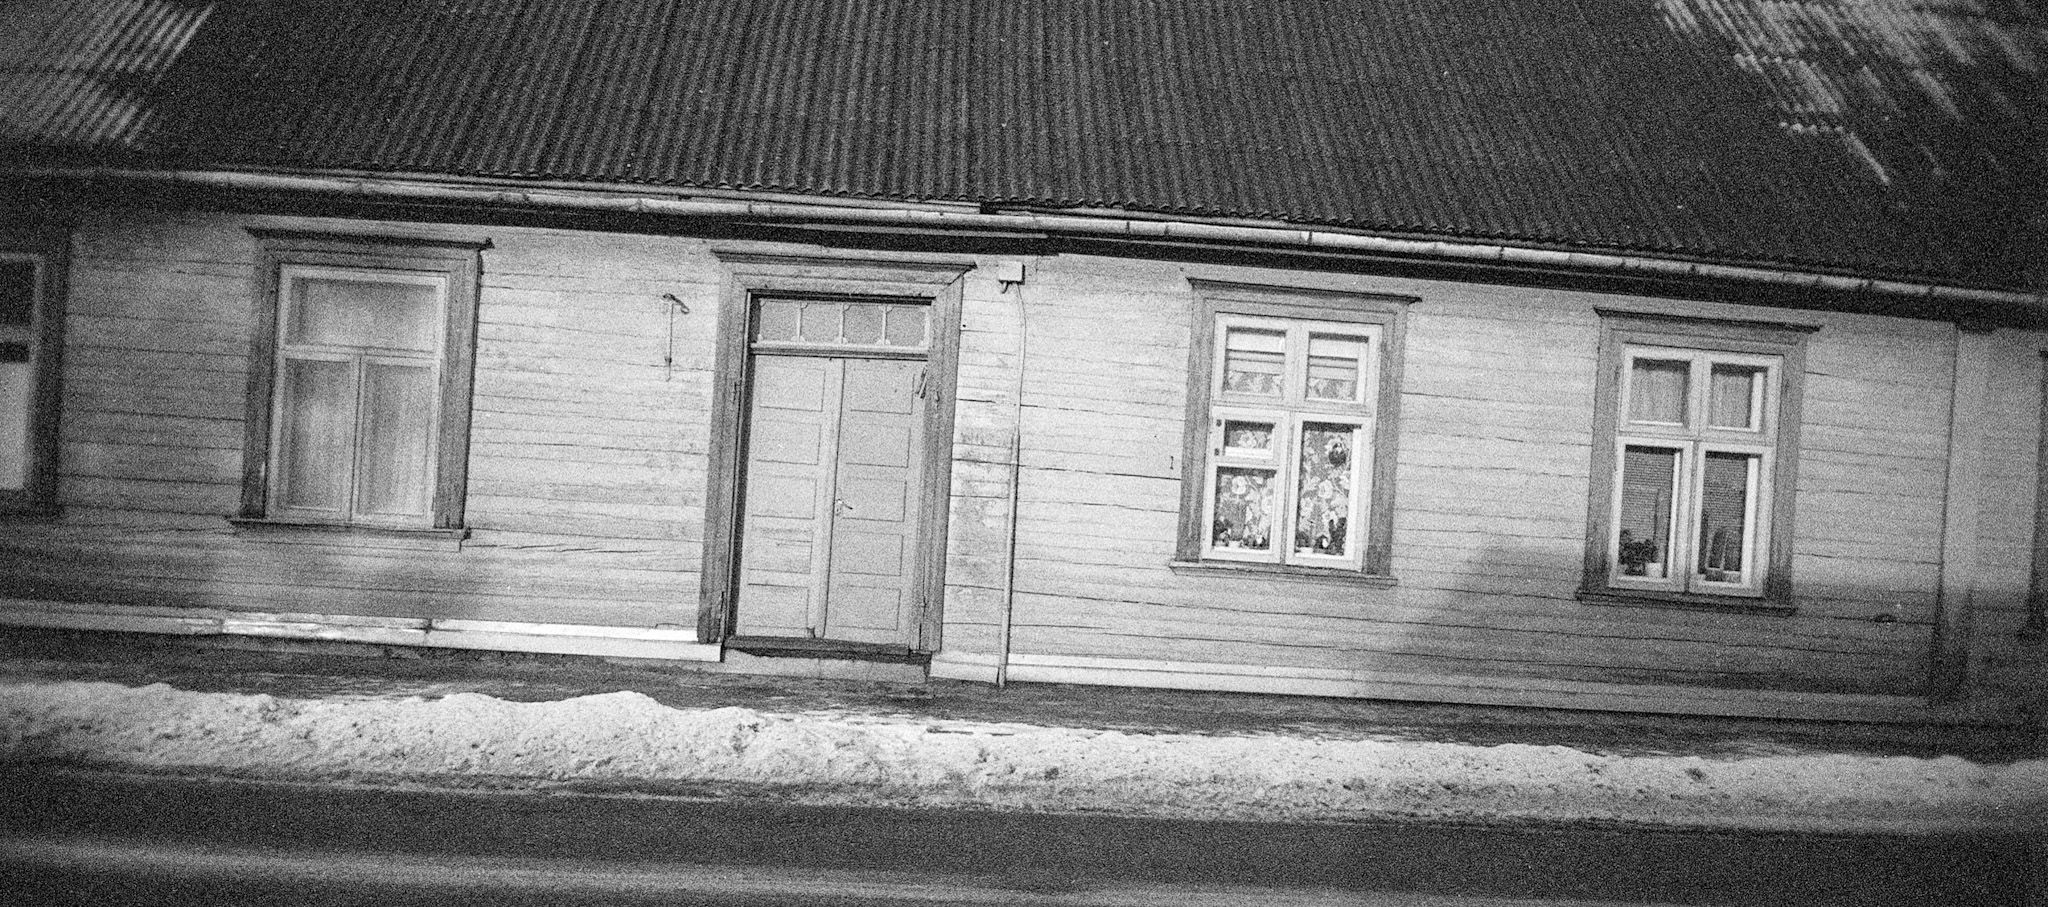
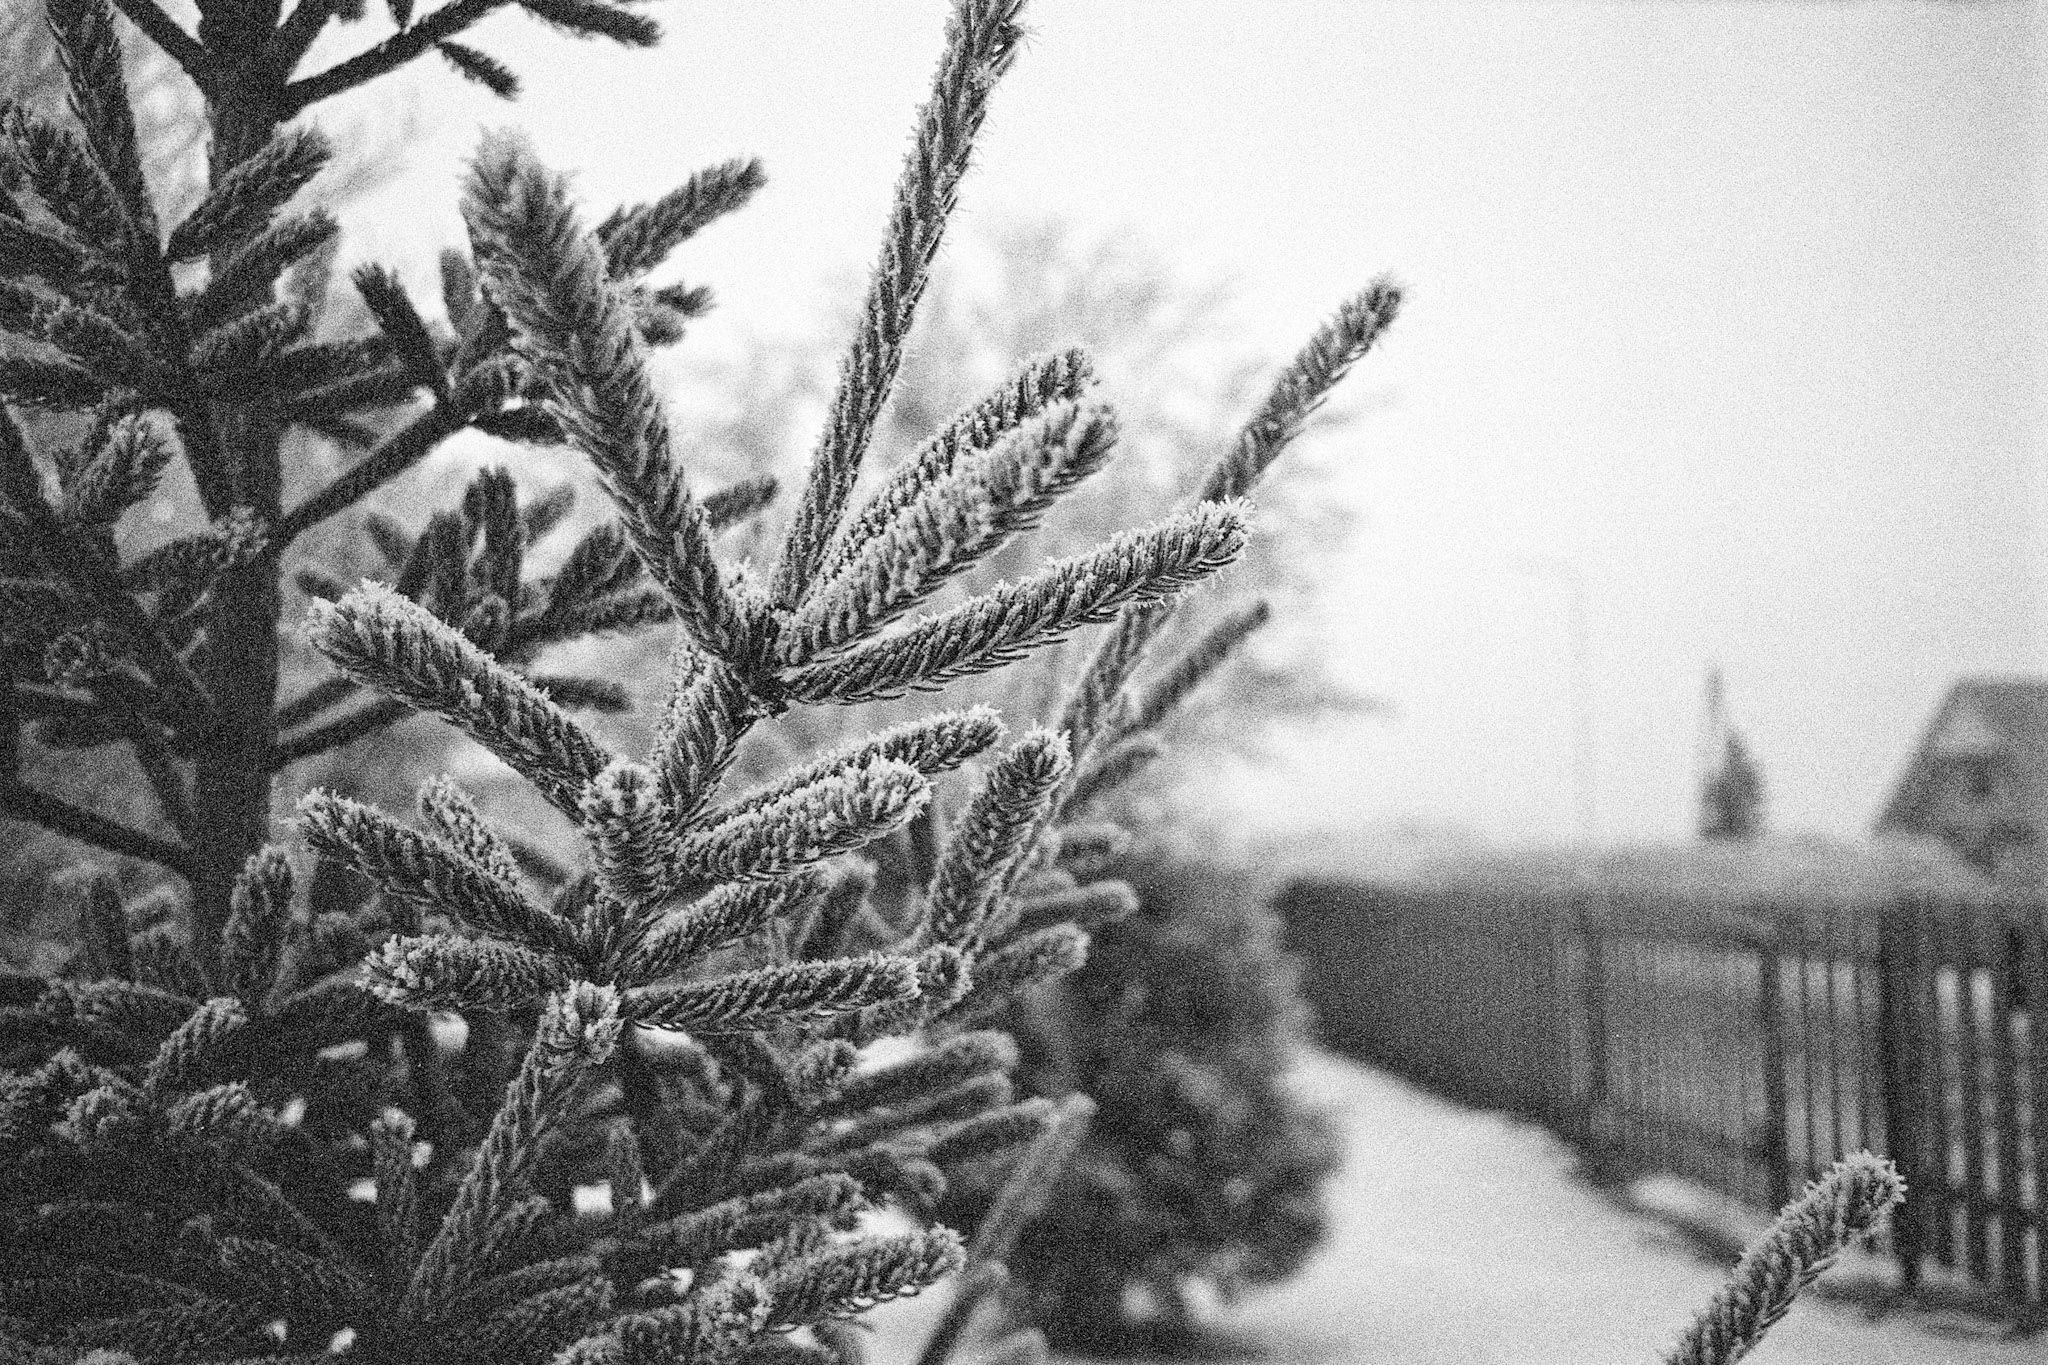
Even technically not great photos can look interesting in black and white taken with the R1. It provides a good atmosphere.
It's a 30mm f3.5 lens so we can't discuss bokeh. You can blur some backgrounds and they look pleasing enough but it's too wide and slow to have world melting powers. It can focus quite close though so some blurring is still possible.
- Camera
- Ricoh R1S
- Film
- Kodak T-MAX 400 EI400
- Development
- Kodak HC-110; Dilution B; 6:30min
- Scanner
- Reflecta ProScan 10T
If you thought that bokeh is not possible with R1 then how wrong were you! Black and white film can make any bokeh good and this is no exception.
The center is also very sharp and detailed. This was taken using the Spot AF mode to ensure focus in the right spot.
All in all the image quality is acceptable but isn't anything special. As long as you use faster film to force a smaller aperture, the results are pleasing. Otherwise try and keep the important stuff towards the center.
TL; DR; & Final Words
For some reason I've written more words than I expected. It might seem that I am quite negative about Ricoh R1. Not amazing build quality:
- broken LCDs;
- dim framelines;
- weak battery covers;
- likely light leaks.
Some poor functionality:
- flash that needs to be turned off every time you switch on the camera;
- very limited manual options.
And lastly the image quality is on the scale between below average and above average. So why do I still prefer this over Fujifilm XF10?
First of all, it seems easier to carry around. It slides in my jeans pocket with ease whilst not being much smaller than XF10. It's very light which means that it doesn't bother your pocket.
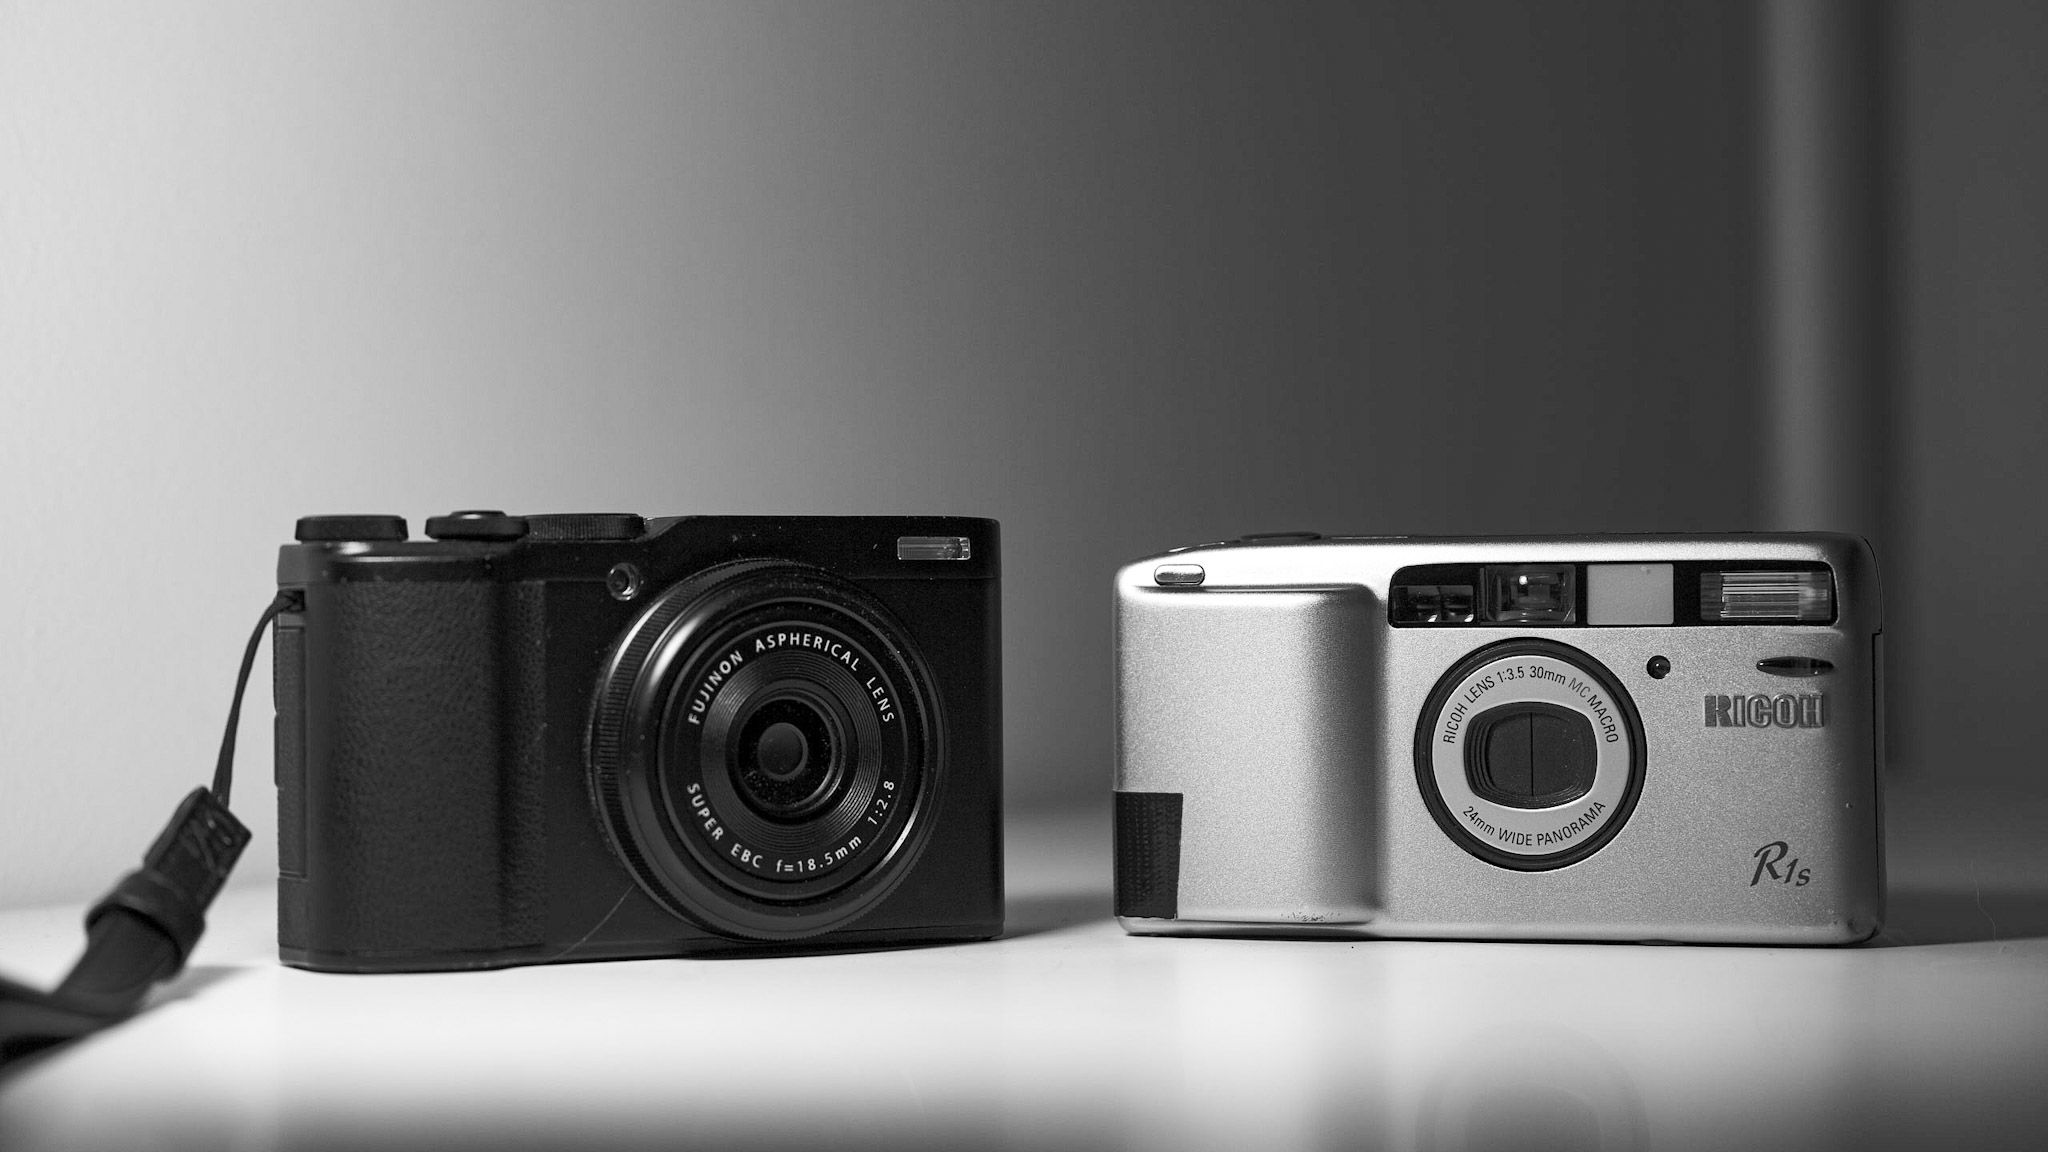
R1 isn't that much smaller than XF10 but it has no edges so it's a lot easier to slide in and out of the pocket. And whilst XF10 is not a heavy camera, it's heavier than R1 which can be noticeable in a pocket.
You can also see R1 being compared with XF10 and X-A1 which is another small Fujifilm camera but with interchangeable lenses. X-A1 isn't that much bigger than XF10 although when you add a lens the difference becomes more significant. I have attached a tiny Pentax 110 lens but something like a pancake would work better.
Then it's the analog joy. Having a full frame camera in my pocket that shoots good black and white photos is great. Yeah, you can also shoot color with it but I won't. The results it produces are objectively worse than those of XF10 but I prefer the ones from R1. They have more character and are more interesting. And whilst the camera doesn't offer much flexibility, that can be viewed as a limitation. We all know that limitation can boost creativity. So with R1 I take more interesting photos than with XF10. Compact point and shoot cameras are not meant for regular photo outings where you go out with the intention to do photography. It's a camera that you pull out to take snaps of something that caught your eye. Mundane stuff. And R1 delivers a more interesting representation of the mundane stuff than XF10.
- Camera
- Ricoh R1S
- Film
- Fujifilm Reala EI100
- Development
- CineStill CS41 "Color Simplified" 2-Bath Powder Kit
- Scanner
- Reflecta ProScan 10T
Is this an amazing photo? No. In many ways it's very flawed. But it has that something that lifts it above the same photo if it was taken with XF10.

- Camera
- Ricoh R1S
- Film
- Kodak T-MAX 400 EI400
- Development
- Kodak HC-110; Dilution B; 6:30min
- Scanner
- Reflecta ProScan 10T
Regular scenes look better in black and white. Even if they have a bit of flash in them as well.
Would I recommend the camera? It all depends on the person asking. If you're looking for top image quality and certain manual control then this is not the camera for you. If you're looking for a camera that gives you an interesting perspective on your everyday situations then R1 might be a good camera for you. Throw some ISO 400 black and white film in it and it's hard to be dissapointed.
I wouldn't want to pay more than $100 - $120 for this camera. I would go ( and have gone ) with a beat up version that has a broken LCD but otherwise works. It doesn't take long to get used to setting the settings without having visual feedback. You can use this manual for Ricoh R1 to learn how to use it blind. You save a fair bit of money that way. Ricoh R1 is an electronic camera after all. It will break. And when it does it will break forever.