Voigtländer BessaPan - Cheap Hasselblad XPan "Alternative"
Hasselblad XPan, alternatively known as Fujifilm TX-1 and TX-2 is a fancy 35mm camera that can shoot panoramic / cinematic pictures. Not in a way that other 35mm cameras can do ( e.g. Pentax MZ-5 ) where panoramic mode can be enabled but all it does is masks the regular 35mm frame from top and bottom so that you get a more panoramic look.
XPan works a different way. It has a wider film gate / opening so that you get to expose a wider part of 35mm film. Instead of the usual 3:2 aspect ratio that 35mm cameras will provide - XPan will shoot in 65:24 ( which is closer to 3:1 ) aspect ratio. You can shoot the regular 3:2 aspect ratio with it as an option but why would you...
There is an issue with XPan and friends. It costs around 3 thousand of your local moneys if your local moneys are close to EUR / GBP / USD. And prices continuously increase. And it's electronic meaning that if it breaks it's likely broken forever.
This leads me to Voigtländer Bessa I. It doesn't cost 3 thousand of your favourite currencies. And it has a large 6x9 film gate. It's not meant for 35mm film...but if someone would put 35mm film there...you would get 90mmx35mm images which is an aspect ratio of 90:35 ( as a math pro you can simplify it to 18:7 ). 90:35 is scarily close to 65:24 ( XPan is 2.71:1 and BessaPan is 2.57:1 ).
You get 90:35 if you expose over 35mm film sprockets. If you take the sprockets out ( on XPan you don't expose over sprockets ) you get a 90:24 ( 3.75:1 ) aspect ratio - which is even wider than XPan! Wider is better right?
Let us use Voigtländer Bessa I to get those sweet, sweet, wide shots.
Preparation
There are two ways how you could achieve this.
One way is to buy adapters that allow putting 35mm film where 120 film should live. There are issues with this approach:
- You have to buy something.
- 120 film has backing paper but 35mm film doesn't. If your camera has a window to see the frame numbers on the back door then this might not work as light could pass through and create a light leak. You could cover the window with tape but that leads to another issue.
- How to know when you've advanced the film far enough for the next shot. If your camera can't do that automatically and you've covered your back window then you're out of luck. You could "guesstimate" or mark the film winder with clever markings but both would yield uneven results.
- Another issue with the lack of backing paper is that there will be nothing helping the film to be pressed against the back plate to keep it straight which can lead to focussing issues as the focus plane will be in various places.
The adapter approach could work for more "modern" cameras where the camera automatically knows when film is advanced far enough and there are no back door windows. Voigtländer Bessa I has back windows and it's stupid and doesn't know how far to advance on its own.
Second approach is to tape the 35mm film to the backing paper - the same way 120 film would be. It has its own downsides:
- You have to do it in pure darkness to not expose film.
- It needs to be precise, even and straight. If it's floppy then focussing won't be accurate as the plane of focus will be in different spots. It needs to be straight otherwise you will get images that are not straight.
- Even if it's placed firmly the film might curl during exposure because cameras will have pressure points designed for 120 film not 35mm film which means that it won't be kept even by the camera.
- You need 120 film backing paper. Should not be an issue if you develop your own film.
This is the approach I went with.
Preparing Film
You can tape the film from a 35mm canister but I didn't want to do that as you won't be using 100% of the film and the unknown length film remaining in the canister didn't agree with me.
I have an expired Kodak TMAX 400 in bulk film loader. You can use as much as is necessary with it and not waste anything.
Next task was to pick the backing paper. I had several options available and I could write another writing purely about 120 film backing papers. I wanted something firm and with bold and visible frame numbers.
I find Lomography ( Color Negative 100 / 400 but I imagine all Lomography 120 films use the same backing paper ) backing papers the best for this task. They are firm. Frame numbers are bold and contrasty. For the kicks I also tried backing paper from Fujifilm ( Pro 400H ) - mostly because I like Fujifilm. Sadly their backing paper is thin and flimsy and I won't be using it for this task again. Kodak backing paper itself is good but the frame numbers are written with a thin font and are not visible as good as Lomography marks.
Next task was to align film to the middle of the backing paper. Theoretically you could align to the top or bottom but middle aligned film is easier to frame with for me. Another benefit is that it will avoid the degraded image performance from the absolute corners and you could also waste a portion of the frame since backing paper is slightly larger than film.
I cut a 14mm tall spacer which I used for alignment. This puts 35mm film bang in the middle of the 120 backing paper.
One last task before taping was to mark the place where film should be rolled to. You don't want to tape it till the end because the start and end of backing paper is used for spooling and having film there would waste it. Typical backing papers will have markings where film should start and end and I used a small piece of tape to mark those spots because I needed them to be "visible" in the dark.
Taping Film
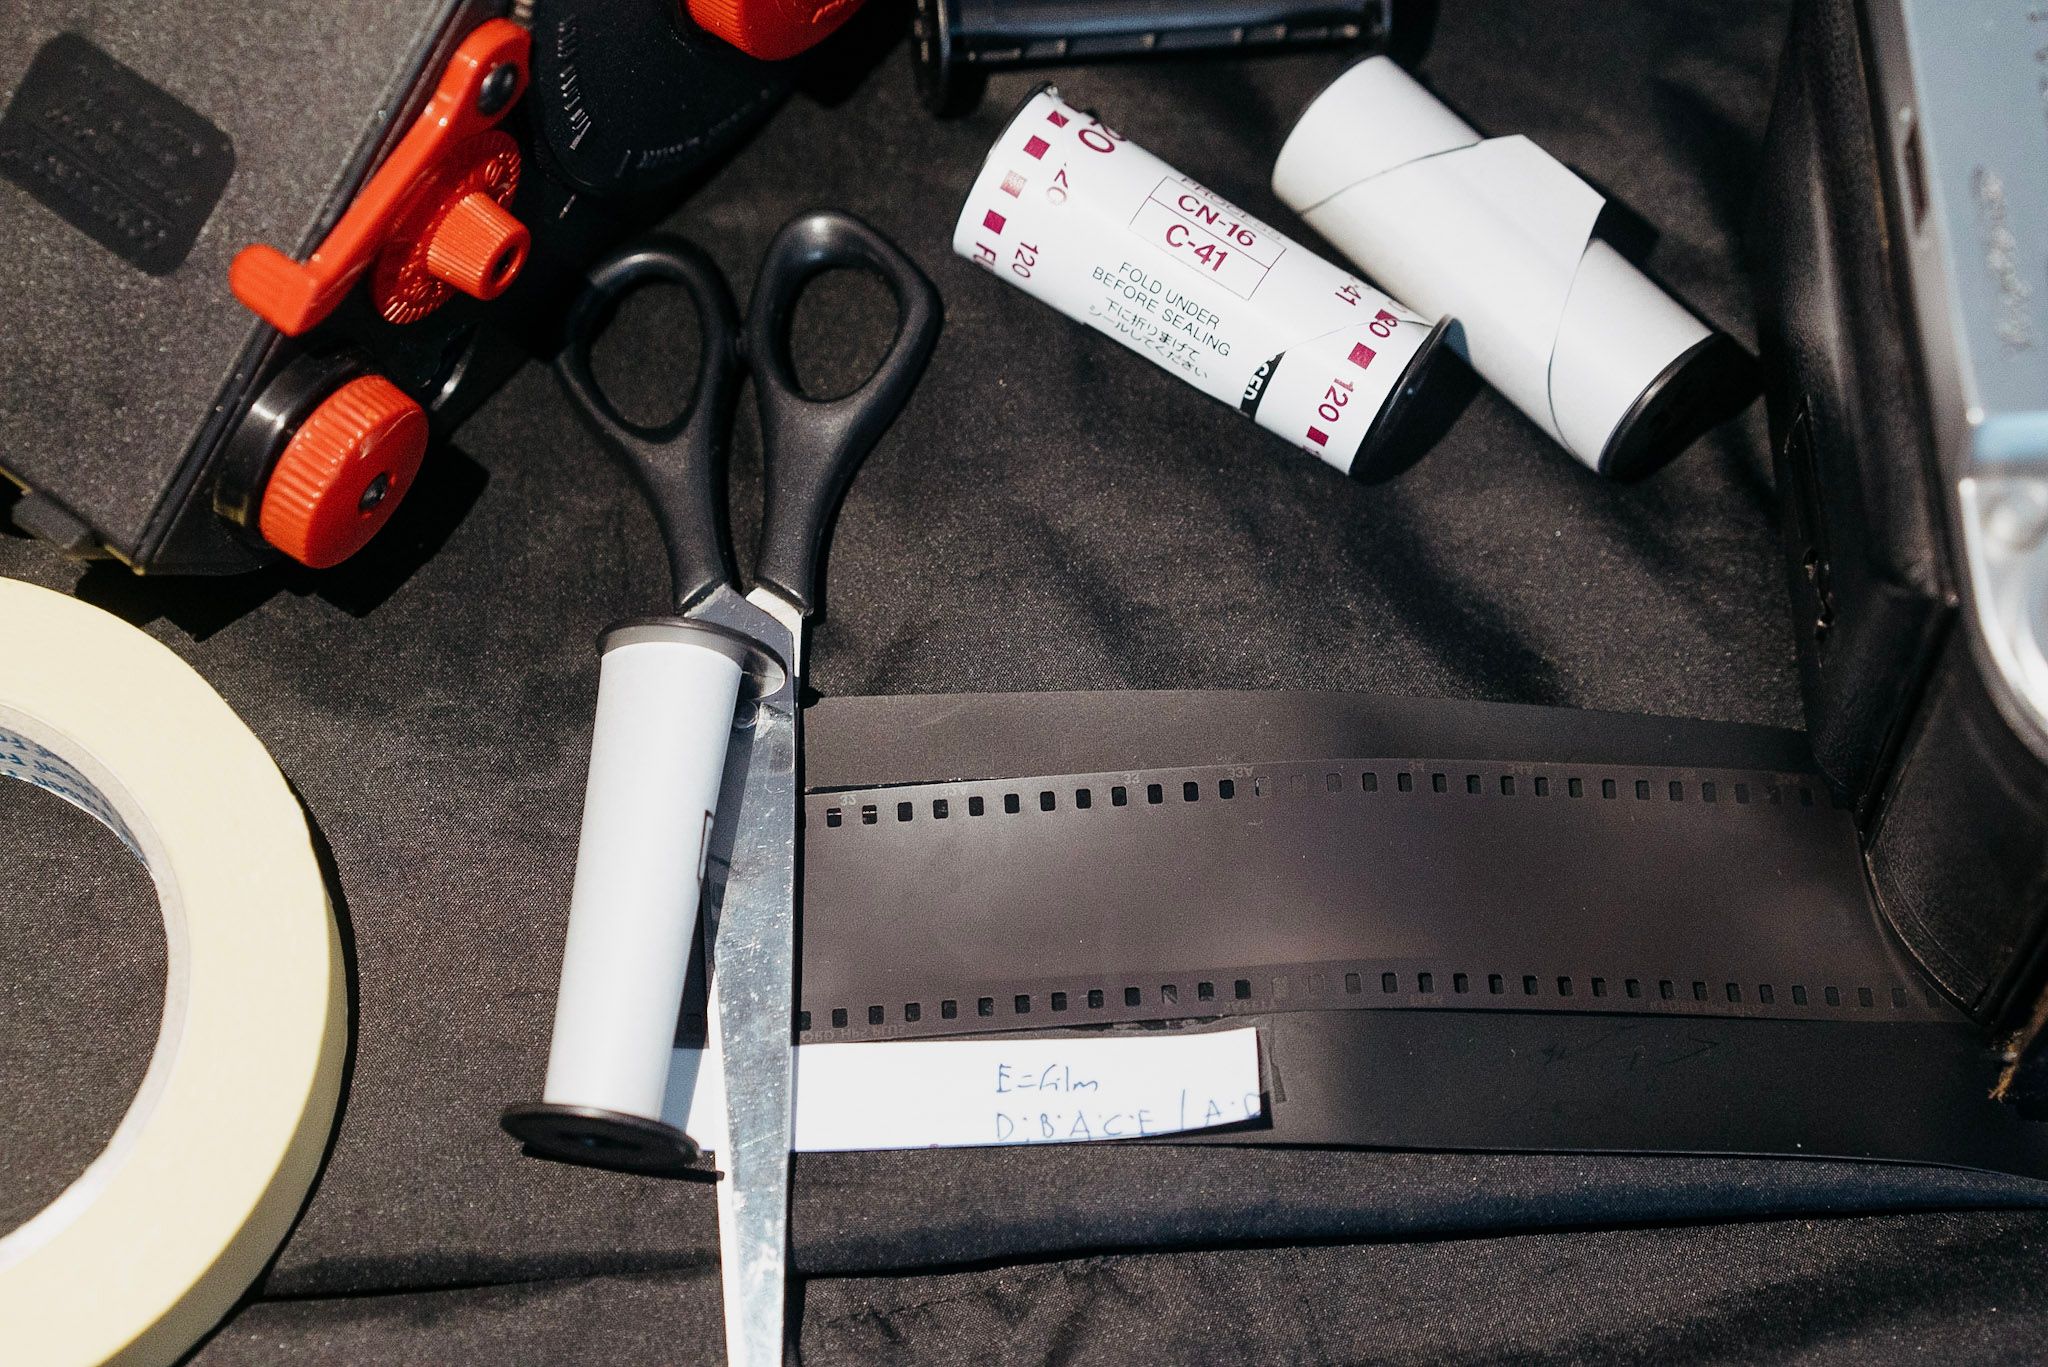
All the things needed for BessaPan creation. Backing paper. Spool. Crude spacer. Tape. Bulk loader. Camera. Time.
I started from the end of the backing paper ( where the last frame would be ). This part was done in daylight as it would be difficult to align the film straight - even with my alignment spacer. I taped a small section to the backing paper and put everything in a dark bag.
I then rolled backing paper together with film on the spool slowly and tightly. Note that the emulsion side should be on the outside and glossy side on the inside ( against paper ).
When I felt the first frame starting point I stopped rolling, cut the film and taped the end to the backing paper and finished rolling.
Done.
It's a tedious process but still better than spending 3000 moneys.
Shooting Process
Shooting process is the same as always but you have to imagine where the frame would be as the viewfinder will show you the 6x9 frame and not the panoramic one as it doesn't know that you're a cheapskate and hacked a peasants film within the camera.
You could tape something in front of the viewfinder to give a better understanding of the framing but I did not bother doing that and instead relied on the good, old fashioned guesswork.
The Results
Here is a selection of results I got by shooting 3 rolls of this hacked monstrocity.
- Film: Kodak TMAX 400 ( expired 2006 )
- Film rated at: ISO 800
- Film developed for: ISO 1600 ( I've learned that this particular expired batch has lost some of its light gathering capabilities and it's best to overexpose a stop - especially when pushing ).
- Development: Kodak HC-110, dilution B, 7 minutes 30 seconds, 20 degrees Celsius, agitate for 30 seconds at the start and then 4 inversions in 10 seconds at the start of each minute.
- Scanner: Epson V600
The first roll that I shot was scanned two times. First within a holder which meant no sprockets and second time pressed down with a piece of glass to keep it flat and get the sprockets as well. You will be able to see both versions - with and without sprockets. They were processed separately so framing and processing might not match completely.
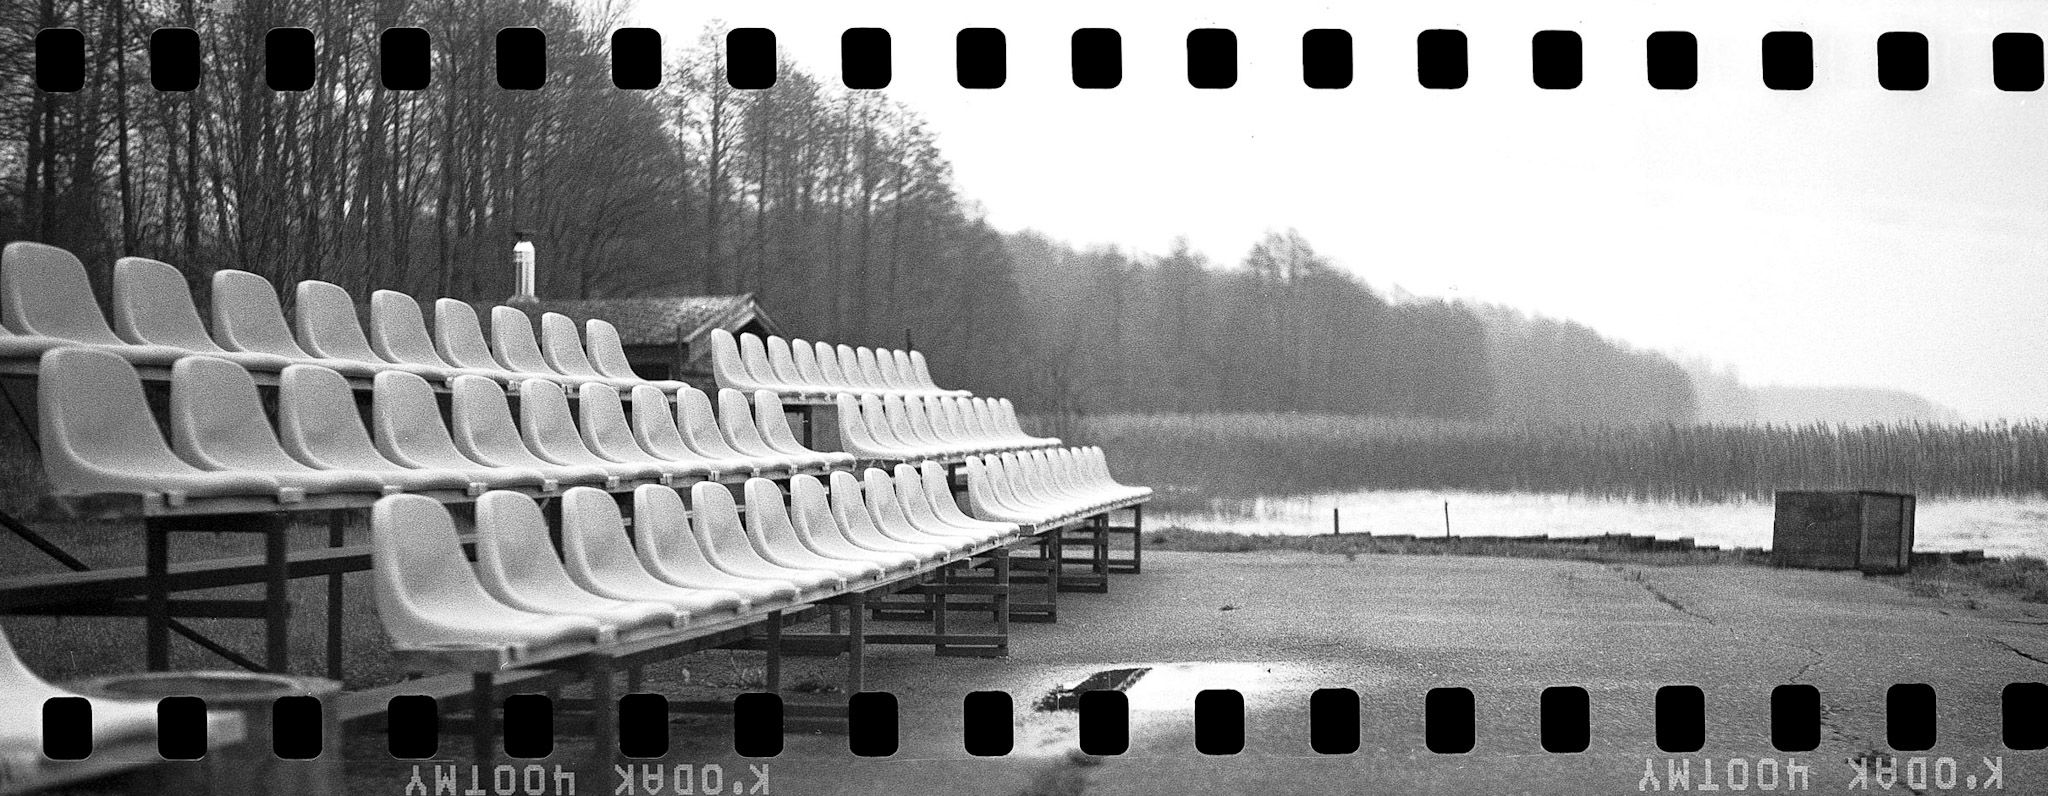
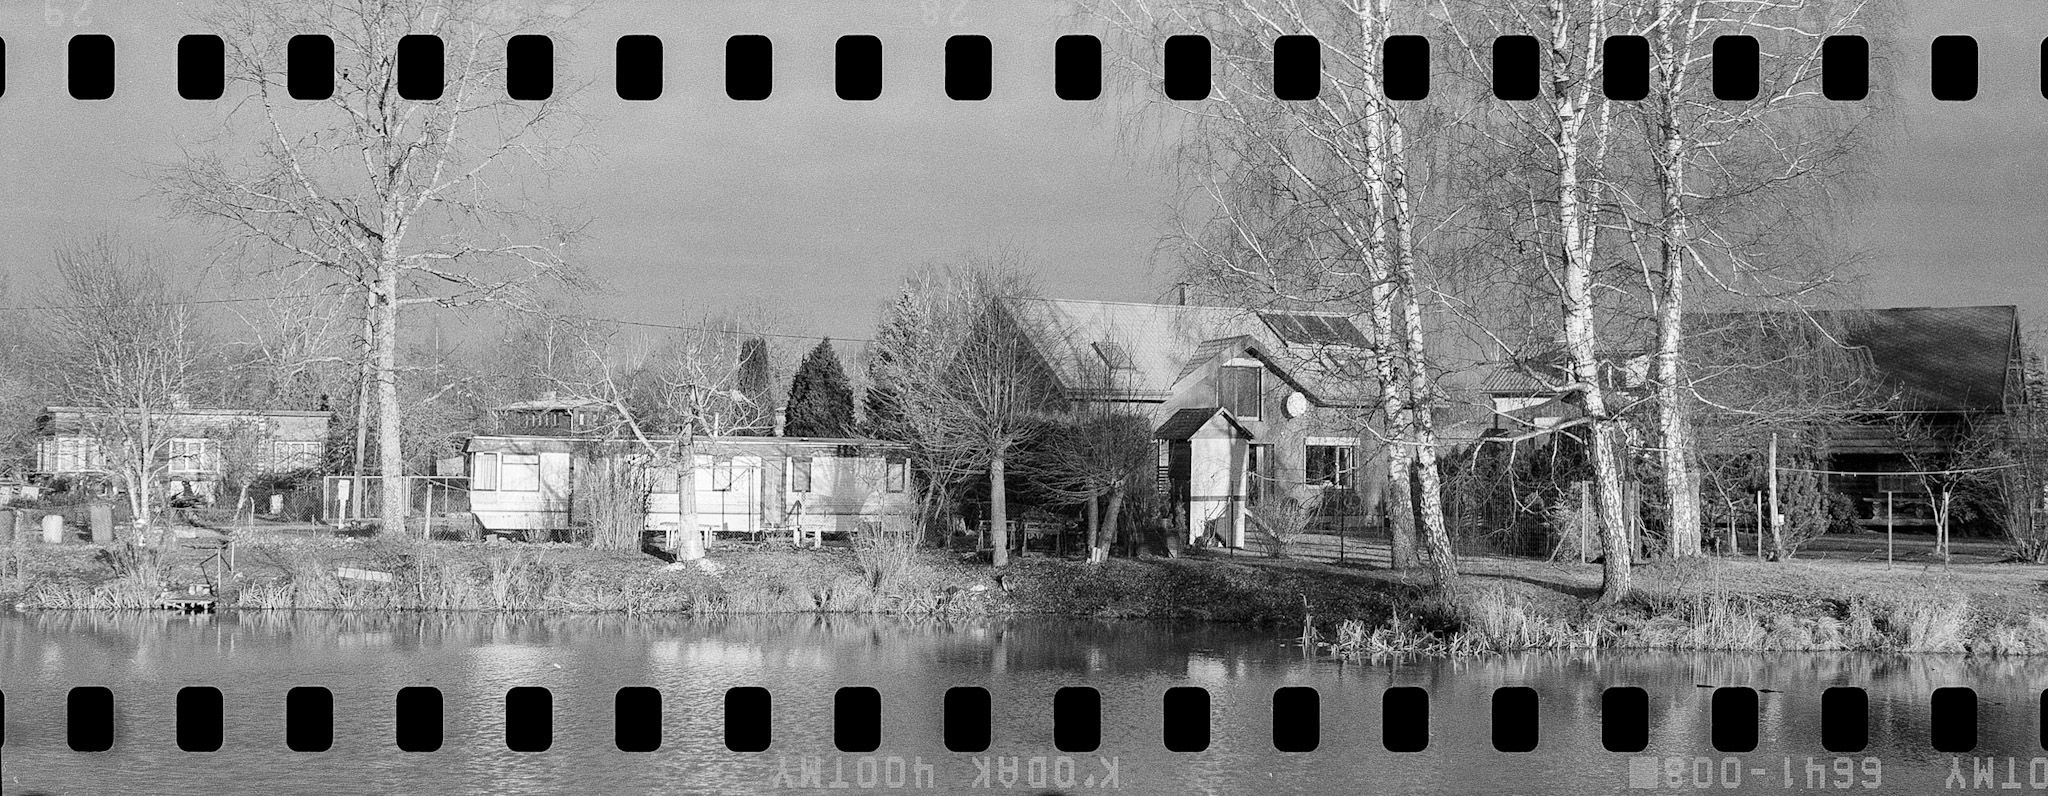
Some benches next to a lake. This was shot wide open and focus is roughly where it should be ( it's a scale focus camera so I can't be 100% sure ).
I definitely prefer version with sprockets. Not that I love holes in my pictures - I just think that it's a way better aspect ratio.
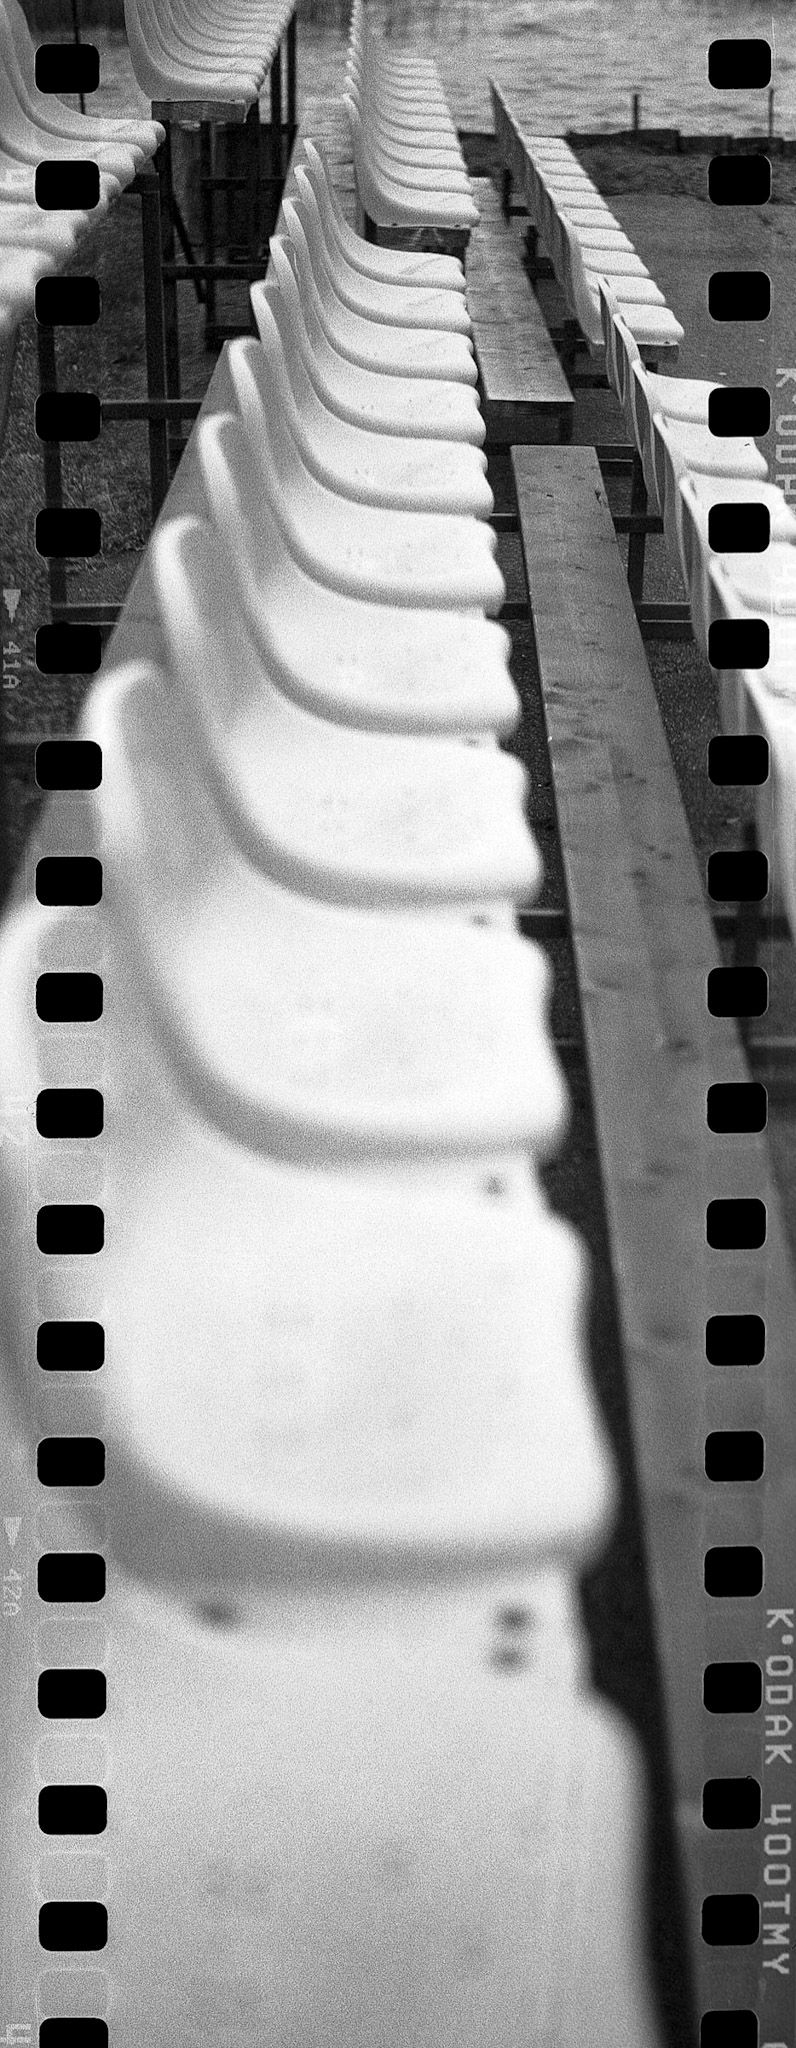
Portrait orientation experiment. I'm definitely not good with portrait orientation shots with this aspect ratio. Whilst I can see the world as a landscape panorama - I don't see any shots with portrait orientation panoramas. Might take some experience or maybe this format just doesn't work that well with portrait orientation.
Without sprocket version definitely looks quite funny to be so tall and thin.

As is the theme - I prefer the crop with sprocket holes included. It gives more space to breathe and seems more natural when framing the shot as well.
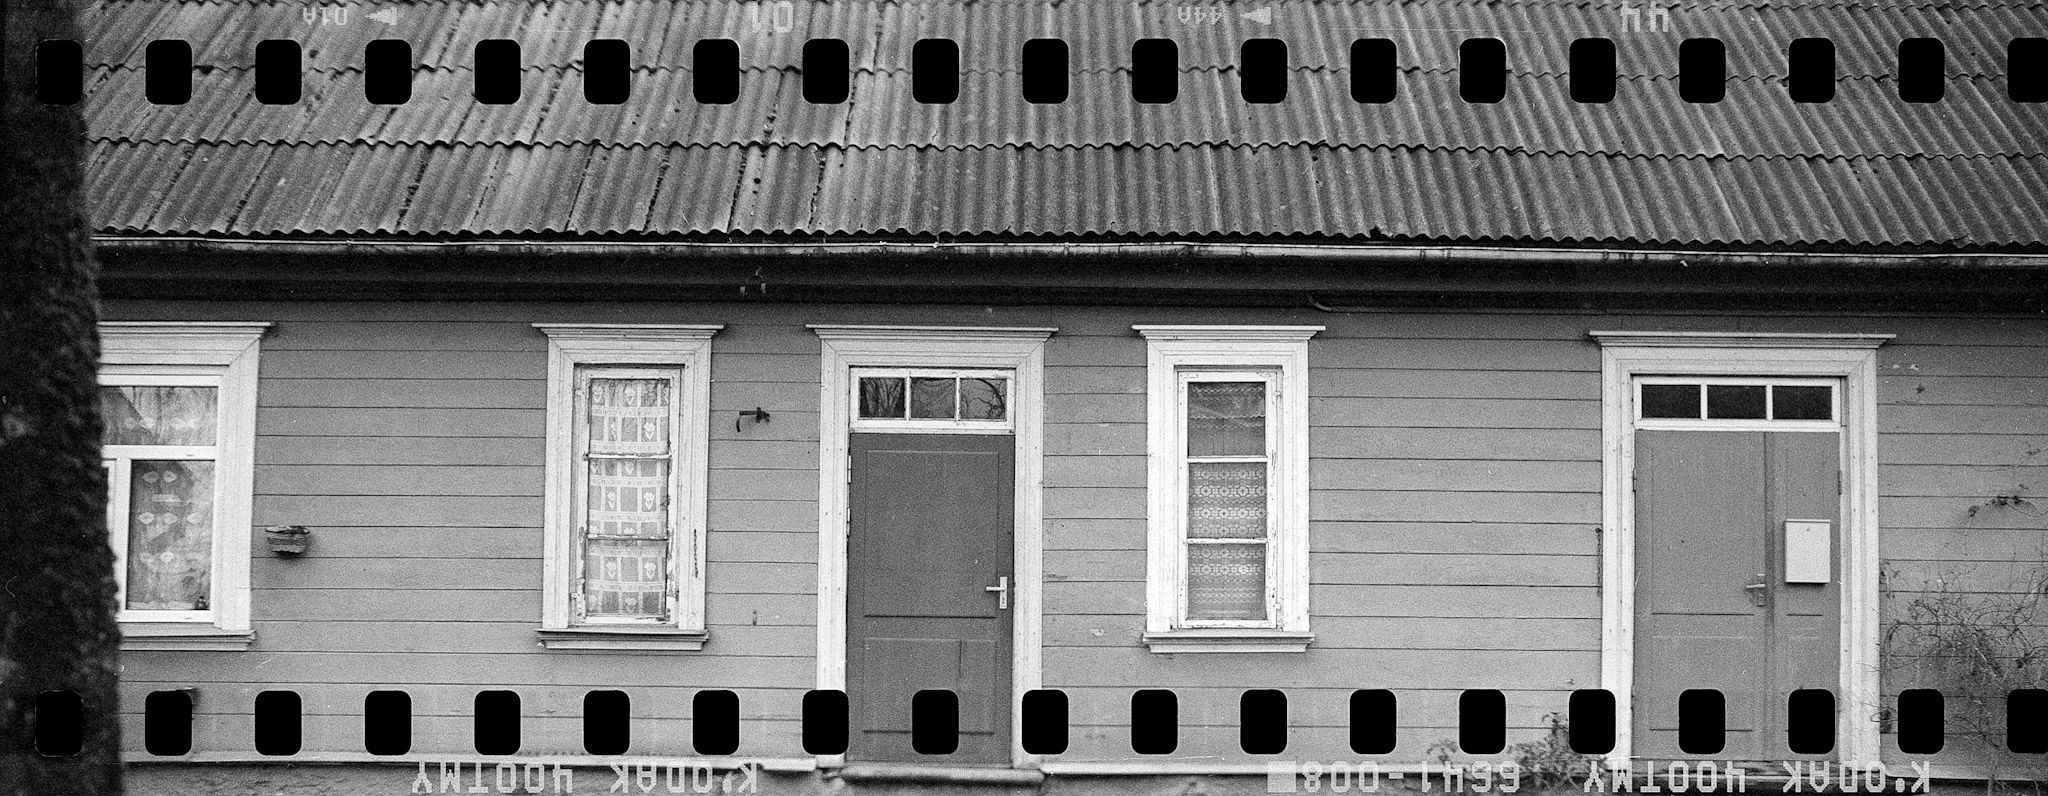
Here's an example with some focussing issues. I'm 90% sure that I set the focus correctly to infinity. The focus point also doesn't seem the same on the whole width of the image ( e.g. left side is more in focus than right ) so I imagine that the film wasn't pressed against the back plate correctly.
Subsequent rolls were scanned purely with sprocket holes as I always preferred shots with sprocket holes from the first film. This means that you have to use your imagination to see how the shot would look without sprocket holes.
Displays some framing issues. It definitely should've been framed lower. Guessing the framing doesn't always work as intended so unless you have a viewfinder adjusted to correct view - don't expect 100% accurate framing.
Picture also looks somewhat un-straight.
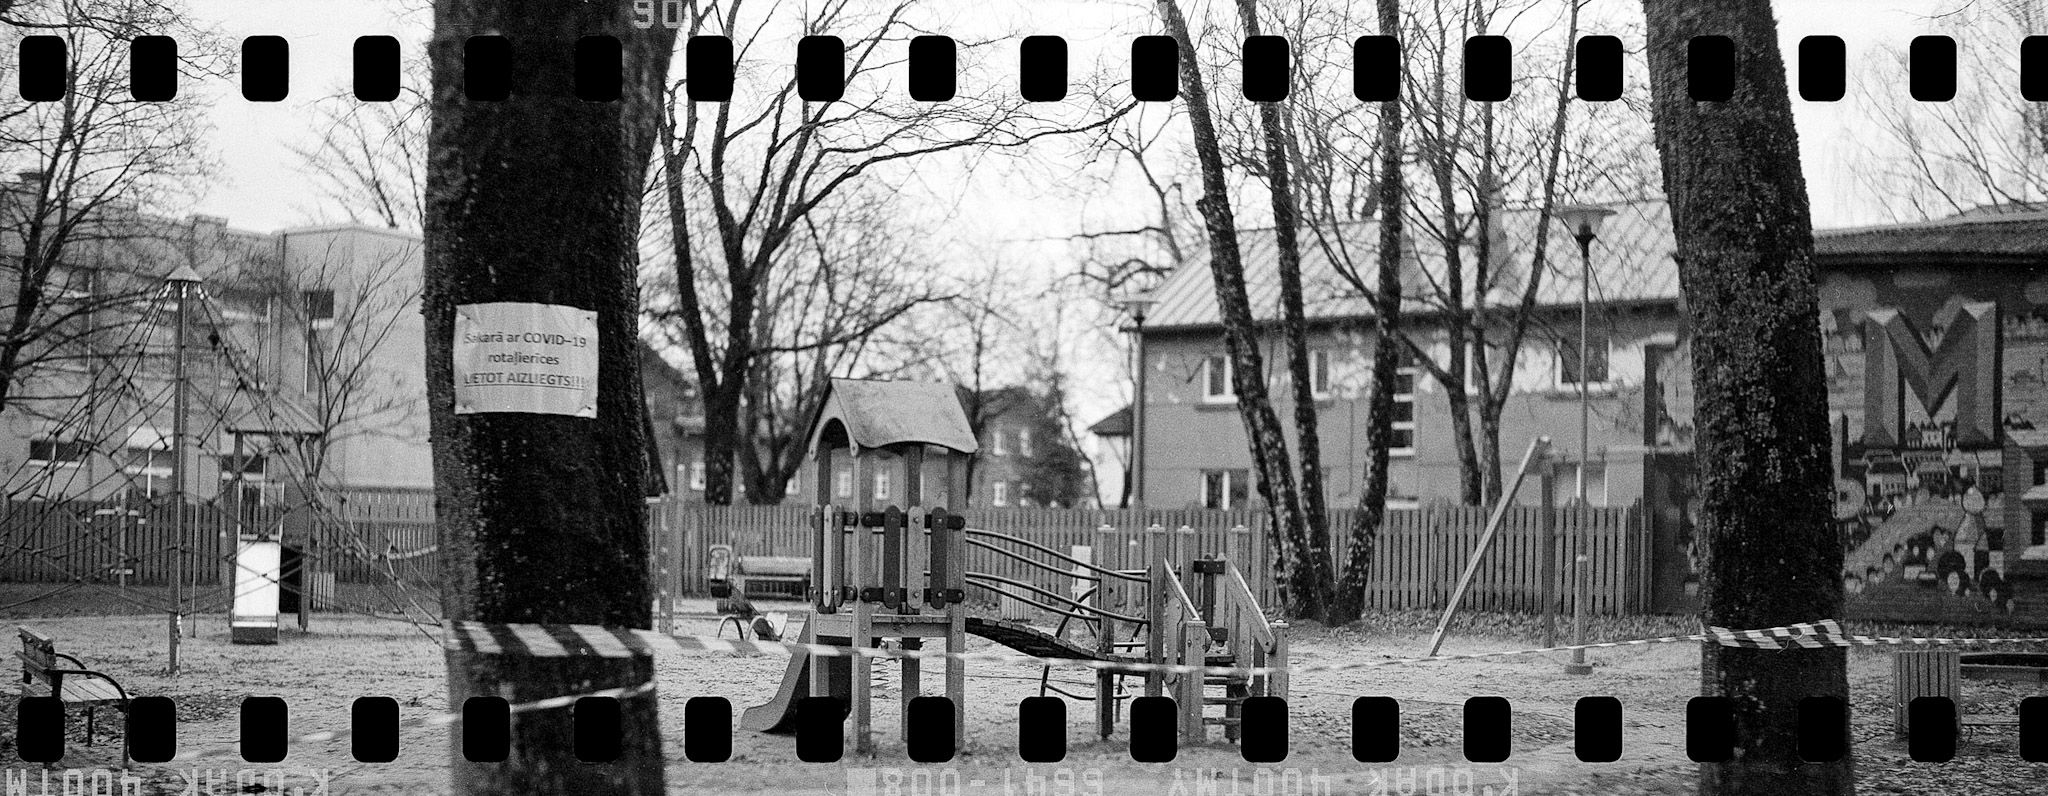
More film curling caused focussing fun. You can see how the tree towards the centre in the background is in focus towards the top but not in the middle although the distance from camera is the same.
I tried to focus on the sign on the tree ( which says that you can't use the playground because of Covid-19 ) and I don't think I misjudged the distance so much - who knows though.
Uneven film can yield interesting results but sadly it's pretty much impossible to use intentionally.

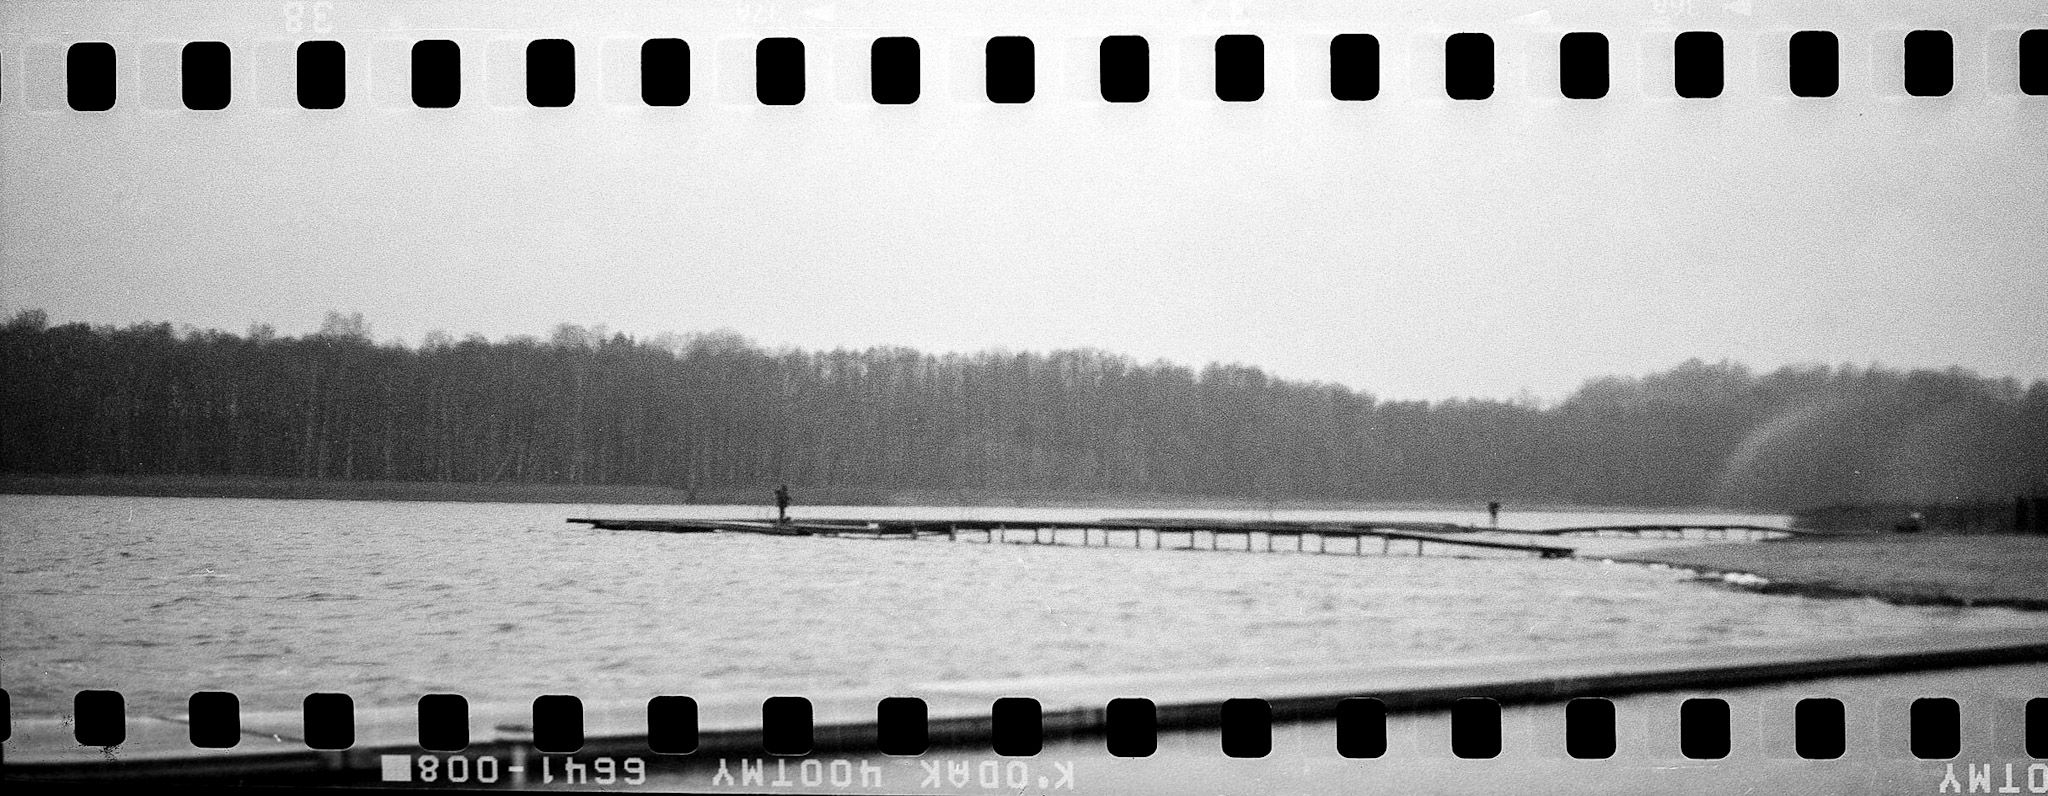
Landscape-like photo. Not much to say here. It's relatively easy to frame and shoot these types of photos as you don't have to be super precise.

Another shot similar to the last one. Panoramic aspect ratio works well here.
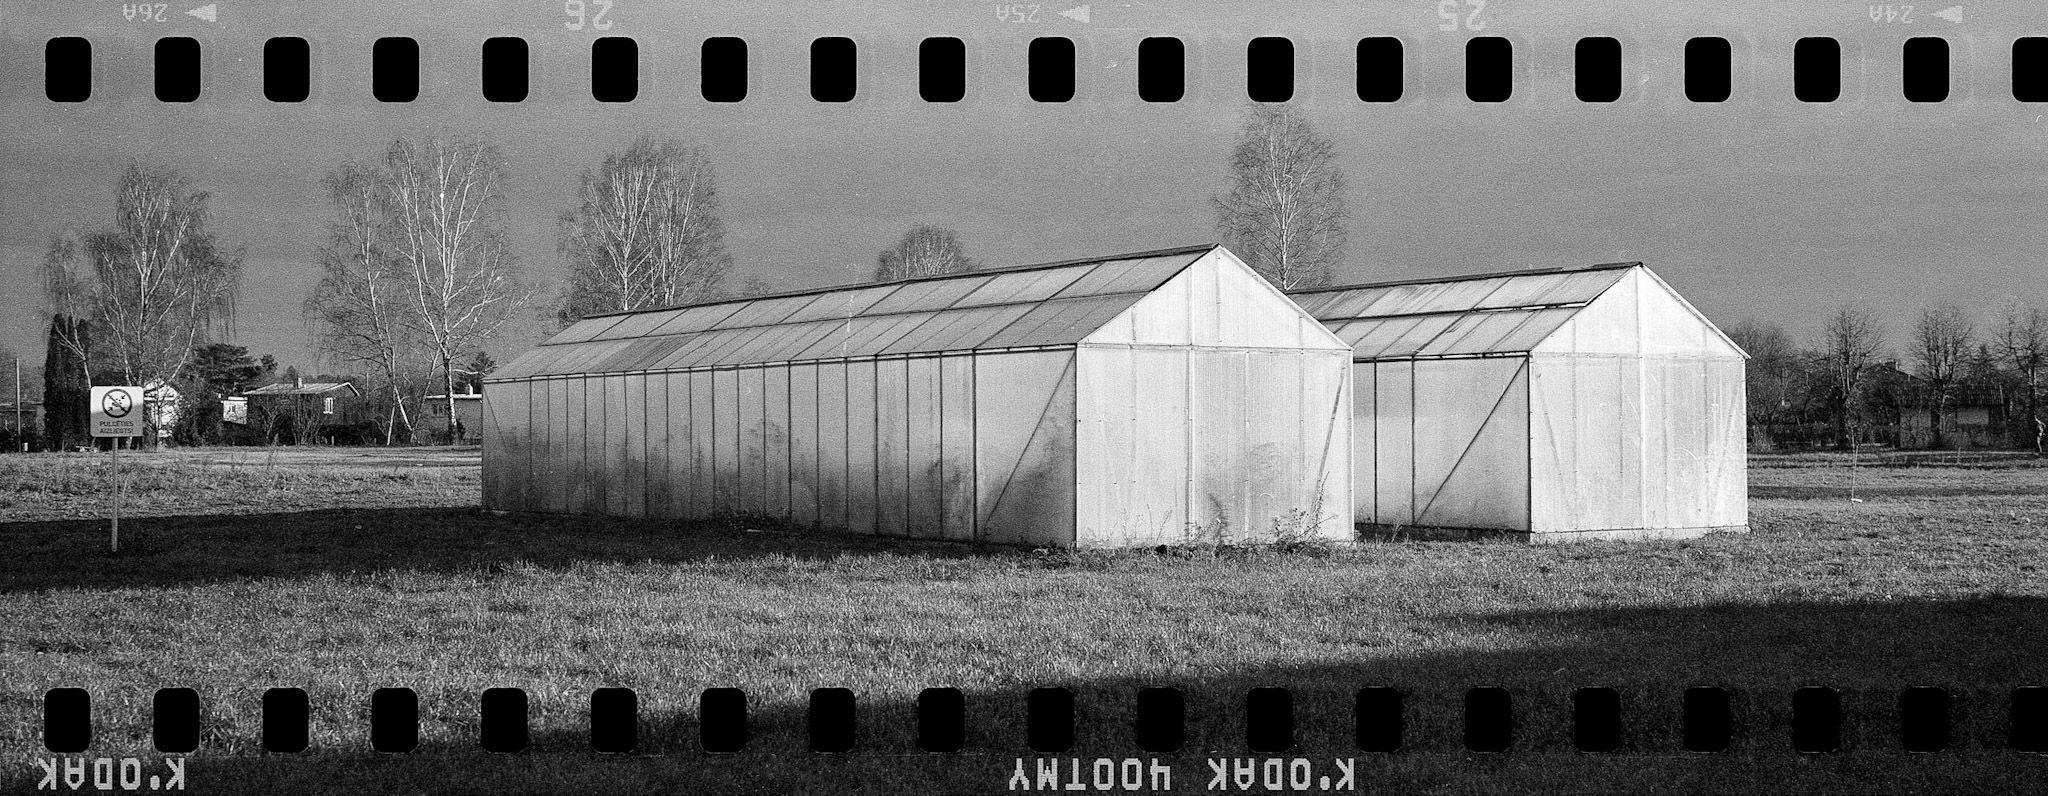
Shooting long objects using this aspect ratio seems natural where as with more conventional aspect ratio I feel like there would be too much dead space.
Last shot which happens to be of a scene that lends itself to this aspect ratio and is hard to get wrong as aperture is quite closed so any focussing issues will be greatly masked.
Verdict And Improvements For Future
I'm happy with the results. I have not had the best experience with pushing Kodak TMAX 400 but it worked out fine although Ilford HP5+ is superior.
Process of preparing the film for shooting is annoying - I want to find ways to improve it so that it is nicer. First step is to start taping further back on the backing paper because too much film is light exposed so part of the last frame was light-leaked.
Aspect ratio without the sprockets is too wide for my taste. XPan got its aspect ratio right it seems. If you don't want sprockets in your shot and want to keep it close to the XPan aspect ratio then you can try using this technique with a 6x6 ( delivering a 2.5:1 aspect ratio ) or 6x7 camera ( delivering a 2.92:1 aspect ratio ).
Scanning without a flatbed scanner might be difficult and even with a flatbed it is not ideal. With a flatbed scanner I place the film in the scanner without any holder and press it down with glass from a picture frame. It works OK but there is more dust this way as there are more surfaces where dust accumulates.
Framing without accurate framelines is acceptable. Issue comes when sprockets are included and the picture is taken with people in frame. You have no idea where sprockets will occur in the picture which can make someone's face a sprocket hole.
I plan to do this again in future because it's fun. I want to try it with color film next.
If you want the more "cinematic" look but don't want to make the 35mm frame even smaller than it is - I recommend you try this. Home development is highly recommended though.