10 Steps For Creating Your First Zine / Photo Book
Printed photos are cool. What's even cooler is binding many printed photos together in a collection. It's often called a Photo Book. Or Zine if you wish to use a "cooler" word. Creating your first Photo Book seems like a pleasant walk in a park in the beginning. Once you understand all the things that need to be done, the task becomes a more daunting one. Regardless of any challenges - how cool is it that you can make your own book?
I can provide a few pointers and steps that should help to conceptualize your first Photo Book. It's coming from a self-publishing author that has created a grand total of 1 ( one ) Photo Books! You won't be getting this much knowledge anywhere else! Let's get started.
A Need For Print
First step is to feel an urge to see your photos as a physical object. Without it you will struggle to put your best effort into creating your first Photo Book.
For me it was a loss of joy from looking at pictures on screens. Be it phone, tablet, desktop or TV. This was especially true for my own photos. They started to blend together and it felt like a mush. I felt like a brainless photo making machine that outputs things with no end result. Most of my photos involve my family. After an event I curate and post-process the photos I took. After everything is done, we all look at them either on a TV, tablet or some other display. As time went on I got less and less from it. It didn't feel like the final step.
It's said that you can make an average photo better by printing it. I don't 100% agree but there is some truth in it. Some photos don't work well when only displayed on screens. Print them and they get infused with some magic that lifts them to a higher satisfaction level.
A Need For Series
You want prints now. That's great! But sometimes single prints are also not enough. You can't make a Photo Book from a single photo. You also shouldn't stuff random photos in a single Photo Book and call it a day. It would lack a greater meaning which would bring the whole thing down.
I don't mind single prints. They work well for certain things. As a decoration on a wall for example. But there's only so much space on a wall and building more walls becomes expensive. I said that printing can level up a photo. Another level up point can be earned when a photo is collected in a single, well defined concept. One shot banger photos are quite rare but it doesn't mean that the other photos are bad. Putting a well selected subset of these photos in a bundle would lift them all up.
A Photo Book needs a concept. Something behind it to inform what's in its belly. If it doesn't exist it will be very difficult to choose the photos to go into it. Even if you managed to do it, the other side of the experience - looking at the Photo Book - would be equally chaotic. Looking at a random photo distribution can be hard for the brain. Having a concept helps both the creator and the viewer.
Pick A Concept
One you know that you want to print a series of photos bound together you know that you want a Photo Book. Next step is to choose the concept behind it. A driving force that tells you want to include and not.
It could be something as simple as a Photo Book about your recent trip somewhere. Or something more complicated where you find a common thing in several of your photos and make it into a concept. Having a concept before taking the actual photos could yield a better result but working backwards ( finding a theme in existing photos ) can also work well.
My first photo book used a hybrid approach. I have been taking photos for quite a while so I have a large library. At one point I noticed that I often take photos of random compositions and patterns found on the outside of houses. For example a framing of certain windows of a house. Or a house wall with some flowers in a specific place. Once I understood this, I started looking for these things more often. At the end this culminated in me having my first Photo Book about this concept.
It's very likely that you already have an idea of a concept that you like to take photos of. A classic example in the film photography world is taking photos of old cars or gas stations. You can use only your existing photos in a Photo Book or add to existing photos by taking new ones with the concept defined in your mind. Or create a concept first and then take the photos. The most important thing is having a concept.
Photo Collection
With the concept defined you are now ready to gather the photos. If you don't have the photos already then go and take them. Then come back here.
Look at your library and select the photos that fit your concept. Don't be too selective and also include photos that you might not like as much or ones that don't fit the concept 100%. Unless you're a pro concept creator, the final definition is not set in stone. You're allowed to shape it to get the best result at the end.
In my case I already had a vast library of photos that fit my concept. After going through my library I collected 272 photos. For the Photo Book I wanted no more than 100 photos. I included all the photos that fit the theme to a certain level. I also included photos that I didn't like as much. At this stage you're just collecting to see what you've got. It's not the final set. Not even close but getting to see what you've got to play with will be helpful in finalising the concept.
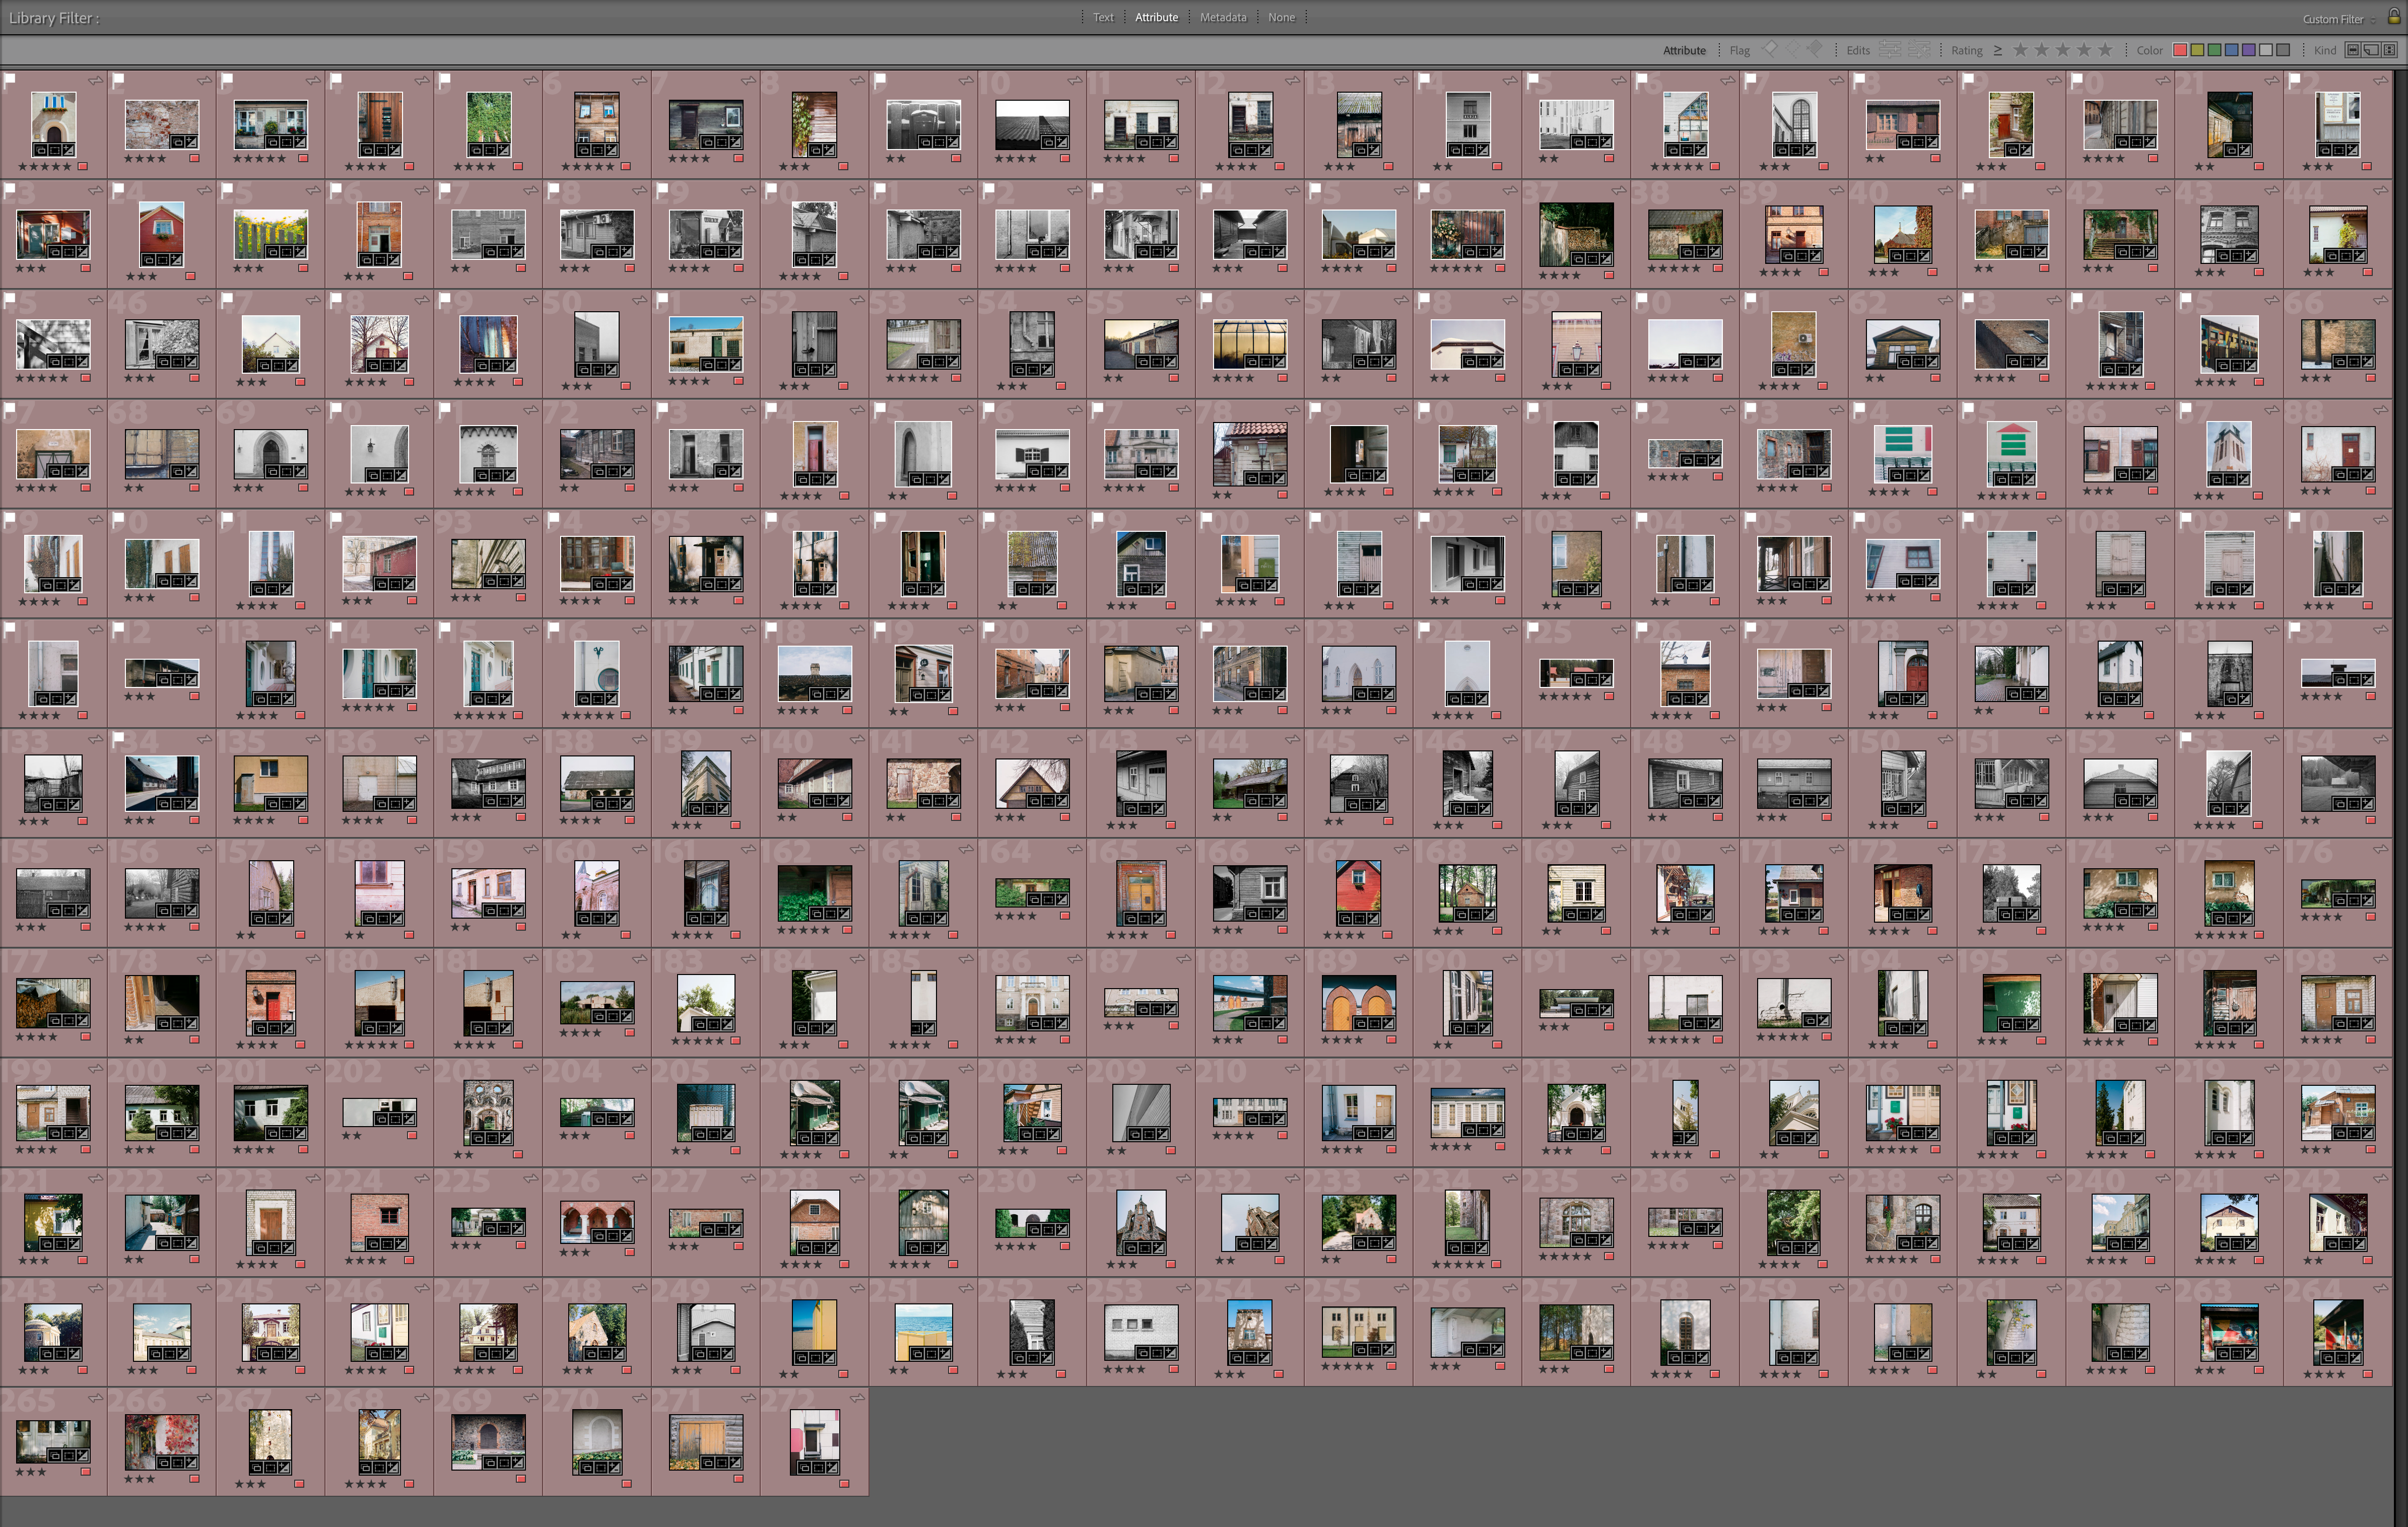
My initial set was almost triple the size of the intended final size. It can be a slog to narrow it down but it has to be done. It definitely helps to understand your own concept better.
I found that using Adobe Lightroom color-labeling feature to work the best for selecting photos for initial assessment.
Curation
Now that you have your large or not so large set of photos it's time to get rid of the dead weight and finalize the concept. It's very helpful to have an idea of the photo count you want to have in your Photo Book. I already mentioned that I wanted no more than 100 photos. I would recommend having less photos than more. Especially for the first Photo Book. I knew that I had quite a lot of photos for my concept so I picked a larger number but even I should've cut it down more.
Because you have a collection in front of you, you can crystallize the final concept. I had pictures that were both close up photos of houses and also photos that included almost the whole house and some surroundings. Whilst I liked many of the pictures that had more open space, I felt like focussing on one aspect would be better. I chose closeups which also meant that I had my final concept done.
You don't have to be 100% precise in your curation. Although you should aim to get rid of the majority of the photos that don't fit, don't overburden yourself with difficult decisions yet. It's OK to have 15 - 30% more photos than you want at the end. My aim was 100 photos and I had 113 photos selected at the end of this step.
Grouping
What I found to be a good next step was to group the photos. To have concepts within a concept. Depending on what your concept is, you could have many sub-themes. For example photos that share the same primary color. Or photos that have a similar main subject. You're looking for things that go together.
This step is here to help you with sequencing and also to allow you to weed out the photos that don't fit in your overall concept. I found that some of the photos that got this far didn't have a good grouping so it was easy to axe them.
All previous steps I was fine doing digitally. With this one I felt like having a physical set of photos would benefit me. You could make small prints of all the photos but I thought that it would be too wasteful. Instead I arranged and printed them in a 4x4 grid on an A4 paper. Then I cut them out and had cute, small pictures that I could move around. This is a cheap and good option. Having small photos makes it more manageable.
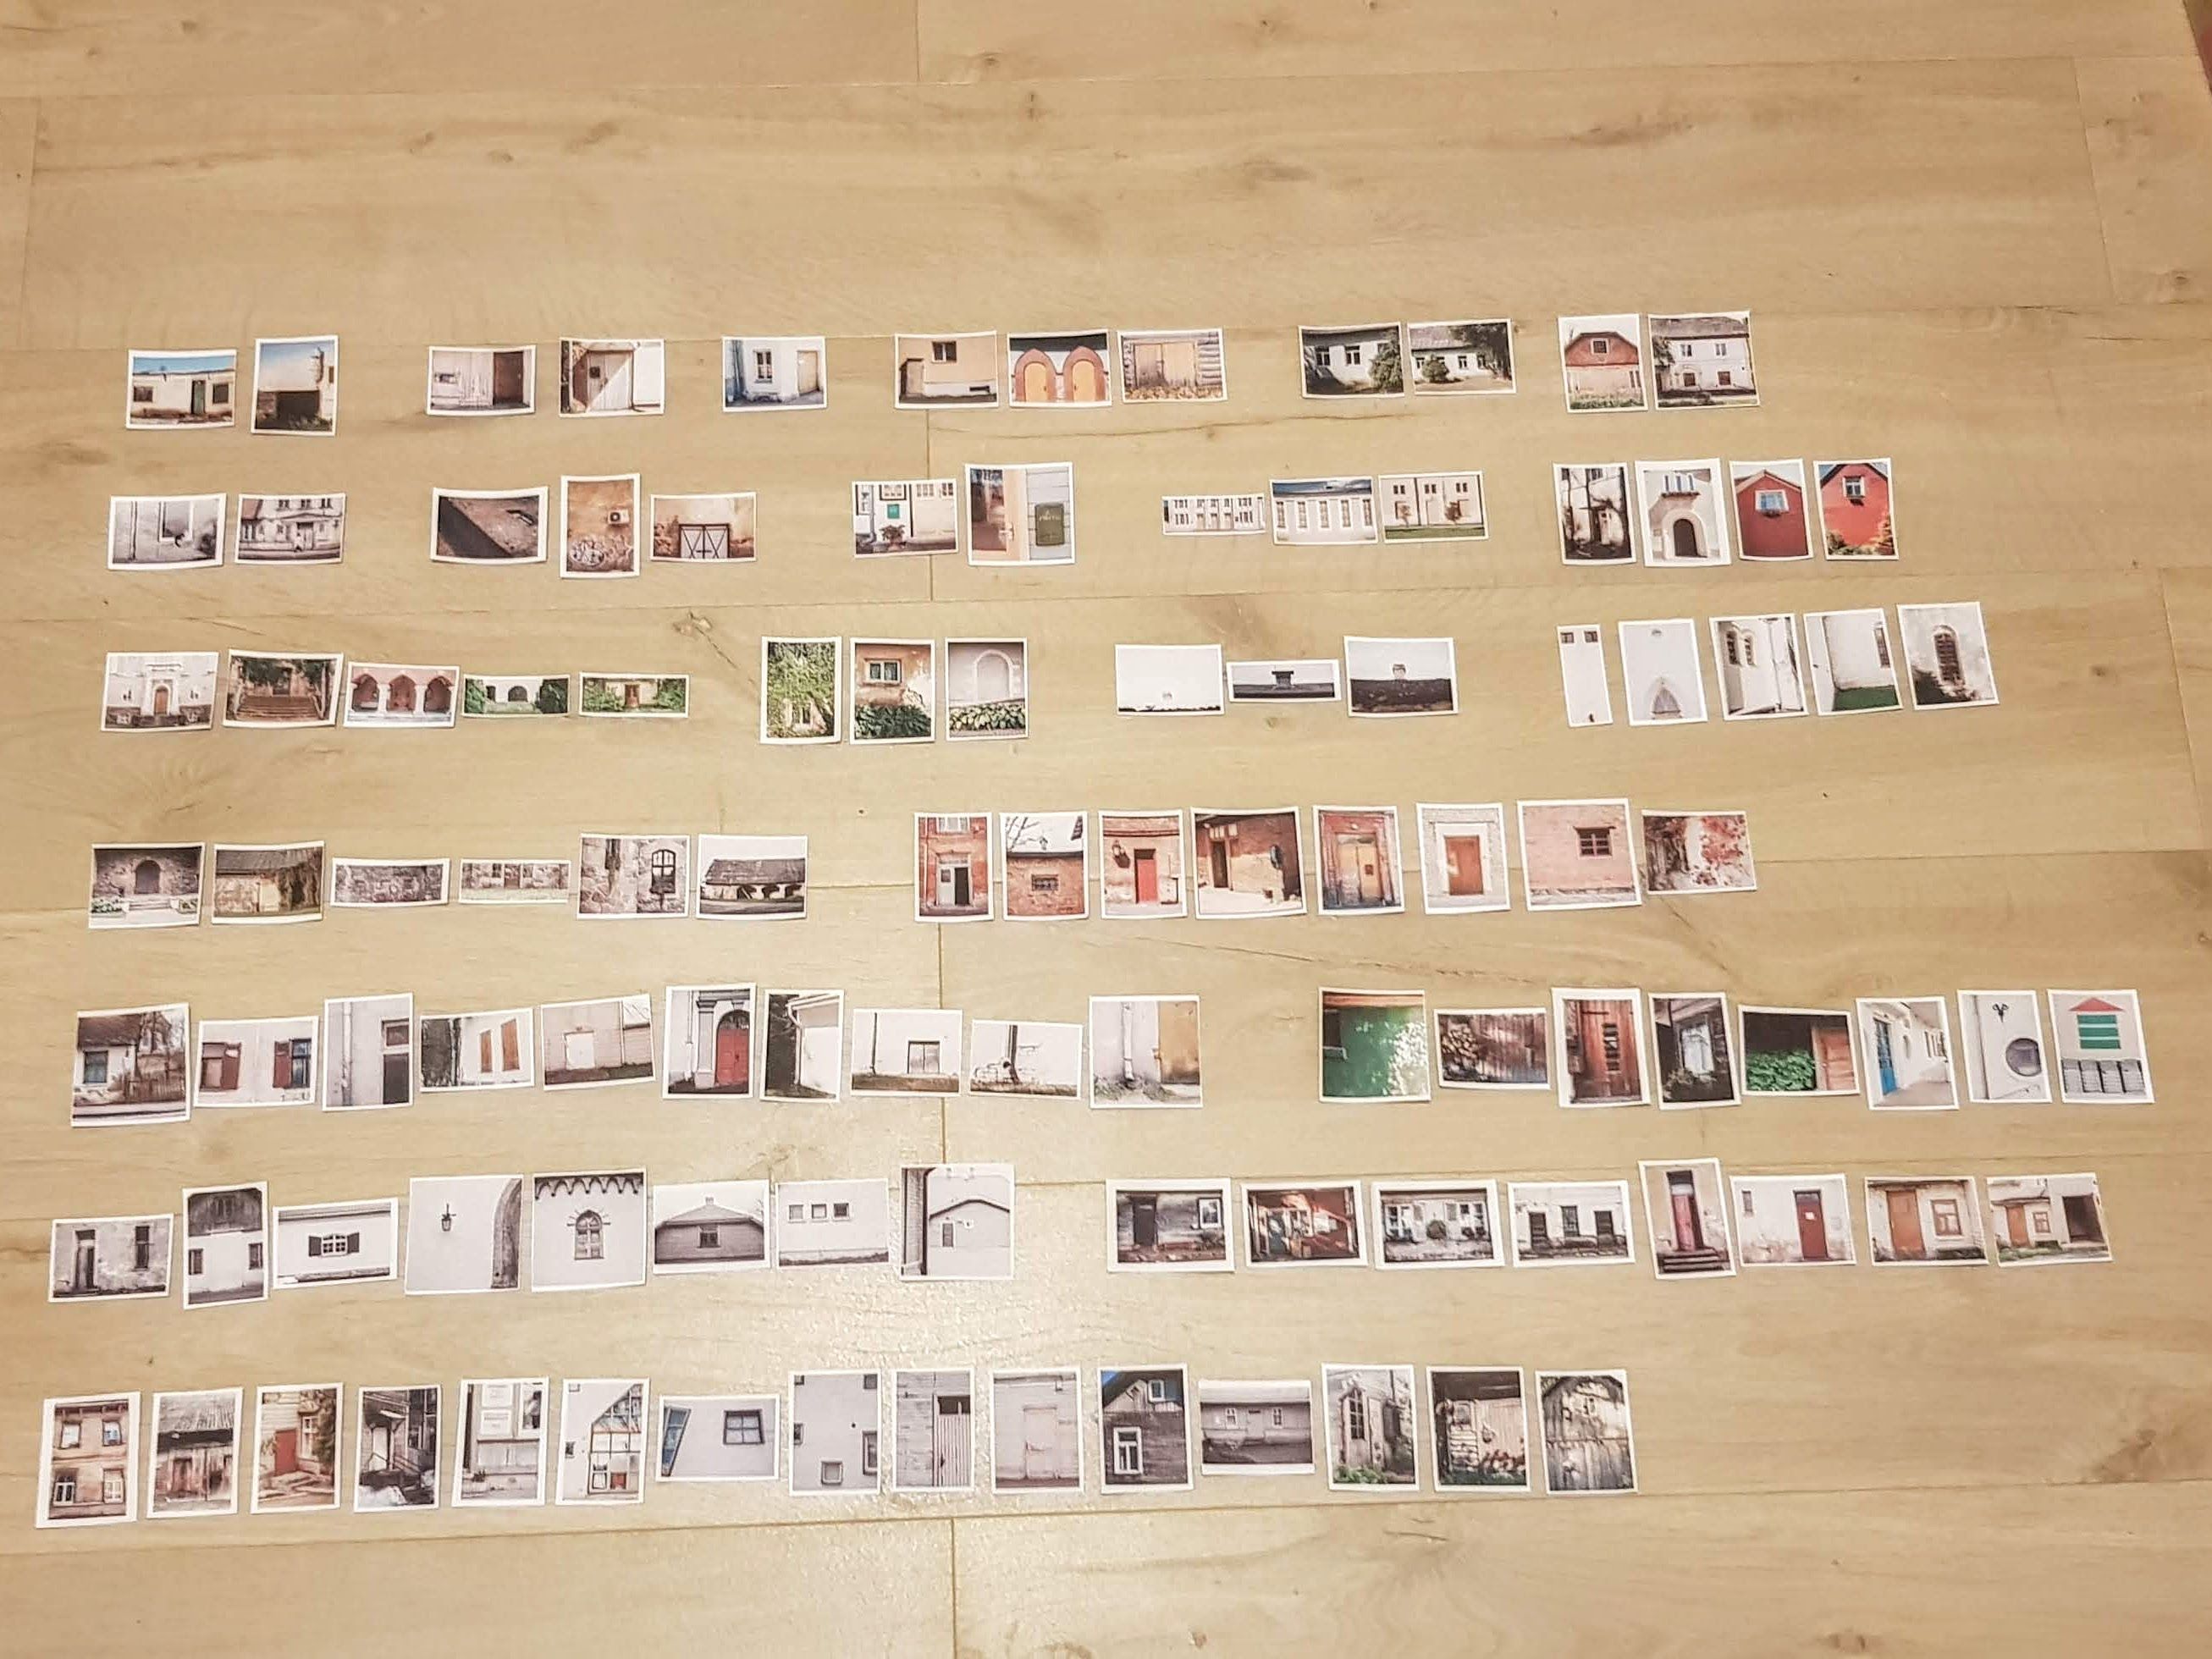
Here are my small, cute prints after the initial grouping step. There are already some casualties that didn't make it past this mark and even more photos will be removed.
As you're doing this step you are spending more time with each photo. Use that to have an idea of how you could pair certain photos. A sub-theme can have many photos in it whilst a book opening will typically contain two photos. A pair. Starting to think about this in the back of your mind will help you with the next step...
Sequencing
...which is sequencing. This is where you order the photos on how they would appear in the final Photo Book. Once again I found this to be a lot easier to do in the real world with my small, low quality prints.
Use your groupings to find pairings. See what photos flow together well. Lay the photos out in a way how they will be laid out in the final, printed Photo Book. Be creative. Not every opening needs two pictures, one on each side. An opening might have one photo. Maybe it's on the left, maybe on the right. Or it could span both sides. An opening could have 3 photos. Or 5. Or none? You don't need to have all sub-theme photos following each other. Mix it up. Throw in a curve ball! Play around with the sequencing to get your vision across and make it interesting for the viewer.
Because you've been looking at the same photos for so long, some dislike may start to appear. Use it to your advantage to remove photos that don't feel right. But don't go too hard. It's easy to start thinking that this whole thing sucks and it's not worth doing. It is worth doing!
You're building the final set in the correct order. Keep in mind your target photo count and remove photos until you get that number. It doesn't need to be exact. I removed more photos than I planned to. My final set was 93 photos out of the planned 100.
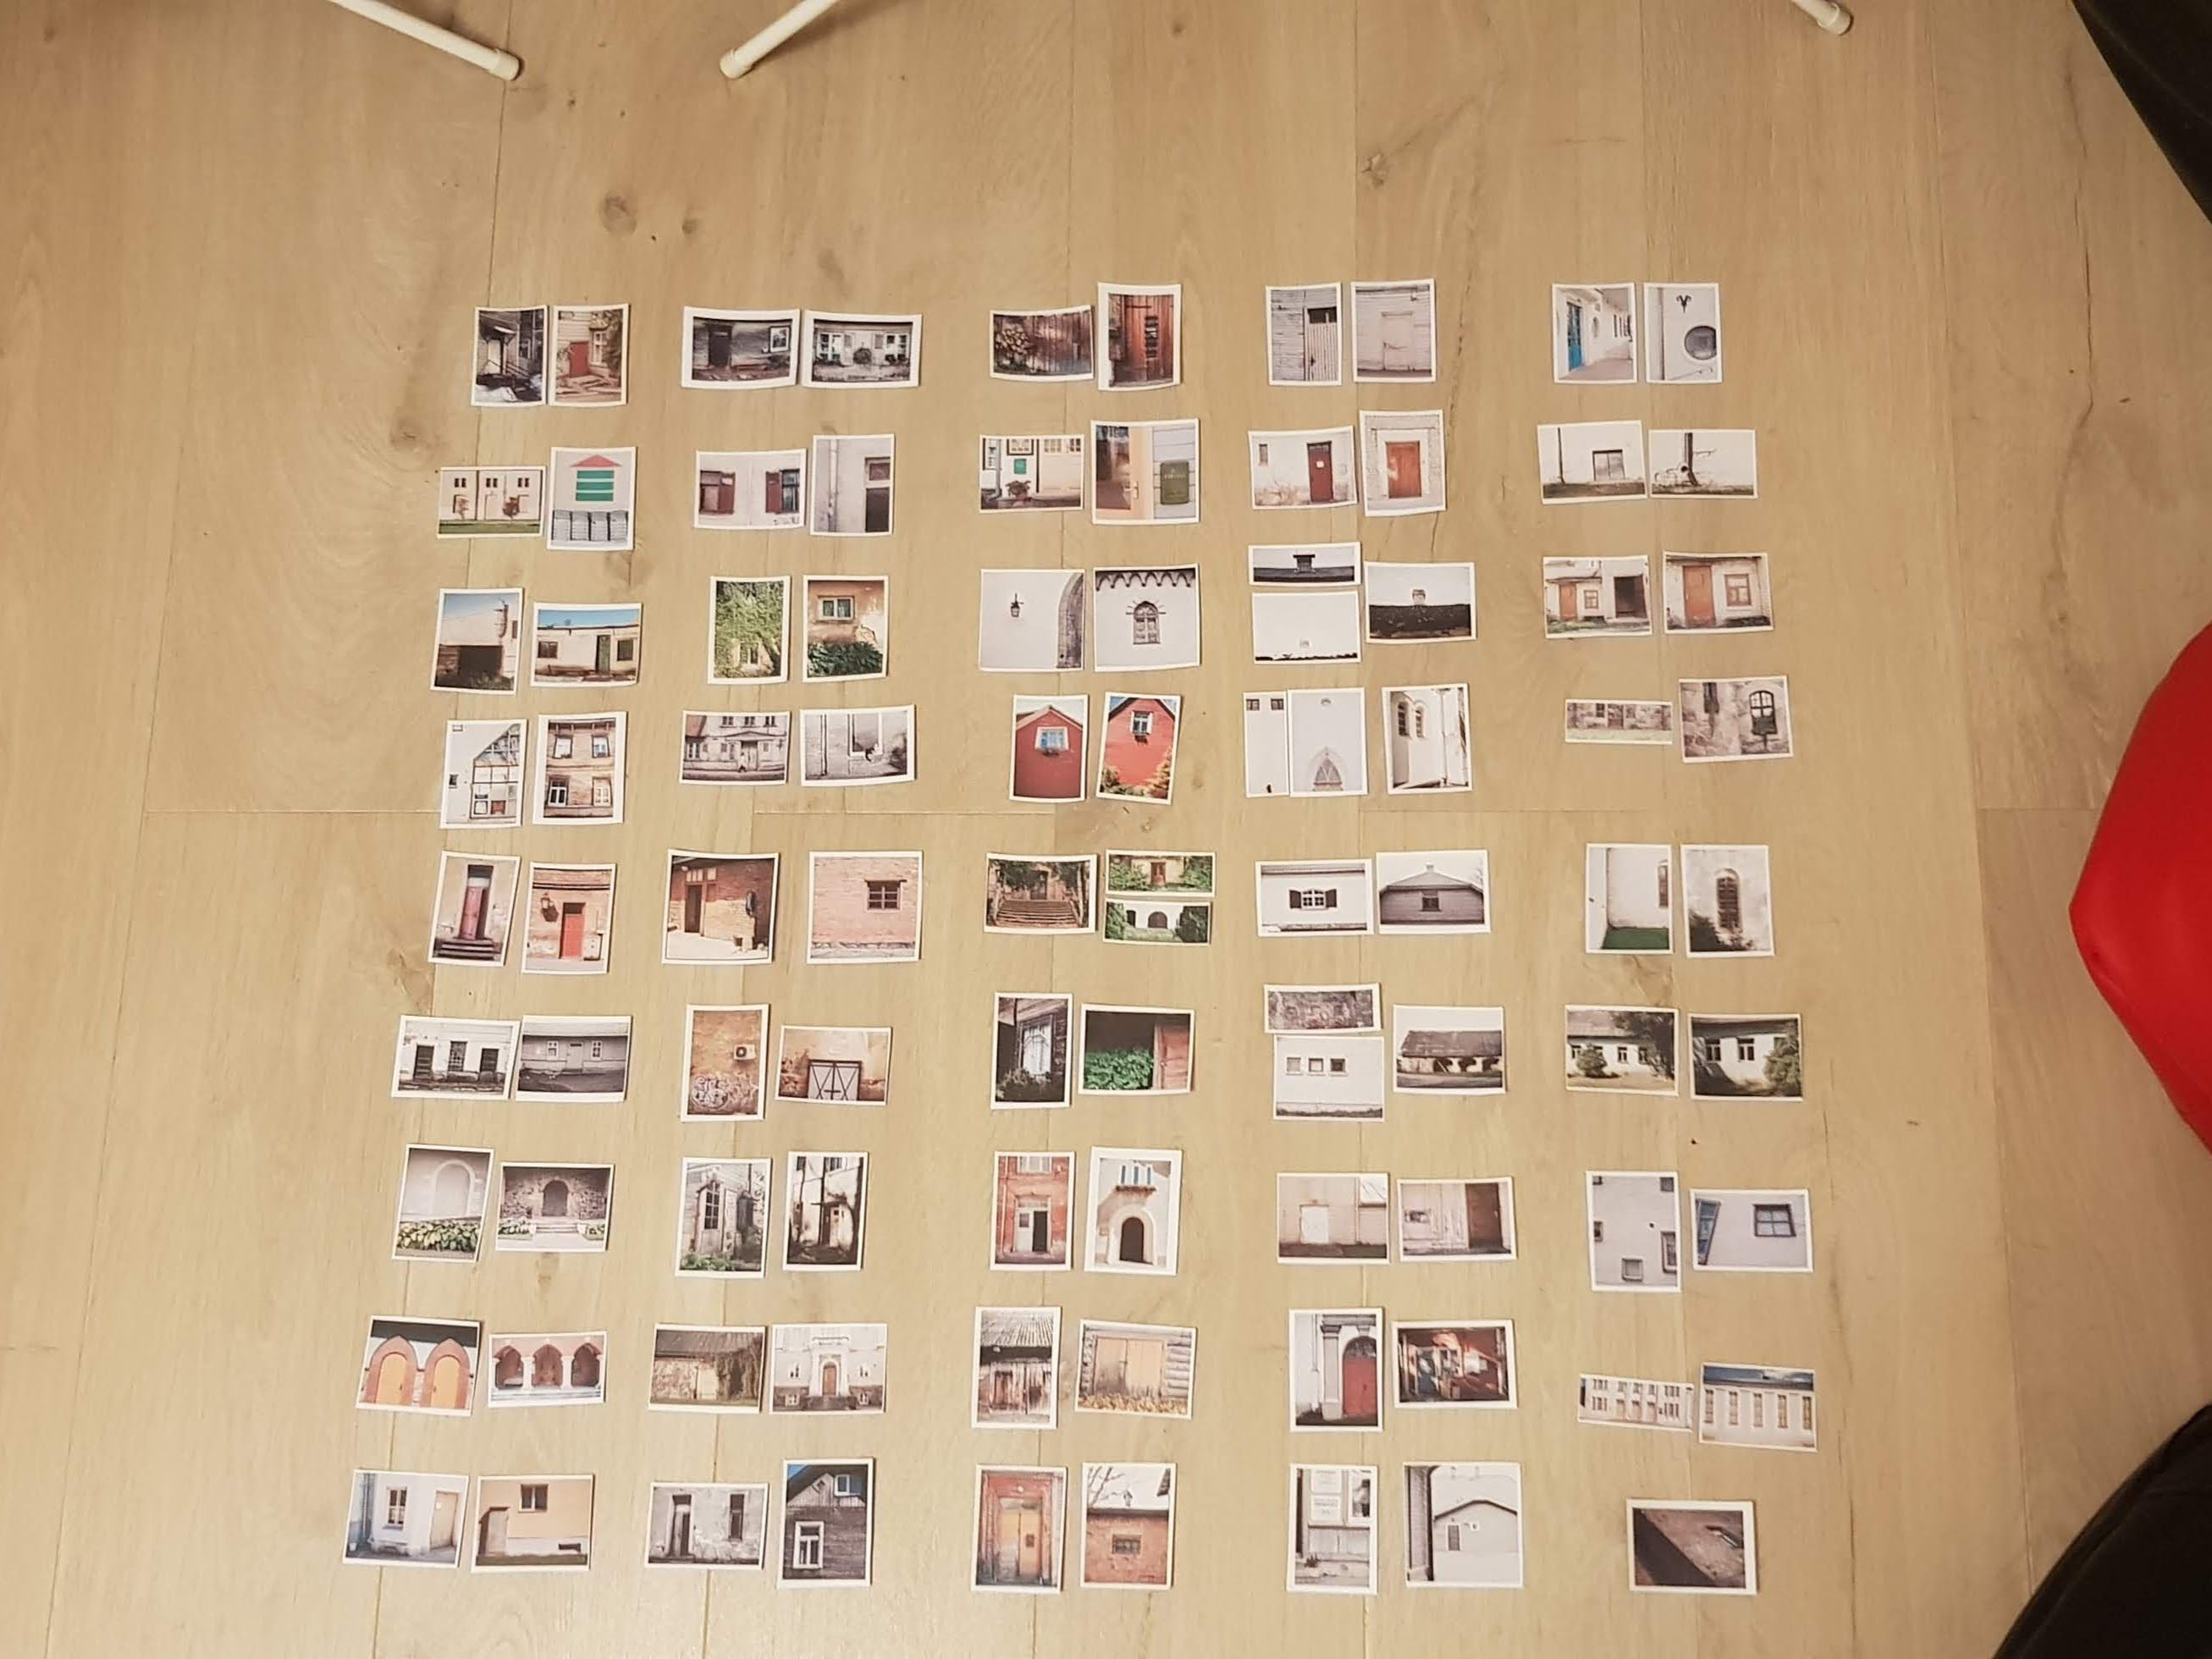
The final set of photos. Sequenced and ready to be taken to the next step.
I found this to be the hardest step. You've been looking at the same photos for so long that they all start to merge together. Plus it's hard to sequence. At least for me. Keep at it and take breaks if you have to.
Finding A Printer
With the hardest task out of the way it's time to find a place where the Photo Book will be created. There are many aspects impacting this choice. Whether you want a unique design or a simple template based layout. What size you're looking at. Quality of photo paper and actual prints. Locality.
It's easiest if you're OK with a simple templated layout and don't have insane high quality needs. If that's enough, then find the nearest business that can handle it and use them.
If you want to create your own unique design then you will have to research a bit more. You will need a place that can specify what input it expects with all the page settings like bleed. Going local is still beneficial if possible. If only because you can start building a relationship with them. And also to have cheaper and faster shipping. That being said, there are global online places that exist to serve your needs. They will usually have a more streamlined process.
I wanted my own design and I couldn't find any nearby place that would do it for me so I went with Blurb. I'm not paid by them and I haven't used any other place so don't take this as a recommendation. My plan is to still find a local place that can also do what I want but it will involve me contacting people which is not something I like to do.
Layout
Now is the time to create the layout that will be created in a real, physical book! If you went with a simple, templated approach then it's not too hard. You will likely be using a web based tool that your printer provides. There won't be an insane amount of options but that will only make things easier and faster. Since you've already done the hard work of sequencing it's just replicating the layout as close as possible to what you designed.
If you want to be kewl and unique with your cute little special design then there's more work in front of you. Especially if you also have to learn the tool that's used for creating the book. As it was in my case. I used Adobe InDesign and I had never used it before. There was a certain learning curve but you can overcome everything with enough motivation. There are other tools similar to InDesign. Like Affinity Publisher for example. I can't say which is the best tool as there probably isn't one. Plus I'm a beginner in all this so my opinion isn't worth much.
Using a tool like InDesign will definitely allow you to create a layout that is exactly what you envisaged in the Sequencing step. It just might take a while.
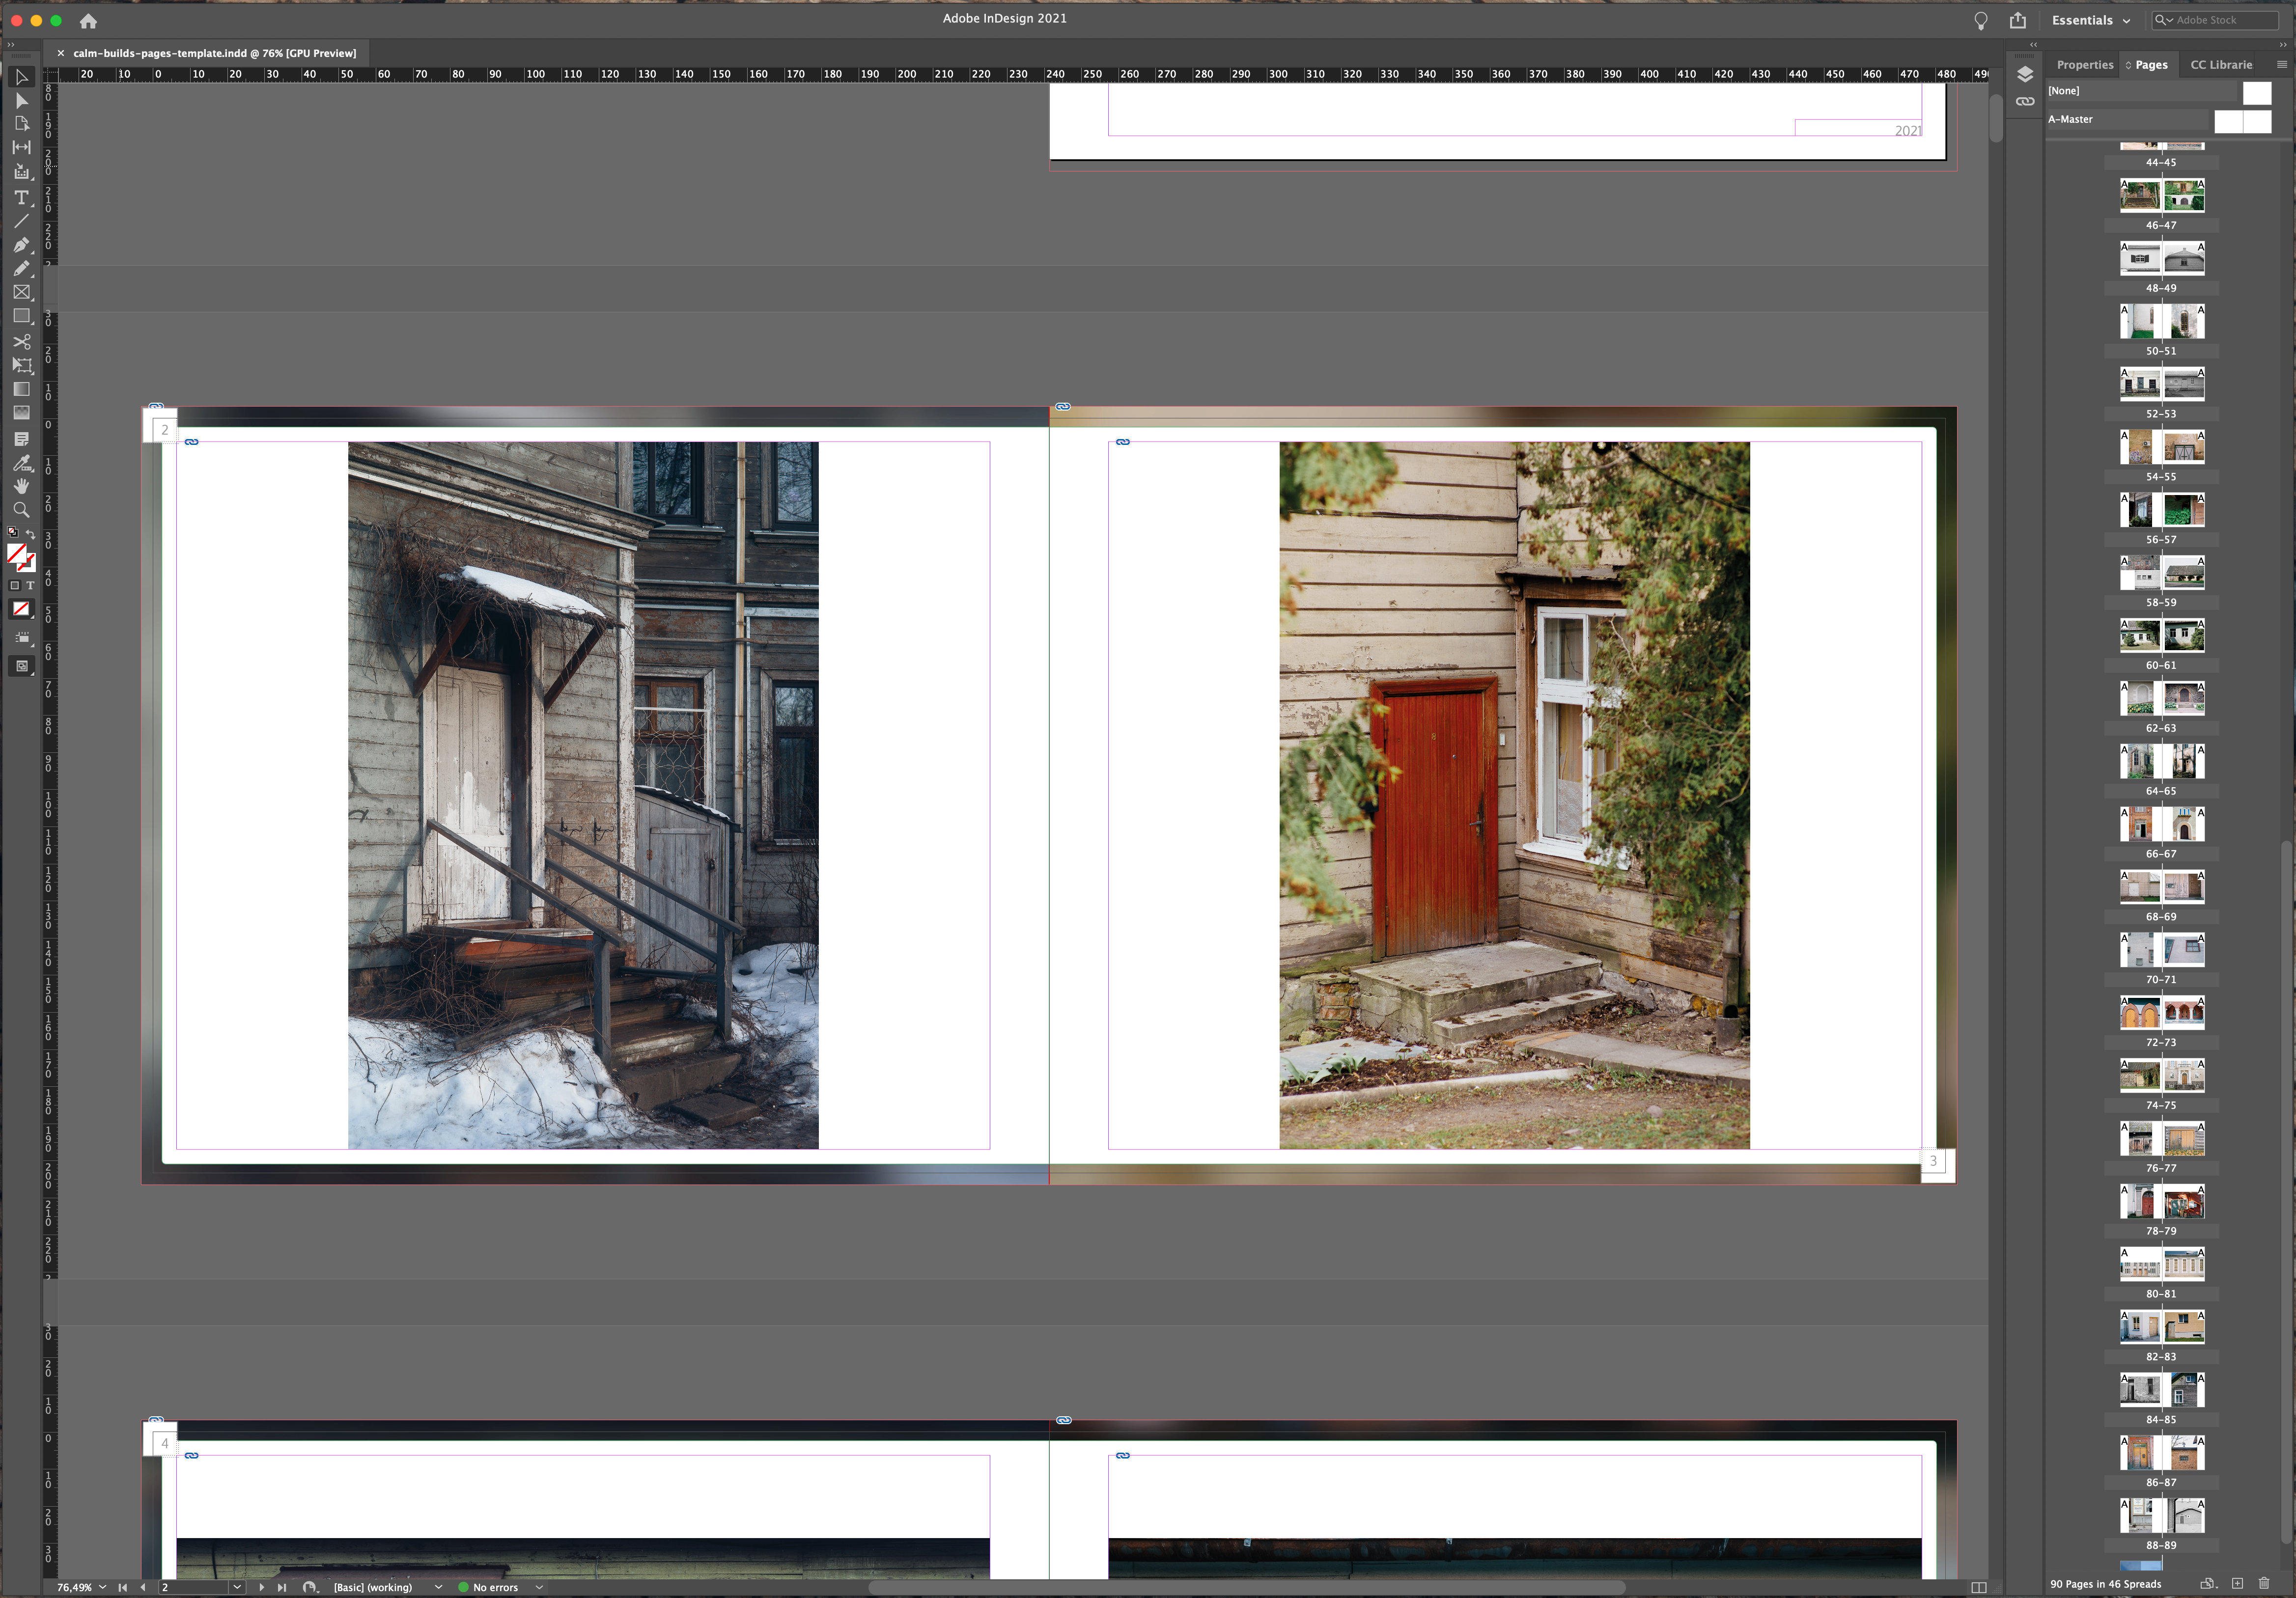
Adobe InDesign isn't the easiest tool around. But it does allow you great freedom to build what you have imagined.
With the final layout done it's time for printing. Send it to your printer and await the finished product. I recommend ordering one copy in the beginning. It's to avoid any issues that might've been overlooked. Like photos not having enough resolution or color spaces being all wrong. Having one copy with errors is better than having 5 or 500.
Lastly, just enjoy what you've created. As you're holding the final Photo Book in your hands, it will feel like it was worth it. It was. And you will want to print more things. So go and do it.
I am very happy with the final result. The colors look exactly as I expected them to look which was my main worry. Photos are crisp and detailed. Very nice.
The only disappointment is with the cover. I don't like my design too much. Mainly for the text part. I rushed it too soon and it will need an iteration to improve it.
I will write a separate writing just about my Photo Book some time later.