Mamiya C System Review Part 1: Mamiya C220

Mamiya C220 camera. Not much to look at - especially without a lens. Also my copy is not in mint condition.
This is the first entry in a series of reviews regarding the Mamiya C system. Plan is to make several reviews where each focuses on a specific item from the Mamiya C system.
Quick Words About The System
Mamiya C system is a series of medium format 6x6 TLR ( Twin Lens Reflex ) cameras, lenses and other accessories.
What makes the system interesting and special is the possibility to change lenses and other accessories which is not typical of other TLR cameras. It's similar to a modular camera system ( like your Bronica SQ or Mamiya RB67 ) albeit not as flexible.
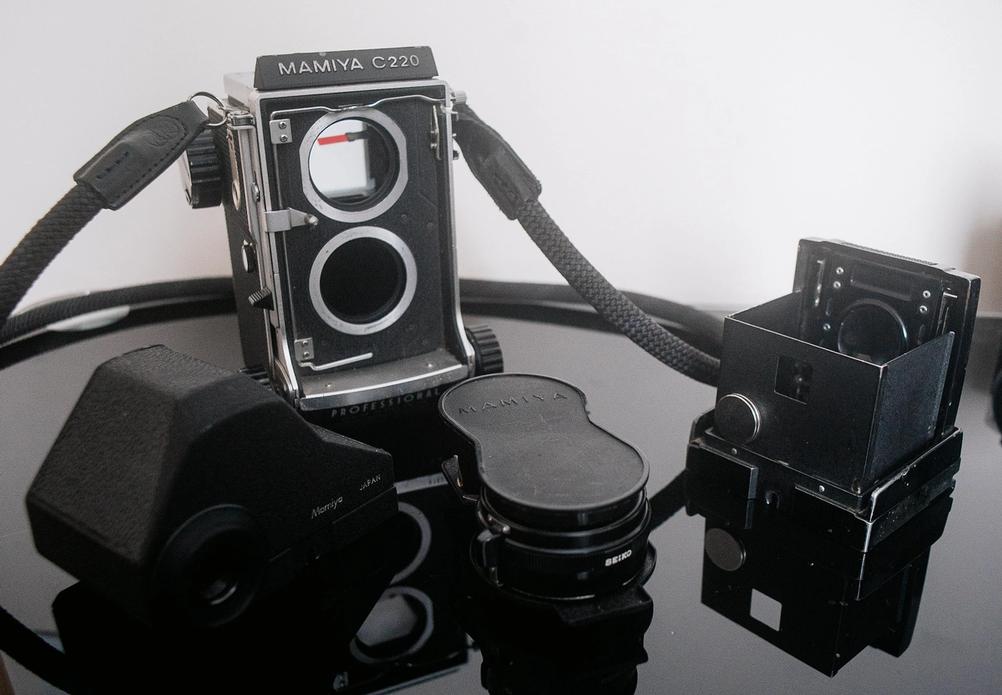
Disassembled Mamiya C system. Body, two viewfinders and a lens. Not a typical sight for TLR cameras.
Slow Words About The Camera
Be warned that the Mamiya C220 is my first TLR. It’s also my first 6x6 camera. It’s also my first medium format camera. Since writing this review I have shot other medium format cameras. I have also reviewed other medium format cameras.
I got my C220 from GAS relief central itself - Ebay - together with a Mamiya Sekor 80mm f2.8 lens and a prism finder. It's not in a mint condition, but I don't value mint condition things as sooner or later I would un-mint them anyway.
Although I will include some images taken with this camera - remember that lens ( and film ) is responsible for how the image looks. Analog camera is just a box that allows lens attachment and has some controls that enable the picture taking process. Having a cheaper or more expensive camera from this system and keeping the same lens would yield the same image at the end.
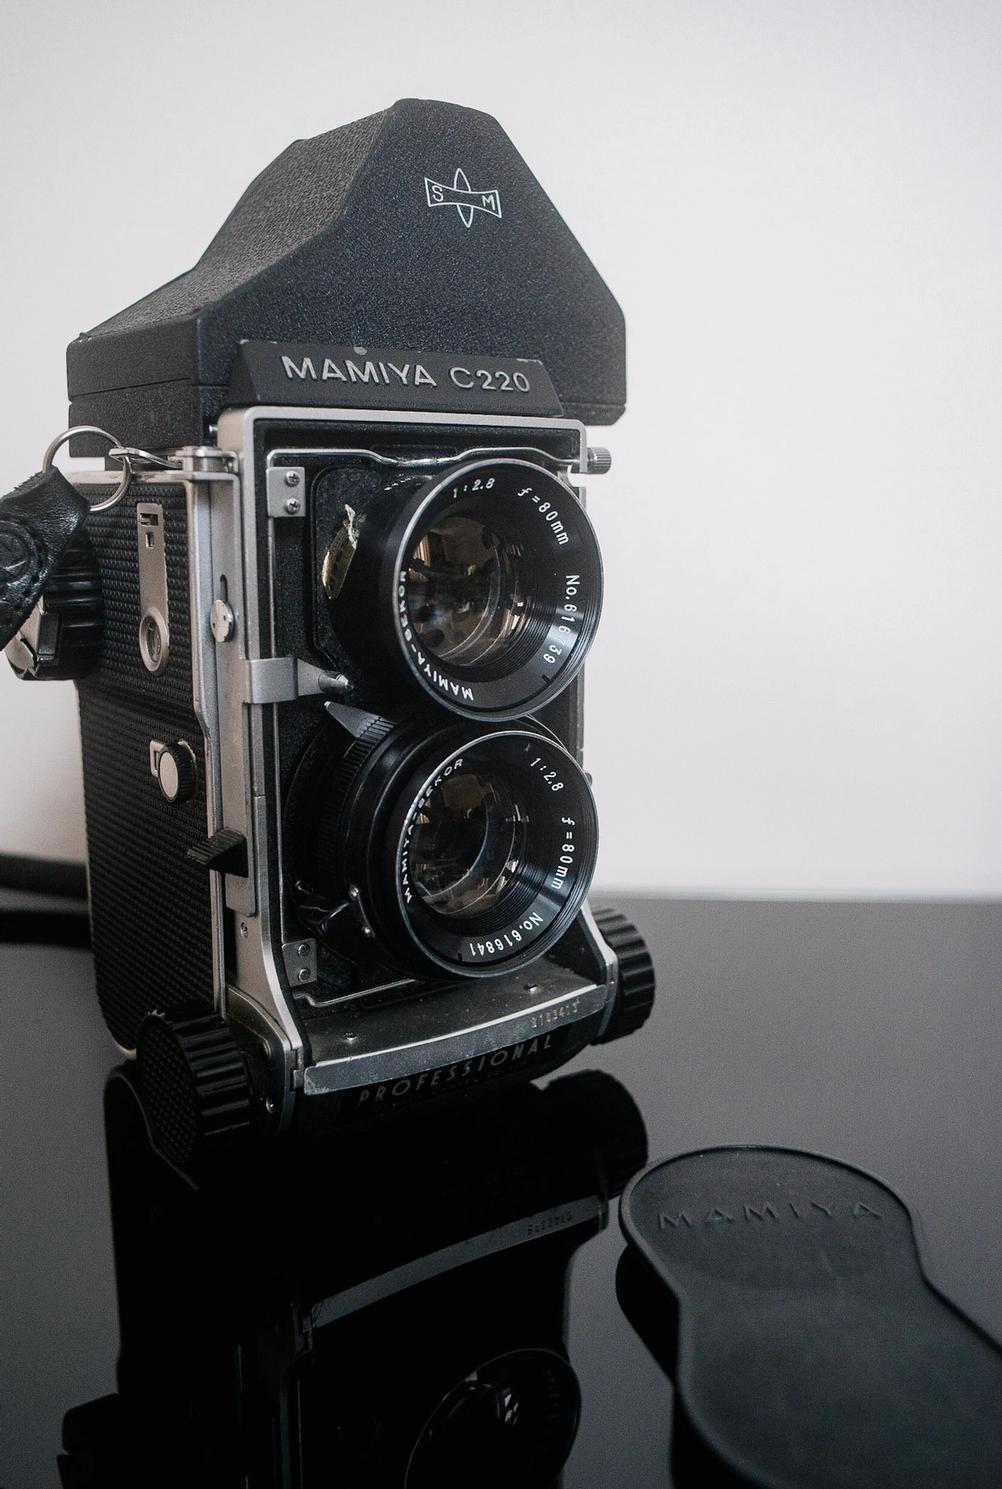
This is the kit I got. The prism viewfinder definitely makes the already big package quite a lot bigger. Other than that it looks nice.
With that out of the way - let’s talk about the camera.
Aesthetics
It’s a nice looking camera. TLRs tend to look similar and from afar it does look like your average TLR. It’s not particularly small although C220 is one of the smallest in the series.
If you must have the prettiest camera to take pictures then maybe something like Rolleiflex will appeal better but I'm happy with how C220 looks ( but I won't lie that I would not say "no" to a Rolleiflex ).
Build Quality
The camera is solidly built and feels hefty and stable. Almost no part seems flimsy or bad - apart from:
- Film advance dial that can feel too light and plasticy. But it is ultimately saved by the super satisfying clicking sound when you’re advancing the film. Flimsy feel replaced by the amazing clicking feedback you hear and feel through your fingers.
- Shutter release button / lever that is a bit rattly and doesn’t have the best feel. C220 is a simple camera so shutter release just moves a thing on the lens but I wish it felt more solid to use.
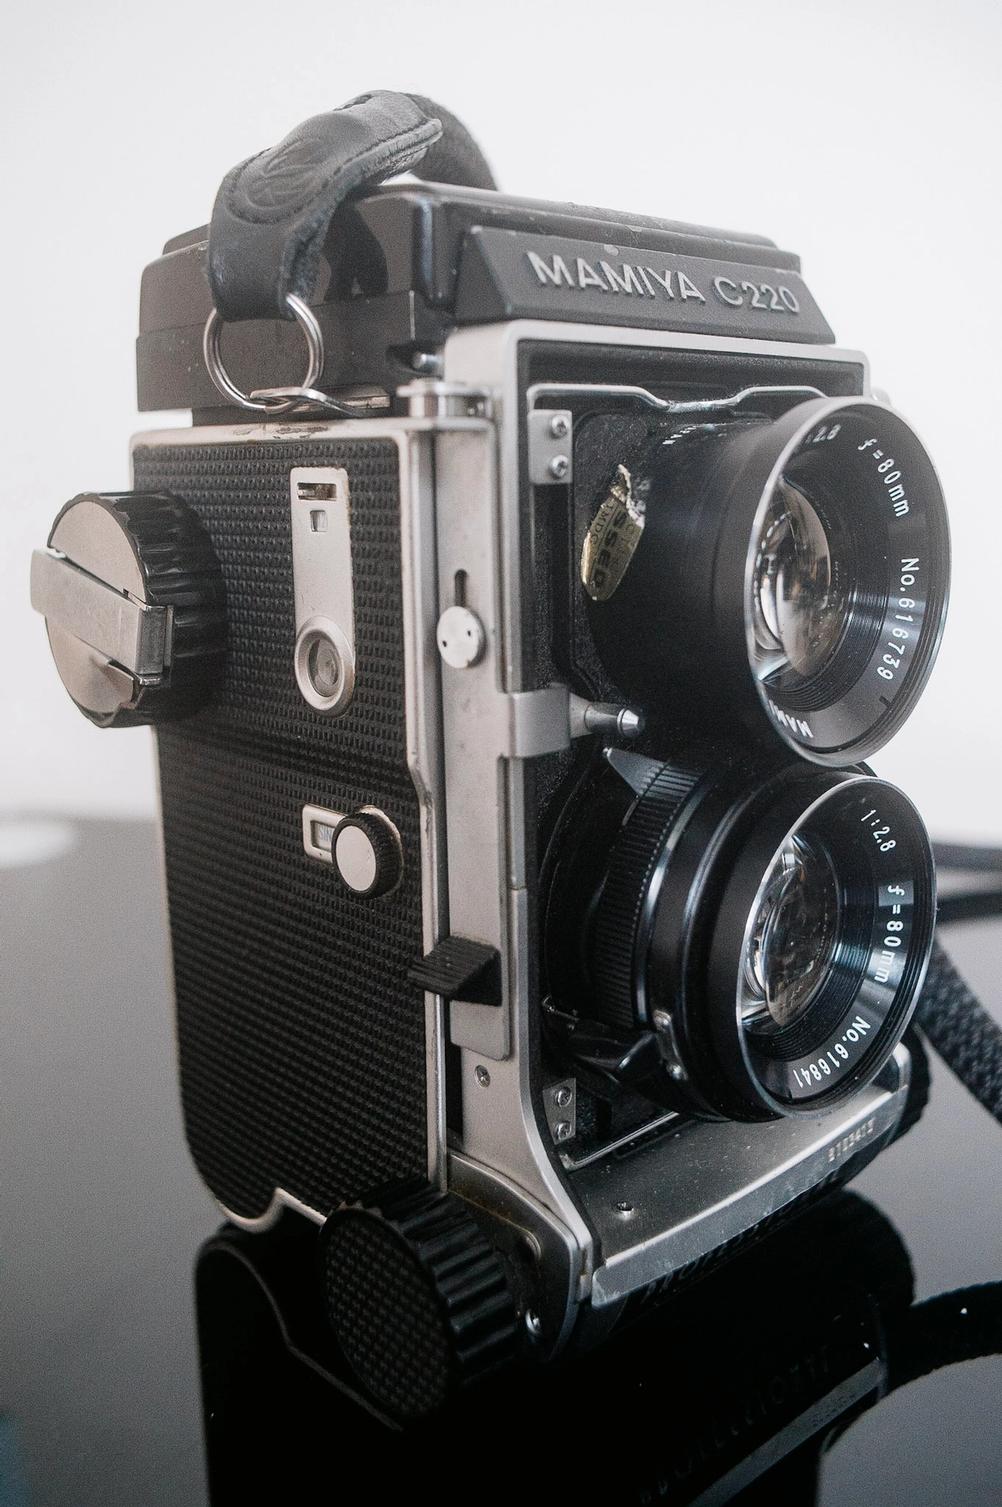
Here's the film advance "knob" and shutter release "button".
Film advance knob is the weird growth looking like thing with a dent on the left of this picture. Rotate it and film advances. Magical.
Shutter release button is on the same side. You press on the black plastic bit that moves the whole metal bit that ultimately triggers the lever on the lens. Amazing engineering.
Outside of those two things - nothing rattles. Nothing breaks off. Nothing feels like cheap plastic. The back door shuts super tightly and doesn’t budge if you try to move it without activating the release. It might even be slightly too solid as you have to apply quite a bit of pressure to get it closed but I prefer that over rattling doors all day everyday!
Lens removal lock toggle and pressure thing feels like you’re operating a heavy lever which is also great.
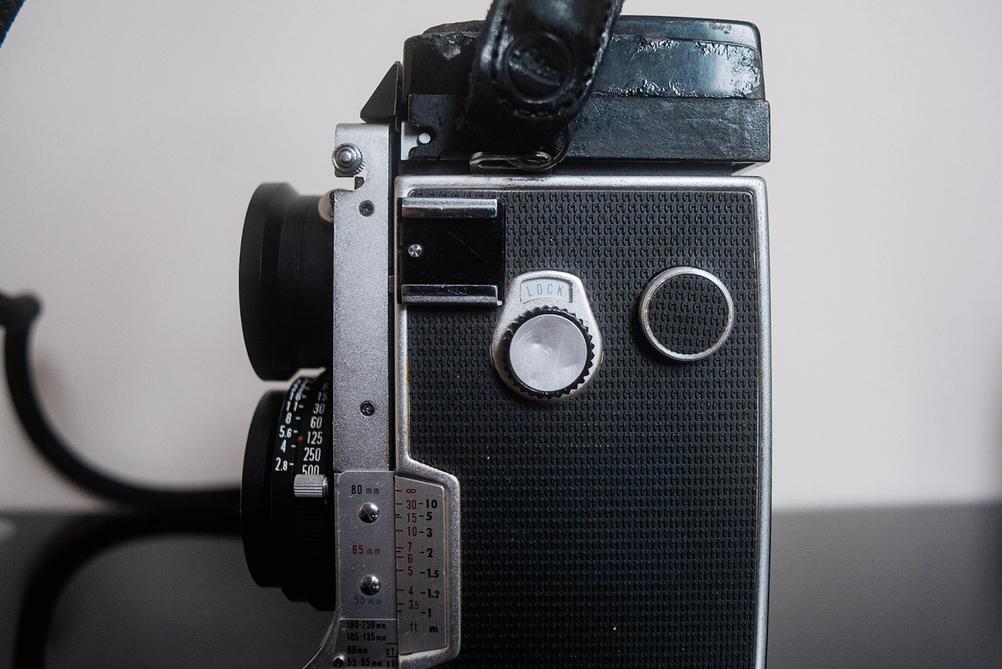
Here are the controls needed for lens removal.
First you move the lock toggle to make it say "Unlock".
Then you move to the lever and pull it slightly down and open it like a gate. The lens falls out. You catch it before it hits the ground and lens is off.
The controls themselves have a good kind of heavy feel to them. Like you're operating a tractor. Everything is well lubricated but kind of heavy.
Ultimately the build quality is very good and feels satisfying in the hands. It’s not quite Leica levels but also not too far off. Well above average.
Film Loading / Unloading
C220 was my first camera to try and load 120 film into - and it went super well. It’s super easy to do in this camera. Film exists in a flat plane and doesn't need to bend over corners. It's also close enough together to make it easy to apply slight pressure when attaching the film starter end to the spool.
Fresh film goes on the bottom spool and film / backing paper is stretched to the top spool. Spool it in until the marking on the film matches the marking on the camera and close the door. Then just crank the film advance dial until it stops and you’re good to go. You don’t have to try to read any film numbers through dim windows on the back or judge it on feel. You only need to crank the advance dial and enjoy the clicking sounds made by angels.
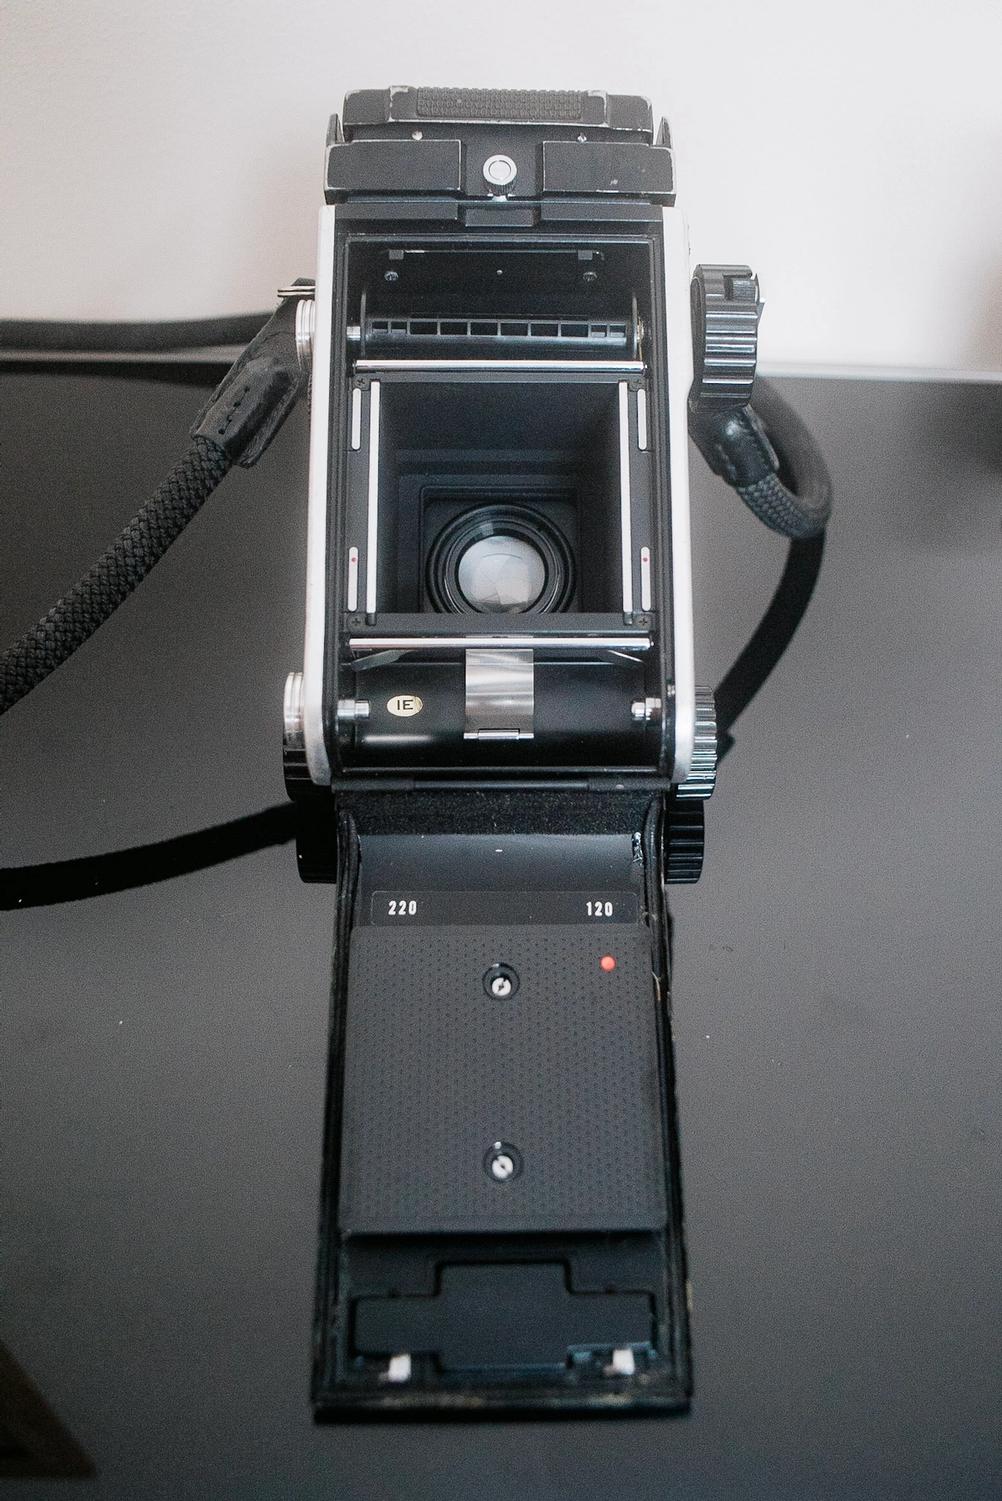
Back of the C220.
The top spool is in place. It's the spool that will continue the finished roll. Fresh roll goes to the bottom and at the end of the roll it will be just the spool. Also check out that marvellous opening.
You can also tell the camera whether you're using 120 or 220 film. The choice is also shown when back is closed.
The shiny, circular metal thing on the closed back is used to open the back. Rotate it clockwise and then pull it to the right and back will open. When back is closed rotate it anti-clockwise to avoid accidental back openings ( although even without that it would be difficult to accidentally open ).
After film is finished - crank the dial once again until you feel the film releasing from the bottom spool and do a few more cranks. Or you know - just crank for 30 seconds ( to have some enjoyable time with your clicky friend ). Open the back and release the top spool which now contains your film. It's released by pulling one of the pins. Spool will pop up on one side to make it easier to pull out. The bottom spool sadly doesn’t do that ( at least on my camera ) so you have to jam your fingers / fingernails in there to get it out but it’s not a big deal.
I can only give top marks for film loading and unloading. It feels very easy and intuitive.
Shooting Process
First you crank the film advance dial. It’s about one full turn and it stops when the film has advanced to the correct distance. C220 won’t automatically cock the shutter so you have to do it yourself. It’s not hard and nothing bad happens if you forget. You will just find out that you can’t take the photo. Worst case is that you will miss some potentially awesome moment.
Shutter speed and aperture is on the lens so I won't cover it much here since this review is for the camera itself. I can only say that it feels natural and doesn't cause any confusion.
Focussing is done through the camera and not the lens. It’s somewhat unique in a sense that it’s a bellows camera. The lens doesn’t have any moving parts - you move the actual lens forwards and backwards to focus. This allows for very close focussing if you like that sort of thing.
If you do focus very closely you will have to adjust your exposure. More extended the bellows the more light the camera will require. There are markings on the side of the focussing system that informs you by how much the exposure should be adjusted ( e.g. half a stop or a full stop ). You can't see that whilst looking at the viewfinder but because macro photography is typically a slow process it shouldn't cause too many issues and in time you would get used to the adjustments needed based on the distance you are at.
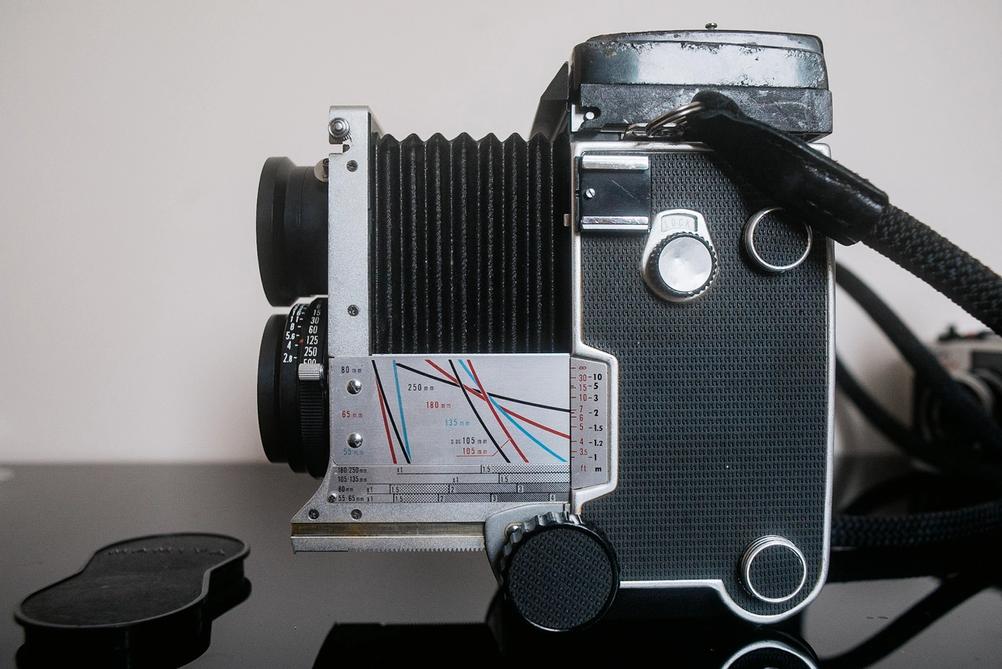
Extended bellows in all their glory.
The shaded x1, 1.5, etc... markings tell what light adjustment you should make based on the extended level for each lens.
You can also see the distance marks for each lens.
It might not be the easiest chart to read at first but once you understand what is what it all makes sense.
You can also see the shutter cocking lever on the lens next to the "500" lettering.
To focus you turn a rotating knob that appears on the bottom of the camera on each side. Rotate it forwards to focus closer and backwards to focus further. It’s worth noting that infinity may not be where the focussing locks - it will depend on what lens you’re using. It means that you should check focus through viewfinder even if you want to focus on infinity.
You can also do scale focussing as there are scale markings in the same place where the exposure adjustment marks are. It has markings for all lenses and you have to read the marking for the lens you're using so it's not as easy as what you would be used from rangefinder lenses for example. There's also no hyperfocal distance scale.
I would classify focusing as quite sensitive. You only have to rotate the knob very little to change the focus by quite a lot. For example infinity to less than meter in front of you takes about ¾ of full rotation. It may not seem small but to nail focus you’re really trying to rotate very little. I would’ve preferred a longer focus throw but it’s still very usable.
To check focus you use a viewfinder ( no way! ). My camera originally came with a prism viewfinder which means that focussing is pretty much like on a SLR. I also have a waist level viewfinder which I prefer as it has a magnifier and makes the camera smaller. Waist level finder is mirrored so the brain will break the first few times ( or years ). I will look more into viewfinders some other time. Suffice it to say that there are several including ones with light meters.
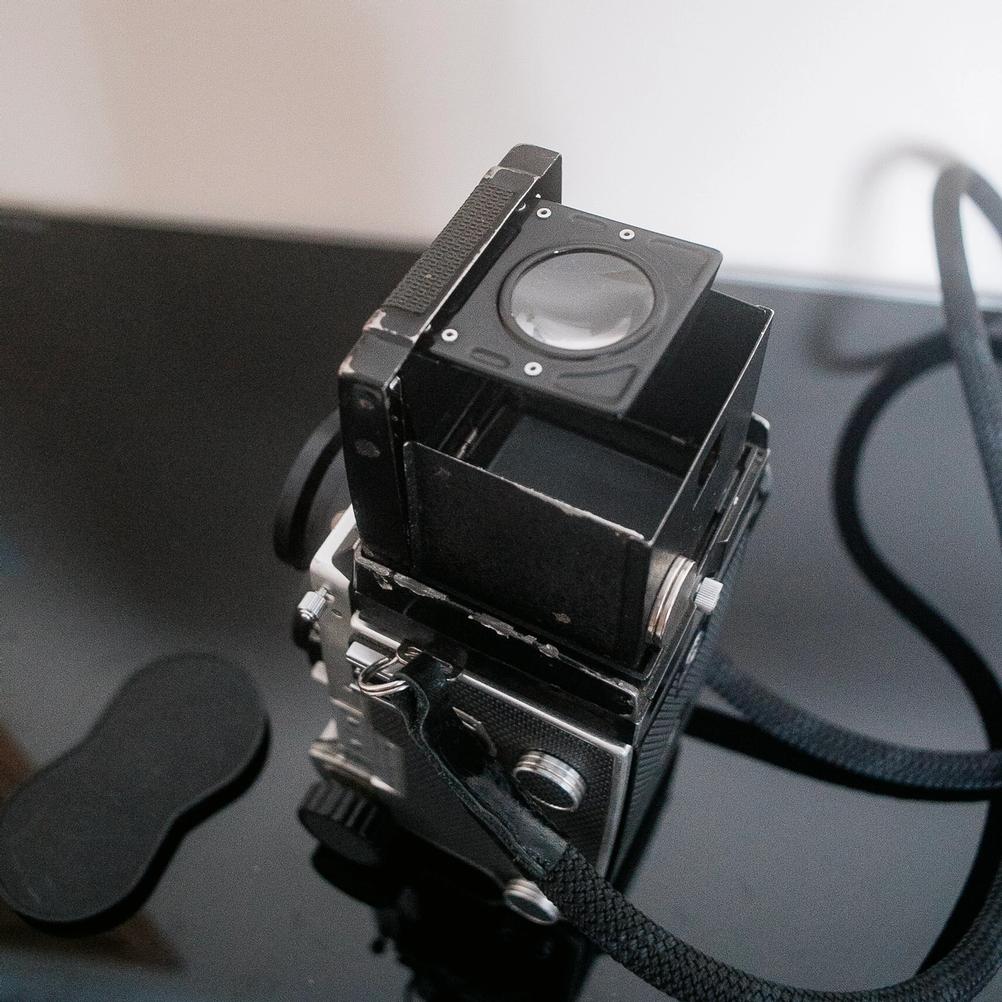
Extended waist level viewfinder. Mine is in pretty poor quality as the camera it comes from appears to have survived some sort of flood but after some TLC it works fine. Just doesn't look the best.
I like the magnifier. Allows to ensure the focus.
The ground glass is moderately bright so it’s easy to focus. Keep in mind that I haven’t used other TLRs ( or medium format cameras with ground glass ) so my view on this can be biased. I prefer rangefinders but it definitely seems easier than SLR - especially with the built in magnifier on the waist level viewfinder.
Once you have advanced the film, cocked the shutter, set exposure time and aperture, framed and focussed - you’re ready to take the shot.
This can be done via a shutter release button on the right of the camera. It’s not a button - it’s more like a lever you push. With a prism viewfinder and eye next to the camera I find it quite comfortable to trigger. With waist level viewfinder I find it a bit awkward. Maybe it’s because I’m not used to waist level viewfinders but it seems like my hands are in a weird position to trigger the release so I’m stretching my fingers and palms which worries me as that causes more camera shake. I would’ve preferred a more generic shutter release button but because the camera is quite simple and it needs to trigger a lever on the lens - I guess they didn’t have many options.
Now you have taken a photo and you can repeat the whole process 12 times ( that’s how many shots you’ll have on a 120 film ). The camera will support 220 film as well but since you can’t really get it these days 120 film is what you will be using most likely.
Biggest issue with the shooting process is really just the size of the camera. It's big. It either needs to live in a bag - but then it's annoying to take it out when taking a photo and then putting it back in. Or it can live on a strap around your neck. It's not light but it's not the weight that bothers me - it's the shaking around my chest area and because I'm pretty much always together with my kids - it's not easy.
Focussing Issues
Sadly my camera came with an annoying issue. An issue where taking lens and viewing lens didn’t agree on where the focus is. Where it looked like it’s in focus through the viewing lens ( viewfinder ) - it was actually front focussed through taking lens ( film ).
This caused about half if not more of my pictures to be out of focus on my first 4 films taken with this camera which was quite annoying. Why 4? Because whilst I was waiting for the scanner to arrive I shot and developed 4 rolls of 120 film. The focusing issue wasn’t severe enough to be visible on the negative ( and I didn’t check with a loupe / magnifier ) so I only found out about it when scanning the film.
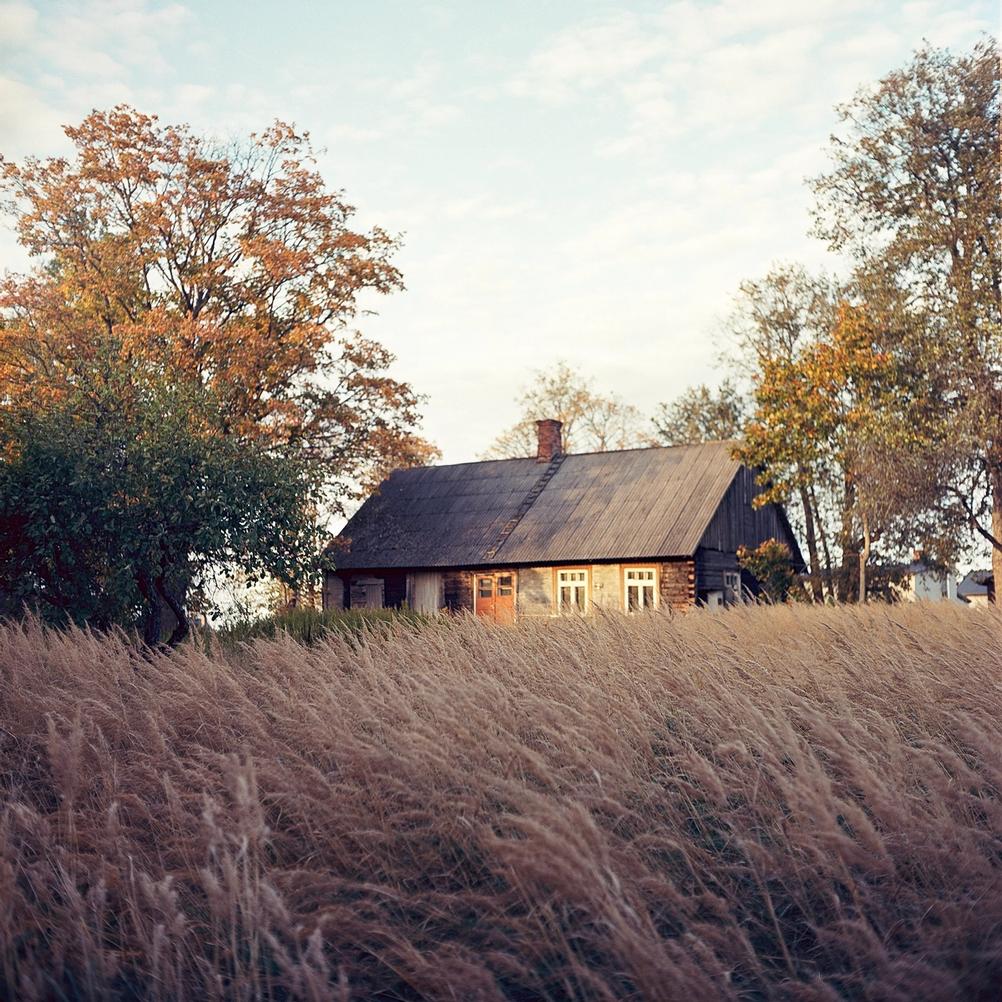
Example image where focus is not where I wanted it to be. In the viewfinder I focussed on the house but as you can see - the focus is quite a bit closer.
It doesn't completely ruin the picture but you can imagine that in majority of cases you actually want to focus accurately.
This was shot on Kodak Ektar 100 film.
The most likely cause for this is that the viewing ground glass is incorrectly spaced. In my case it needed to be slightly higher. I made some spacer shims from a CD jewel case ( that’s the best that I could come up with ) and the thickness of it seemed to be almost perfect.
You can check the focus by focussing through the viewfinder and then placing another ground glass where the film would be to see what’s in focus there. I didn’t have a big enough ground glass initially so the fact that the CD jewel case was the right thickness was a lucky coincidence.
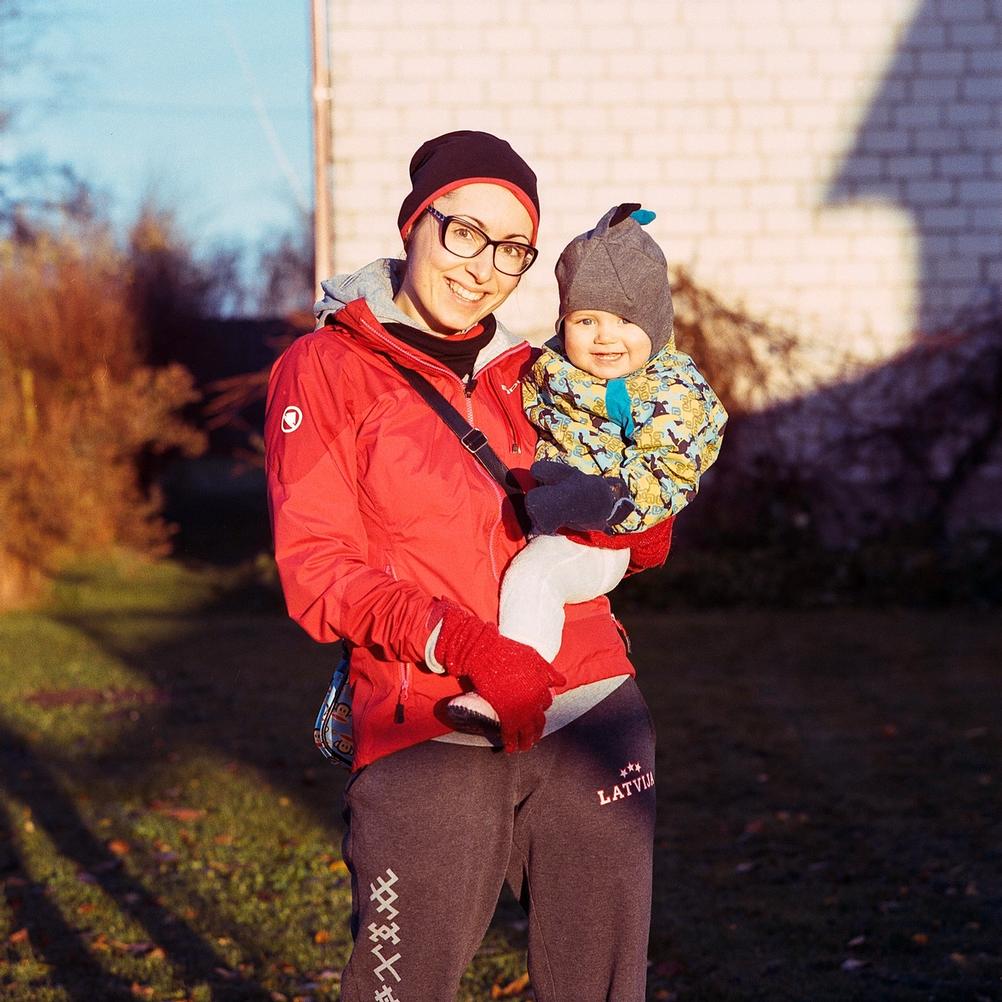
Focus is where I want it to be ( in case you thought that I wanted the house in focus ).
This is even taken with a longer lens making the depth of field smaller so I'm quite sure that focussing issues are now dealt with.
Taken on Lomography Color Negative 400 film.
I’m still not 100% sure that the focus is fully correct but it seems to be roughly there. I will try to tweak it a bit more as I bought a broken Mamiya C33 camera ( I bought it to get a waist level viewfinder as it was easier and cheaper this way than to get it separately ) which has some spare parts that I can use.
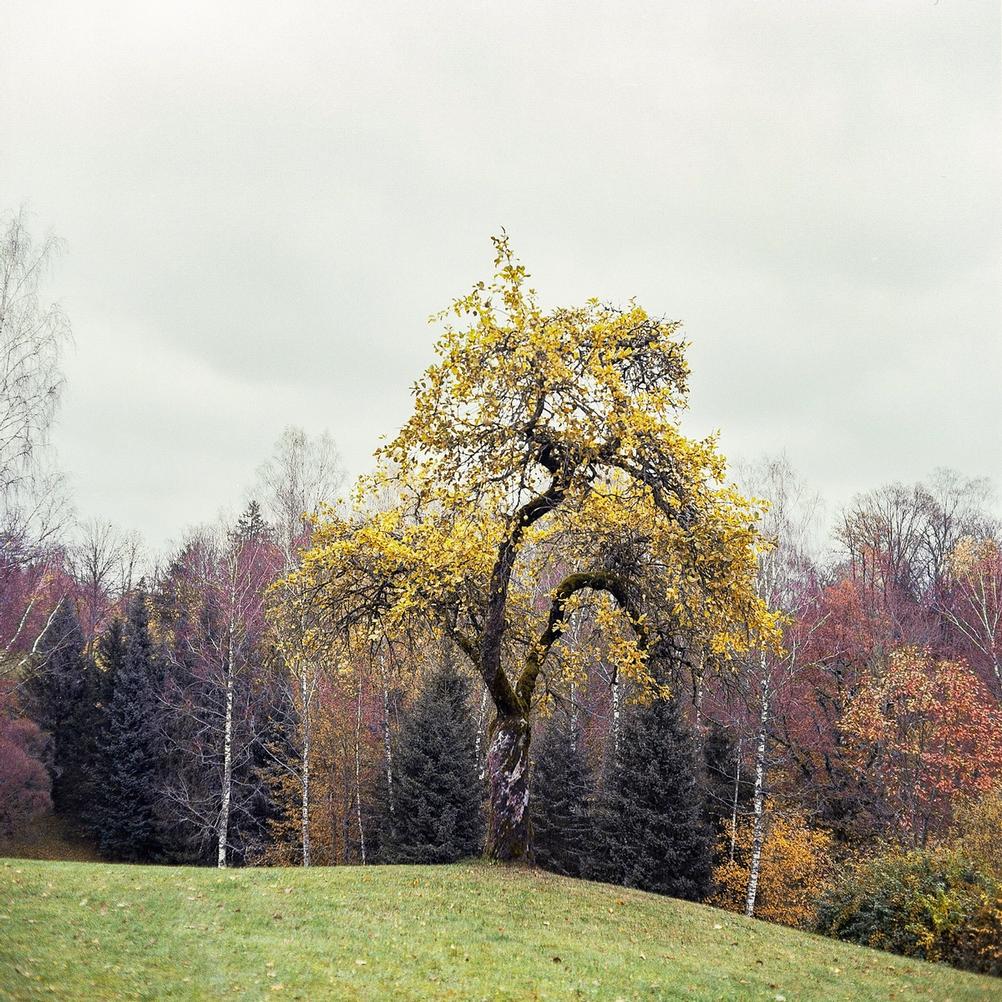
But then there's shots like this which ware taken after the "fix" but I'm not quite sure that focus is right. I definitely wanted to focus on the tree but it almost seems like the background is more in focus. Or maybe I'm going mad.
Taken on Lomography Color Negative 400 film.
Anyway whilst searching on what could be the cause of my issue it seemed like this is a pretty common issue for these cameras so be vary if you get one. Ideally test with ground glass and a test roll.
There are other potential causes for the issue I was having ( like warped lens board ) but they are much rarer.
Overall Score
I like the camera. The build quality is nice. Ergonomically it’s not the greatest but it’s usable although will take some time to get fully used to.
Focussing issue is quite annoying as you expect optical viewfinder to not lie to you but this is what sometimes happens with older cameras. I wouldn’t let that discourage you from getting this camera necessarily. It did however make me not want to shoot this camera. After fixing the issue and trying some other lenses - I really enjoy this camera again.
Biggest issue for me is the size. I don't take it with me anymore if I'm travelling with two small children. When I can be more alone though - I enjoy using the camera although a smaller one would be nicer.
It's a good photo taking box.
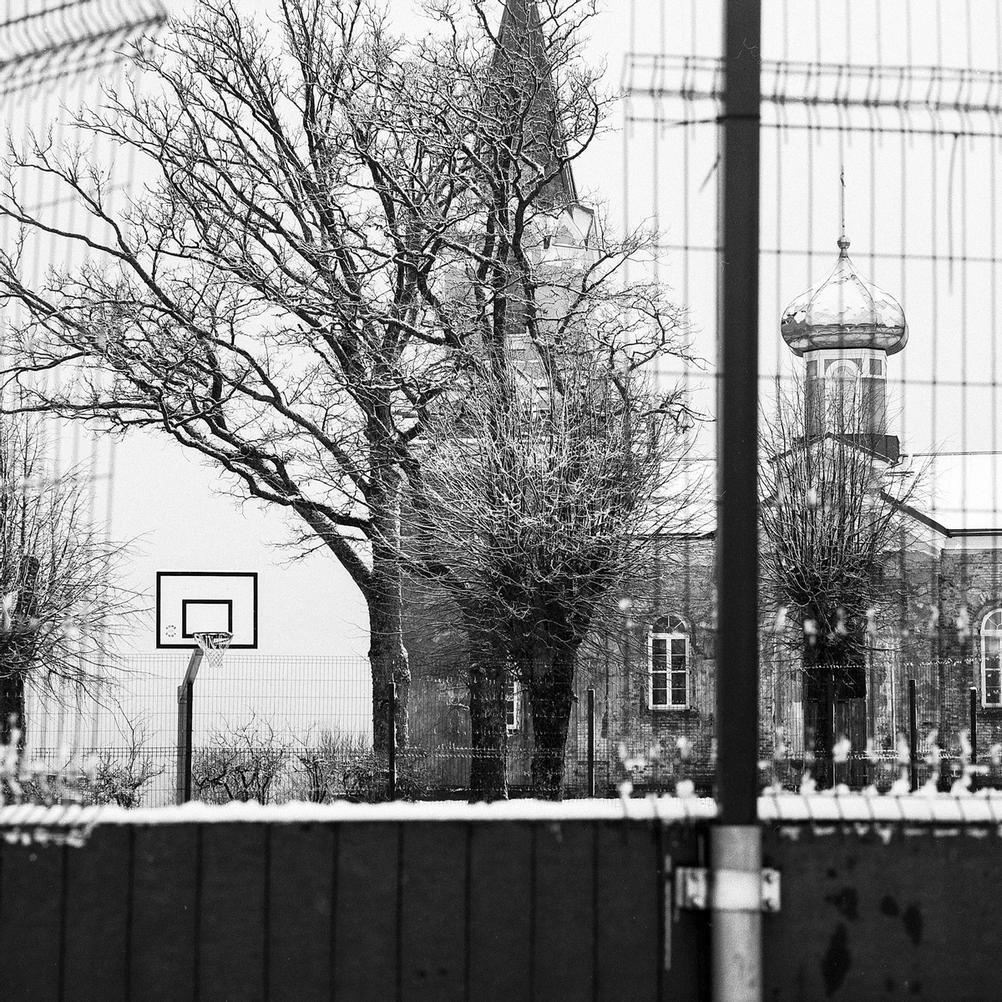
Reviews can feel empty if they don't include at least one black and white photo.
Focus is where I want it to be as well on this one.
Taken on Ilford HP5 Plus pushed to EI3200. EI3200 of HP5 on 120 is a piece of cake. If you can handle the contrast. Might not be easy to print in actual darkroom.
